HTML Widget Visualization
HTML Widget Visualization lets you use HTML code to create a visualization. The HTML widget is a visualization for creating HTML widgets for the dashboards, offering convenience and added functionality.
For example, according to the requirements, you can create custom headers with custom colors, reference links, vertical or horizontal separators, and many more.
Here are some key features of the HTML widget visualization:
- Easily spot errors and warnings, complete with line numbers for debugging.
- Quickly identify errors or warnings with displayed line numbers.
- Enhance user-friendliness with autocomplete functionality.
- Enjoy auto indentation and the ability to collapse/expand HTML tags.
Creating an HTML Widget Visualization
To create the HTML Widget Visualization
- Create a New Dashboard Panel
- Follow the next steps ahead:
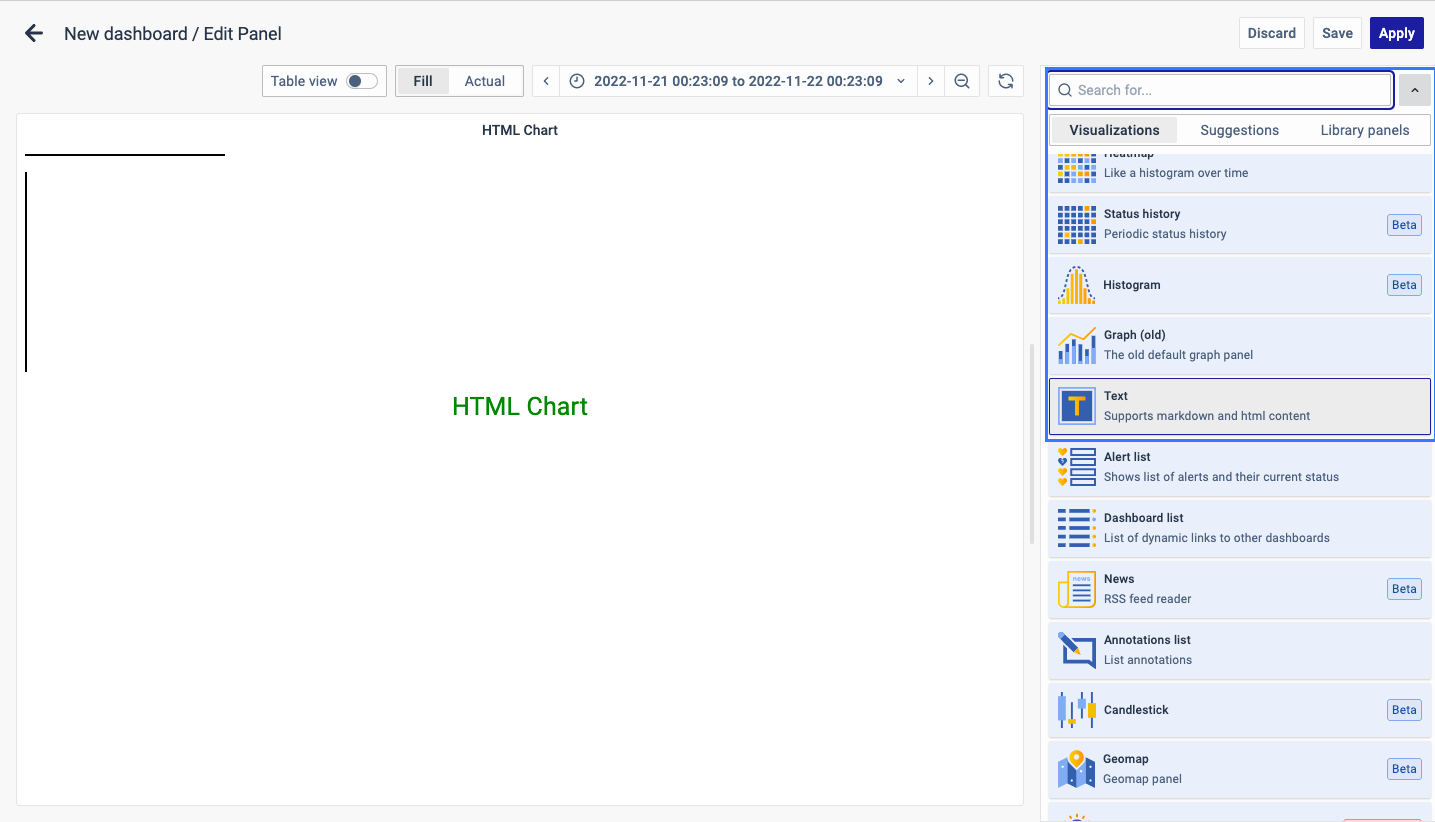
Select Visualization
On the right side of the default screen, select Visualization as Text to create an HTML panel.
Visualization Options
Panel Options
There are multiple options to edit the properties of the panel. The first one is Panel Options. Enter a Name and Description for the Panel that you want to create. For instance, if you're making an HTML chart to track CPU usage, name the panel "HTML Chart" and describe it as "CPU Usage."
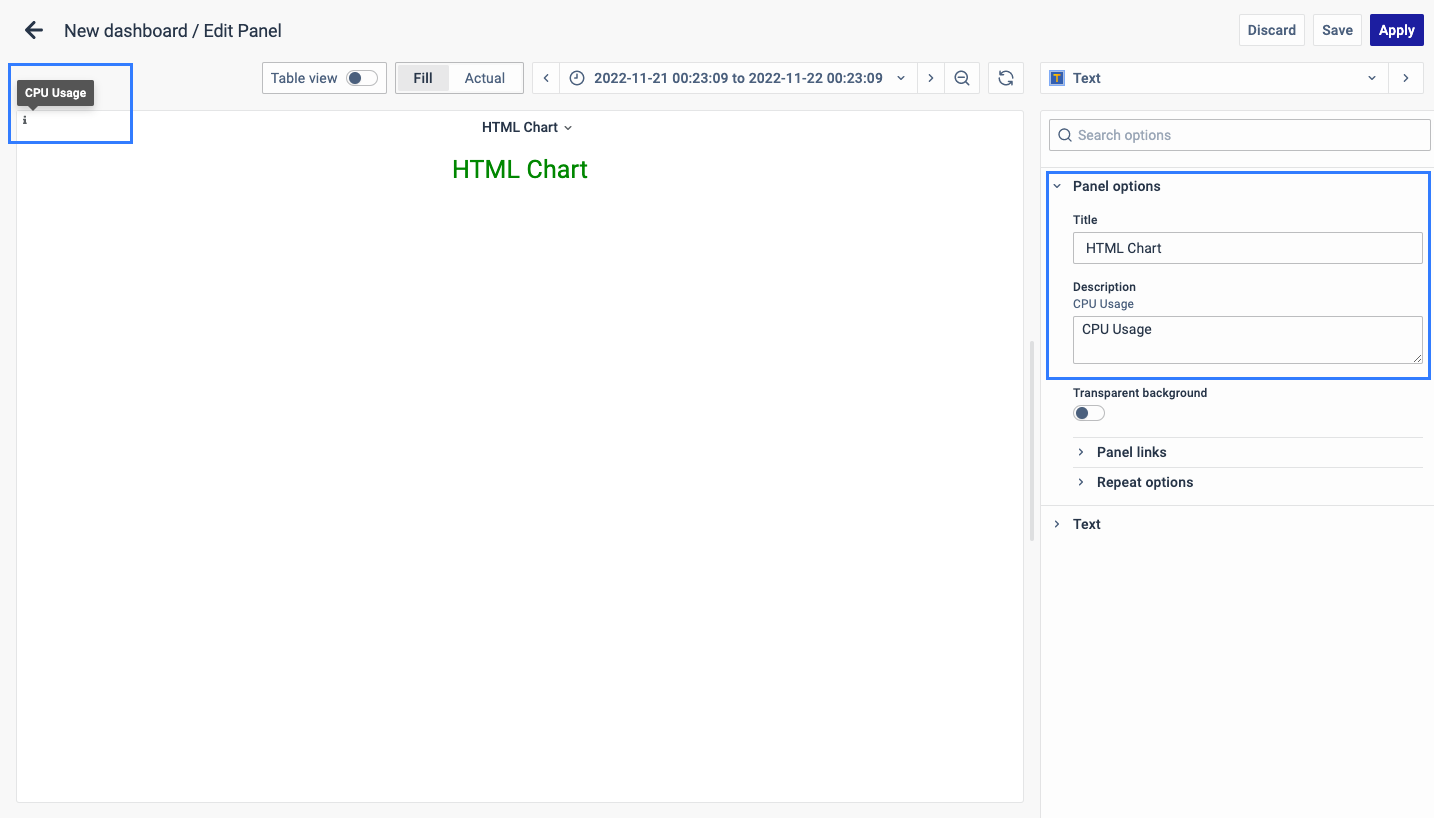
The Description is available in the top left corner and can be viewed by hovering over the i button.
The next part of Panel Options is Panel Link where you can point a link to any other website or dashboard of your choice. Enter a title, and URL and select the ‘Open in a new Tab’ option if you want to open the link in a new tab. Click Save.
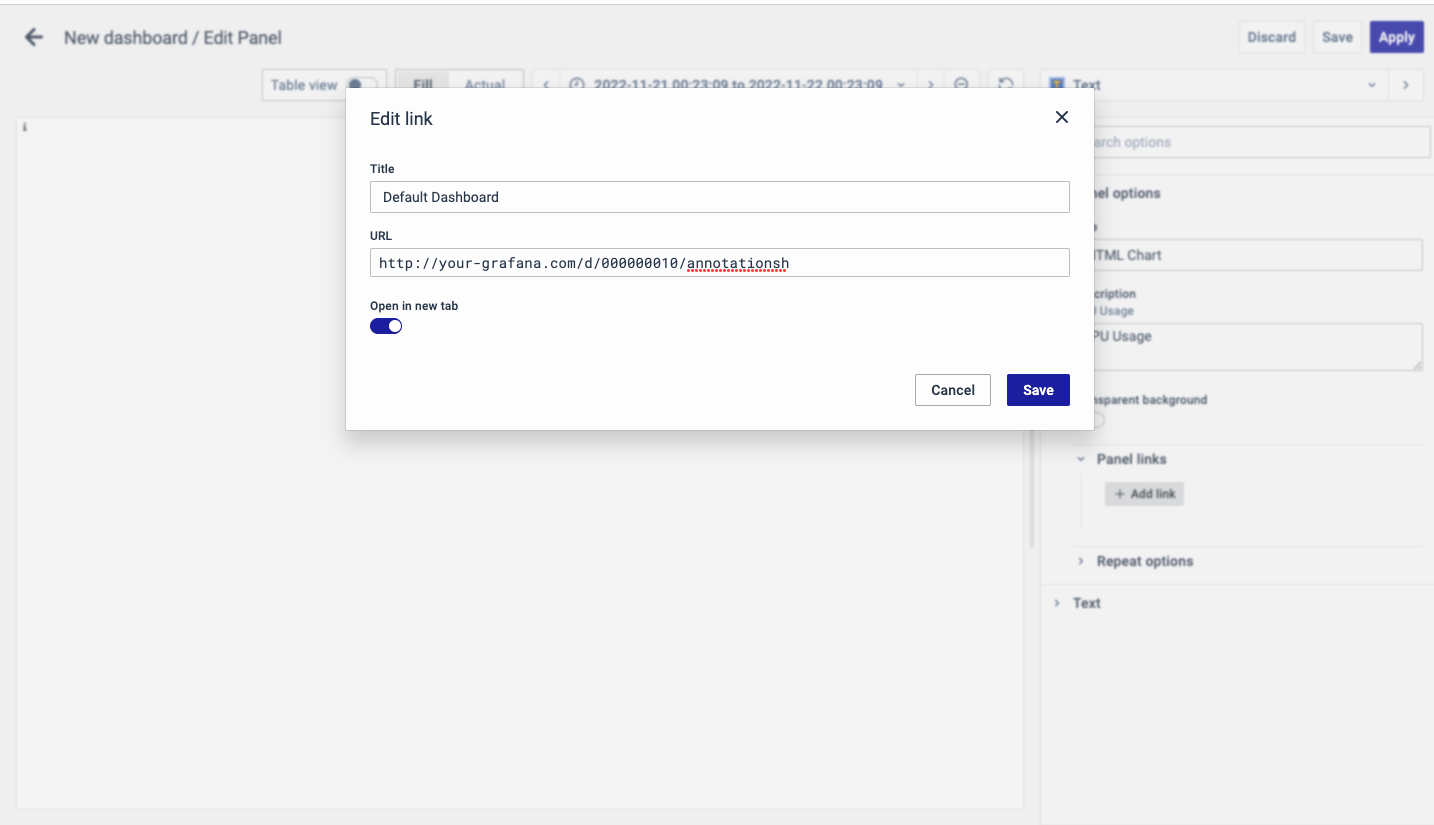
The URL can be a link to another dashboard or for getting help or useful info. When you click on a panel, it opens the link either in the same tab or a new tab, depending on your choices. For example, if you want to compare a default dashboard, just click the link to open it.
Text
The Text option allows you to write and edit the HTML code that you want to display in the chart.
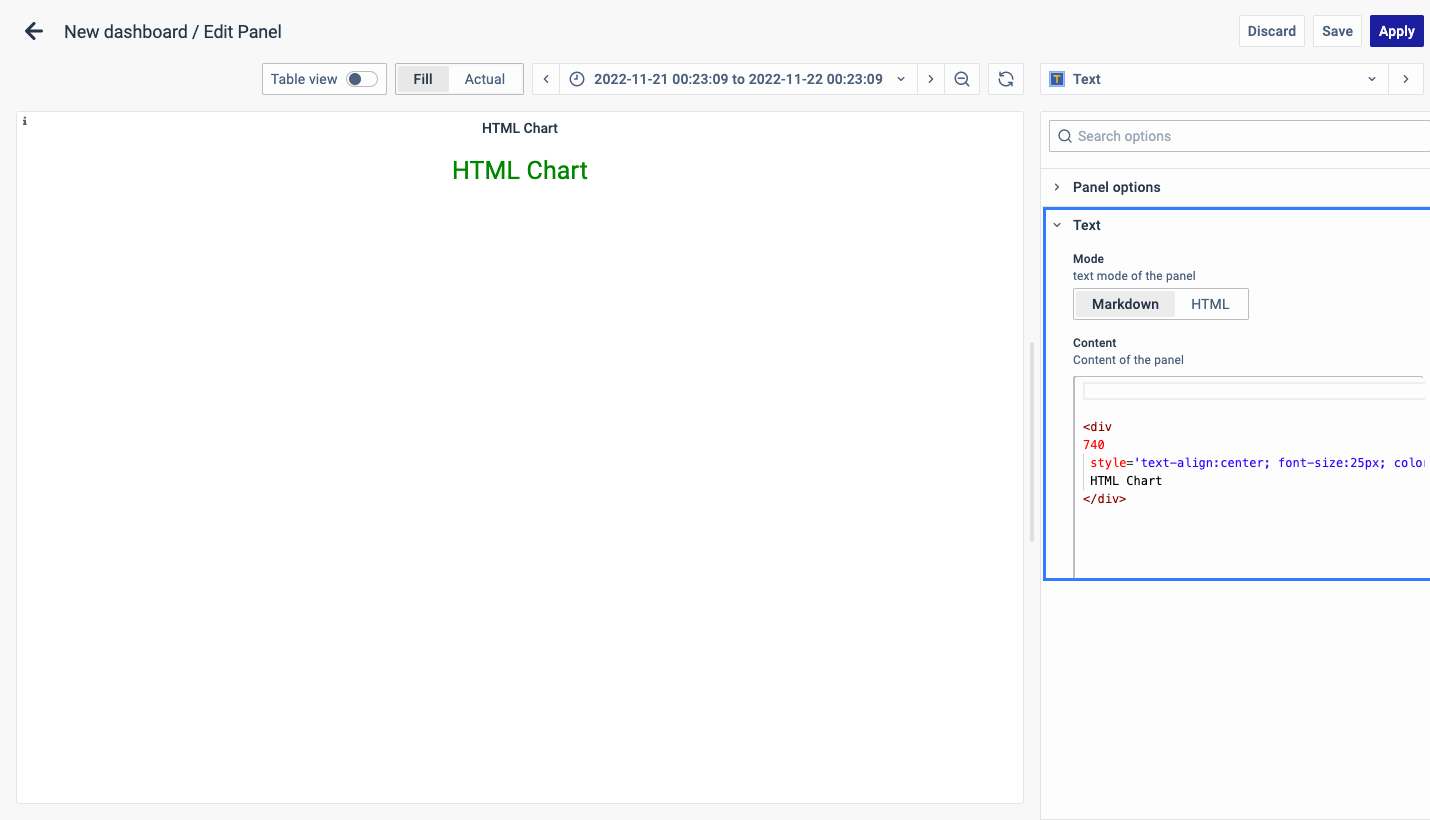
Mode
The text mode of the panel can be:
- Markdown
- HTML
Content
You can write code here in the HTML editor, you can add any HTML code for which you want to create a widget. Assuming you have a basic grasp of HTML and CSS, you can use plain HTML and CSS to create various elements according to your needs, such as table headers, colorful blocks, text with links to other pages, and more.
Frequently Used Code Snippets
Here are code snippets for commonly used HTML widgets that you can customize as needed.
Horizontal and Vertical Separators
Below, we provide code for horizontal and vertical separators (lines) that can be used in dashboards to separate different blocks or visualizations.
Sample code for Horizontal Separator:
<div style='width:200px; height:2px; border:1px solid black'>

</div>
Sample code for Horizontal Separator:
<div style='width:1px; height:200px; border:1px solid black'>

</div>
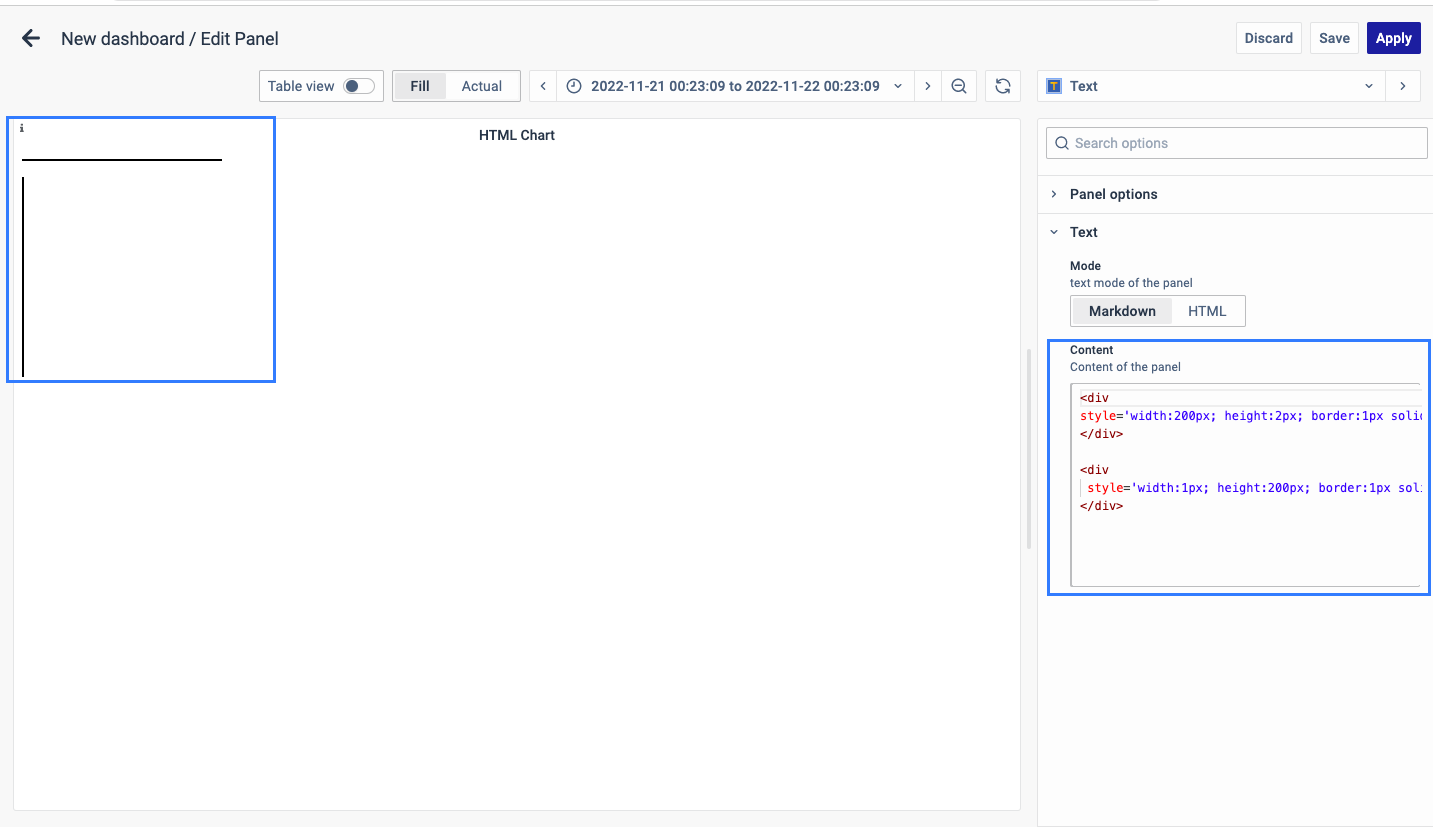 The code can be configured as:
- Width: Set the width of the horizontal line.
- Height: Mandatory field to be provided so that the line can appear.
- Border: Define the border size in pixels (e.g., 1px, 2px, etc.) according to your needs. Choose a border style from the following options:
- Dotted: Creates a dotted border.
- Dashed: Creates a dashed border.
- Solid: Creates a solid border.
- Double: Creates a double border.
- Groove: Specifies a 3D grooved border. The effect depends on the border-color value.
- Ridge: Specifies a 3D ridged border. The effect depends on the border-color value.
Custom Headings
You can use this to add named headings to your dashboard blocks as needed.
Sample Code
<div

style='text-align:center; font-size:25px; color:green; backgroundcolor:yellow'>

Total Orders

</div>
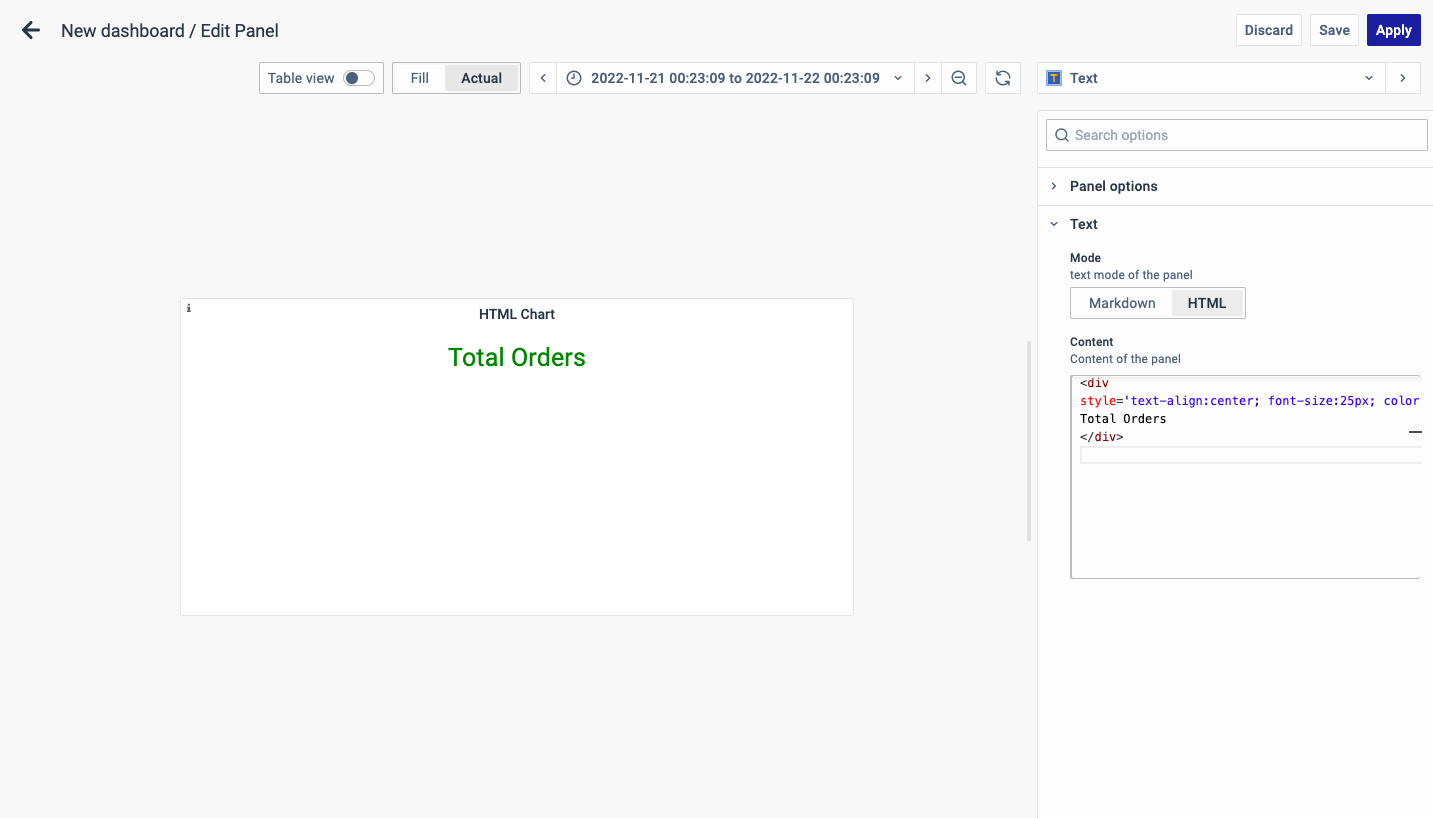
The code can be configured as:
- Text-align: Align text to the center.
- Font size: Set the text font size.
- Color: Choose the text color
- Background color: Define the background color of the div.
Reference Links
Another commonly used HTML widget is to provide a reference link to other pages.
Sample Code
<a href='/app/vienna#/dashboards/'> Dashboards </a>
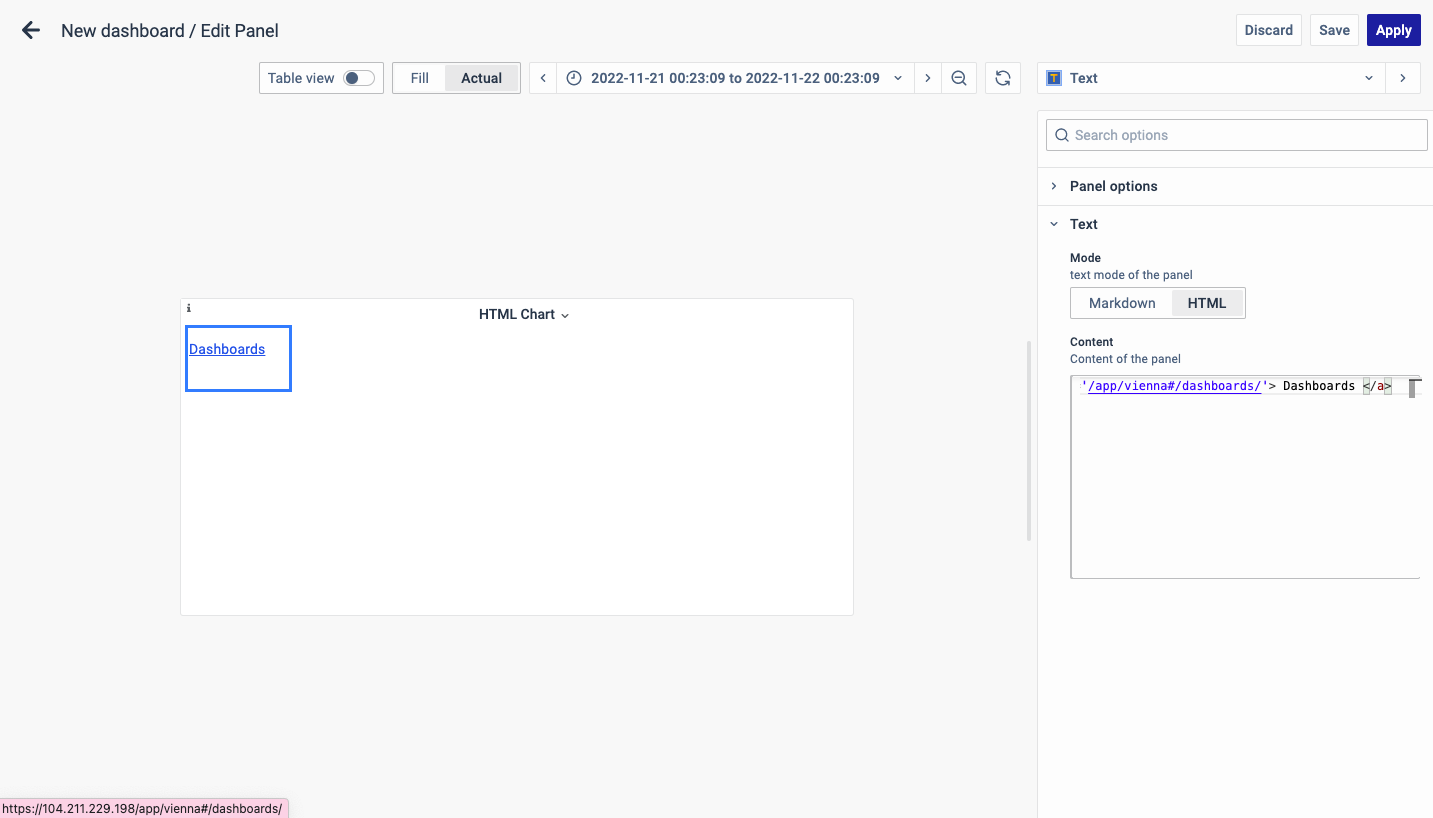
The code can be configured as:
- HREF: Any link can be provided here that you would like to navigate.
You have now learned how to configure the HTML Visualizations, change the panel settings, and more. You can save and edit the panel later too.
