Data Modelling Workspace
Introduction
In today's data-driven world, the ability to effectively manage and interpret vast amounts of information is crucial. Data Models play a pivotal role in this process by providing a structured and user-friendly framework for querying and refining data.
Users can create and manipulate data models that encapsulate complex business logic, making it easier to derive insights and make data-driven decisions. By simplifying database queries, Data Models enable users to focus on defining golden signals and their dimensions, applying transformations, and enriching data with domain-specific knowledge. This empowers users to build comprehensive data pipelines, enhance data with contextual information, and ultimately streamline the analysis process, ensuring that critical insights are readily accessible and actionable. It powers the functionality of Data Visualization, Alerts, Reports, and Insights, ensuring a comprehensive and intuitive data-handling experience.
Getting Started with Data Modelling Workspace
- Accessing Data Modelling Workspace: Navigating your Data Modelling Workspace is a breeze. vuSmartMaps Data Modelling can be accessed from the left navigation menu by clicking Data Modelling Workspace under Configure Observability. Once you're there, you'll find a list of all the data models. You can easily manage your Data Models by performing actions such as creating, viewing, editing, and deleting them. For enhanced control, you can customize permissions for different roles—whether it's granting viewing rights or permitting modifications.
- Data Store: A data store is a repository for persistently storing and managing collections of data. Accessing and handling the data stores is simple and can be found at the top-left corner of the Data Models listing page. vuSmartMaps supports a variety of backend databases, making it highly adaptable to your needs. You can effortlessly query these Data Stores using a standard Query Editor or tailor your queries to the specific capabilities of each Data Store. Currently, Data Stores officially supports PostgreSQL, MySQL, Elasticsearch, and Hyperscale DB.
- New Data Model Creation: Creating a new Data Model is a breeze with our intuitive user interface. The process consists of four straightforward steps: Start by providing the basic information, set up your data query, apply any necessary transformations, and finally, define the properties of your Data Model.
- Basic Information: You are required to provide a unique and intuitive name and a brief description of the data model.
- Prepare Data Query: This involves crafting queries to fetch data from your databases. The process allows you to choose between building queries using a user-friendly Query Builder or directly specifying a Raw query, giving you flexibility in how you model your data.
- Do Transform: These transformations enable data manipulation to suit your specific needs. While not mandatory for data models with a single query, they become vital, especially join and concatenate transformations, when working with multiple queries.
- Additional Attributes: you can select the metrics and buckets you want to expose through this data model. In the 'Set Properties' step, you can choose, and define properties for the metrics and buckets to be accessible to Data Model users.
- Support for Dynamic Filters in Dashboards VuNet's dashboard lets you use dynamic filters for data viewing. The addition of the data model to the dashboard occurs indirectly via Insights. Configure your queries with custom filters to accurately filter the data on the dashboard.
Accessing Data Modelling Workspace
vuSmartMaps Data Modelling Workspace can be accessed from the left navigation menu (Configure Observability > Data Modelling Workspace). Upon clicking 'Data Modelling Workspace', you are taken to the 'Landing Page’.
Landing Page
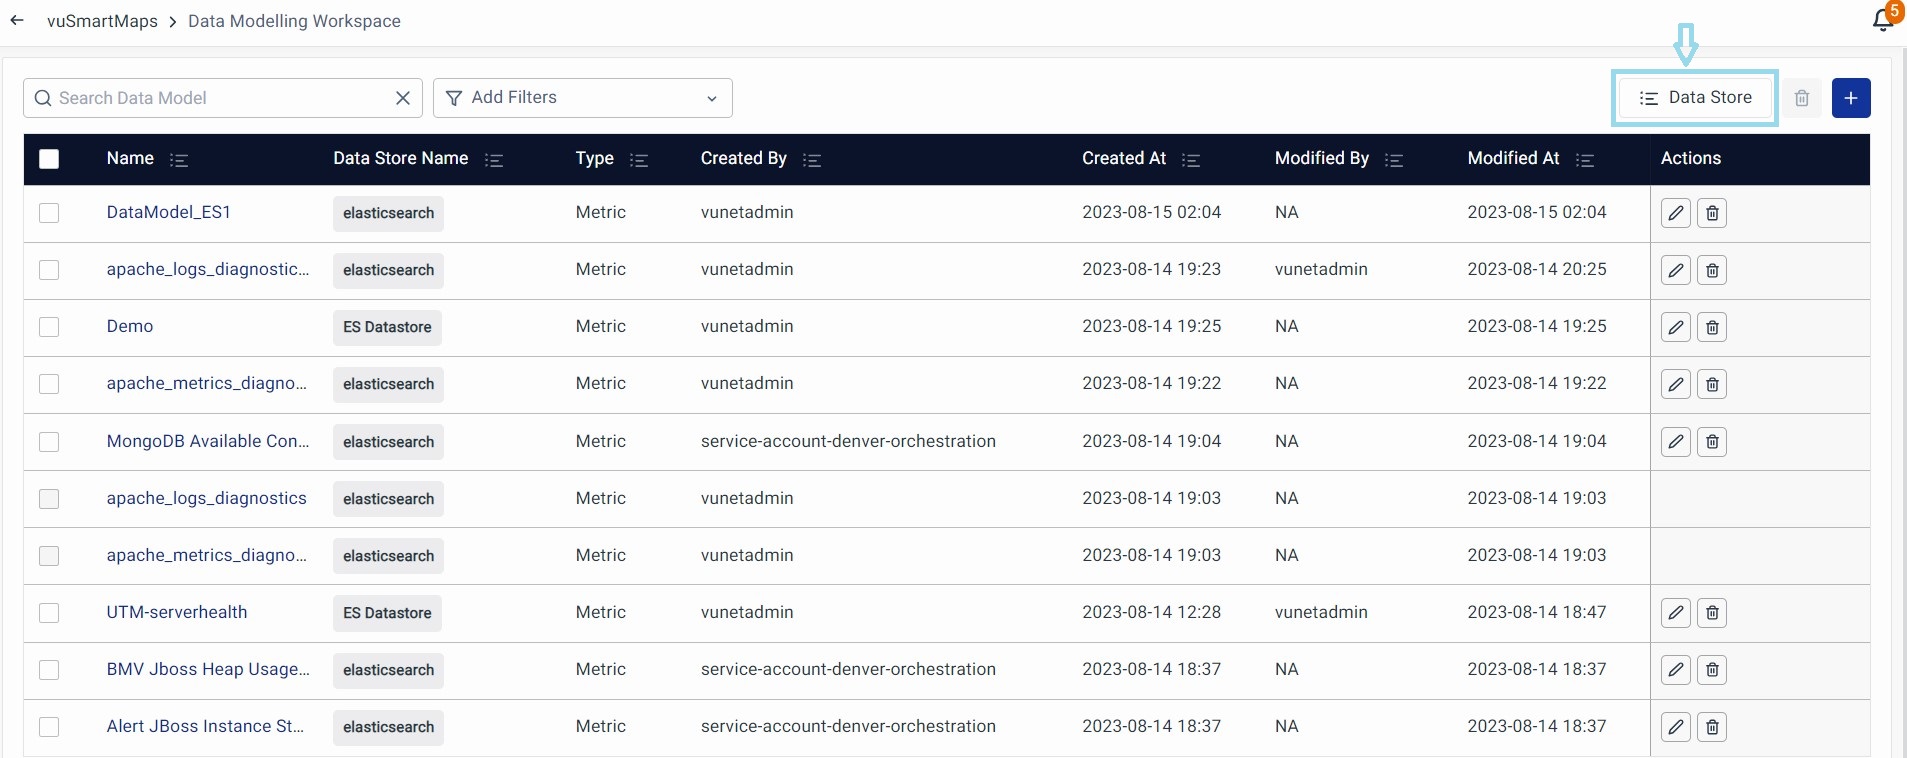
All the Data Models created in the system are visible here. Utilize features in the listing table, such as search and filters, to locate specific Data Models.
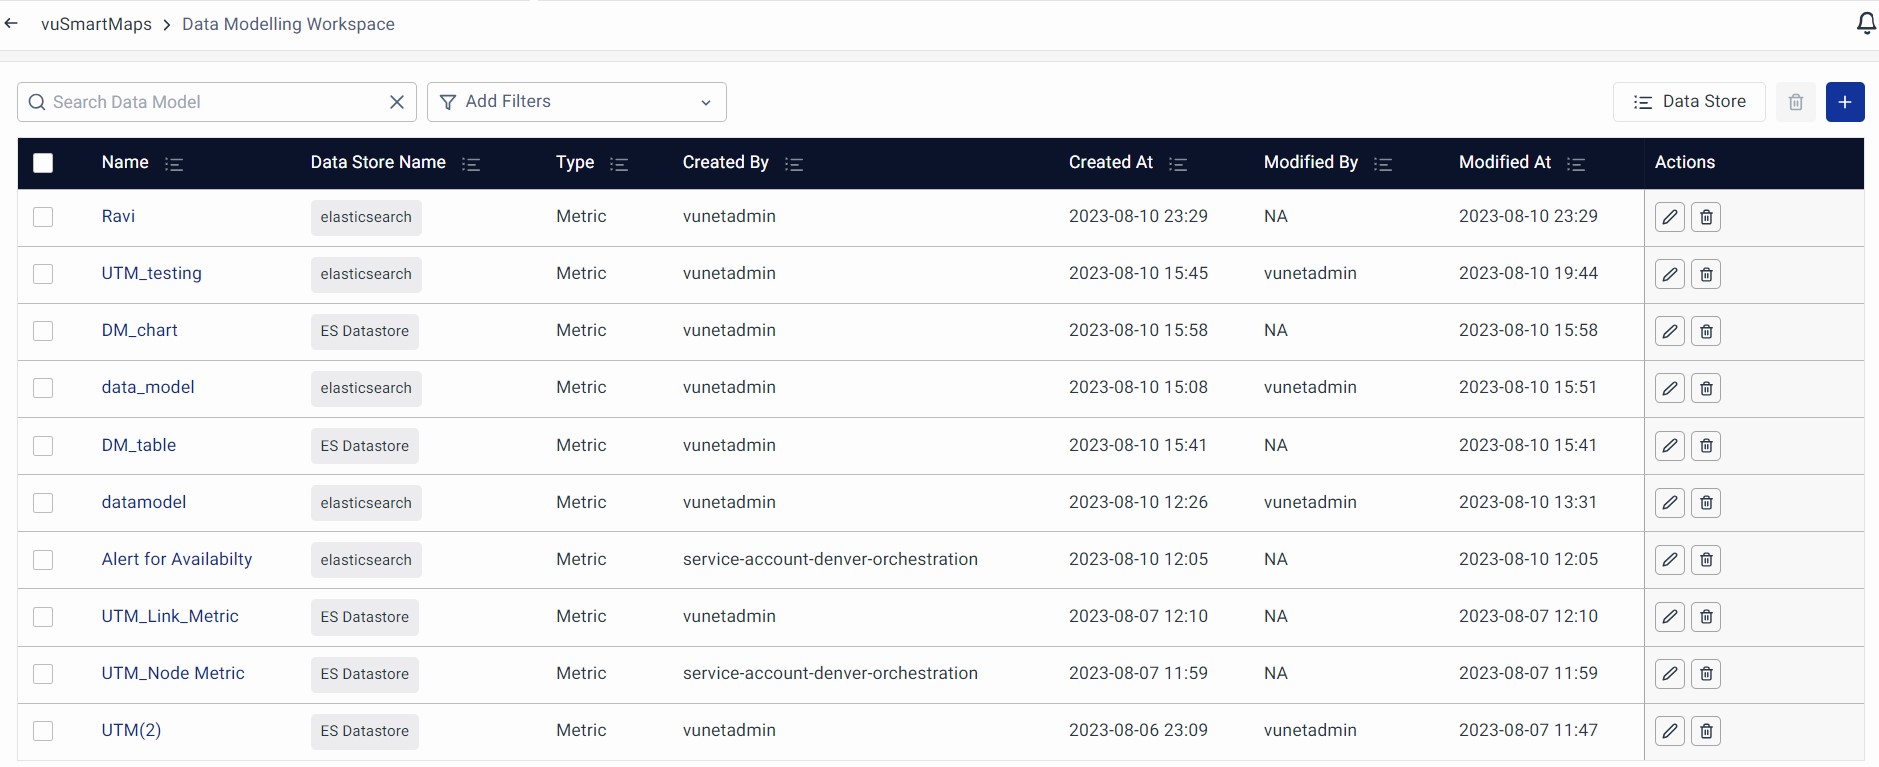
The listing gives information on the following:
- Name: The data model's name. Click it to view the data model in non-edit mode.
- Data Store Name: The name of the Data Store used by this Data Model.
- Type: Indicates if it's a data model that comprises metrics or events.
- Created By: The user who created the data model.
- Created At: The date and time when the data model was created.
- Modified By: The user who recently modified the data model.
- Modified At: The date and time of the most recent modification.
- Actions: Edit or Delete your Data Models using the buttons under this column.
- + button: It is used to create a new Data Model. You will learn how to create a Data Model under the New Data Model Creation Section
Actions
The Data Modelling Workspace's home page can be used for various basic operations such as, Edit and Delete Data Models.
Edit- Click on this icon to edit the respective Data Model.
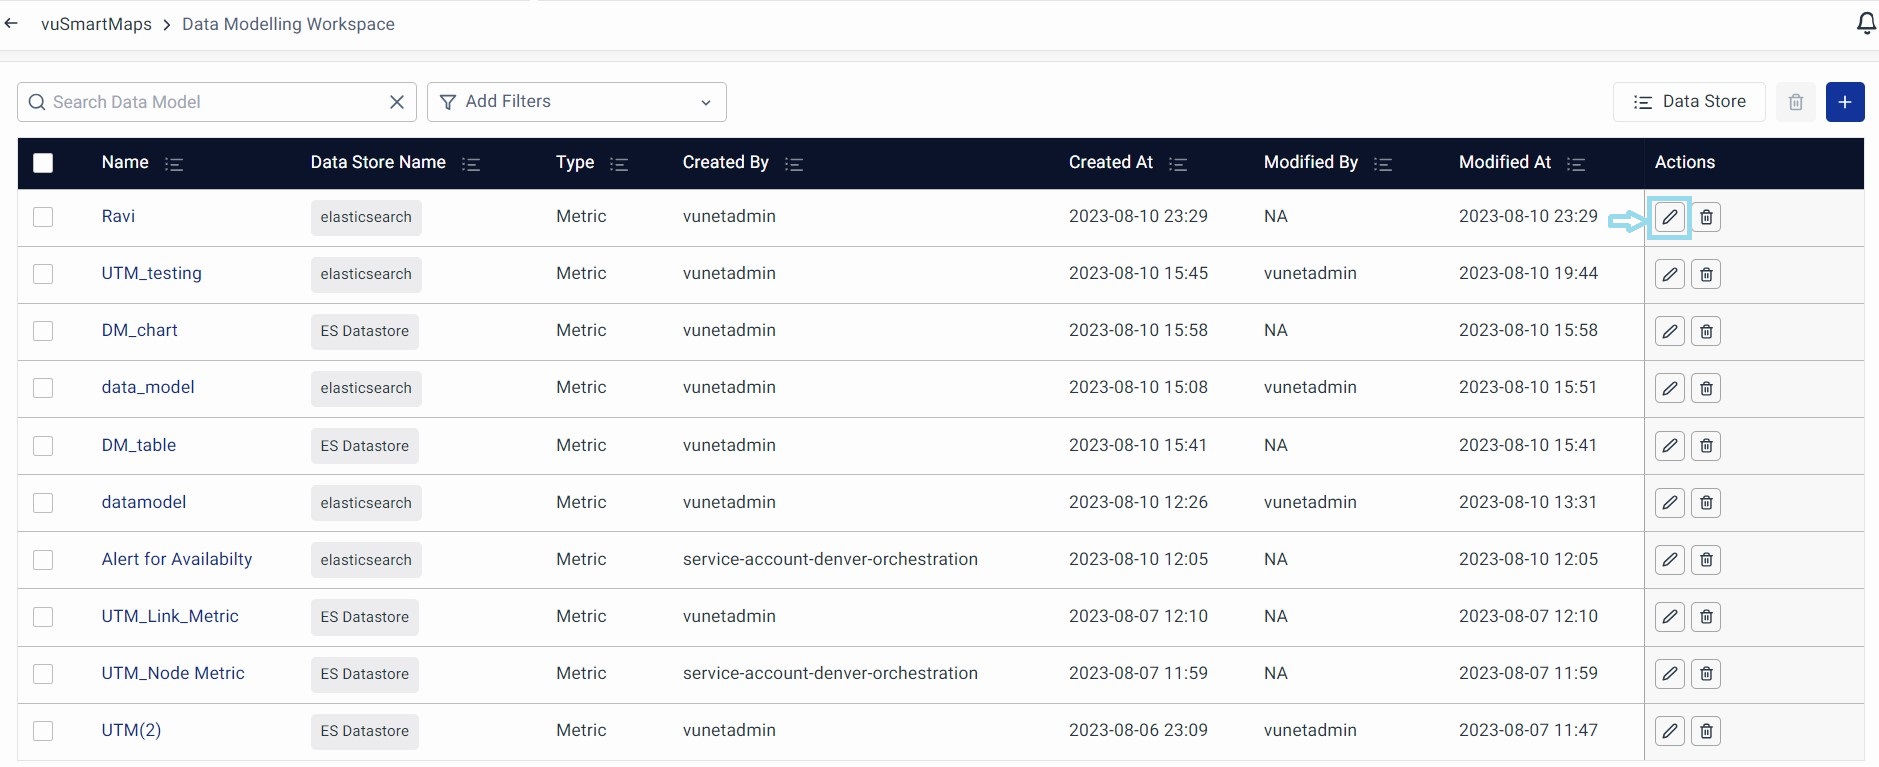
Delete: You can delete a Data Model by clicking the delete option under the Action column. Please note that the Data Models can't be deleted if Insights Alerts or Reports are using it.
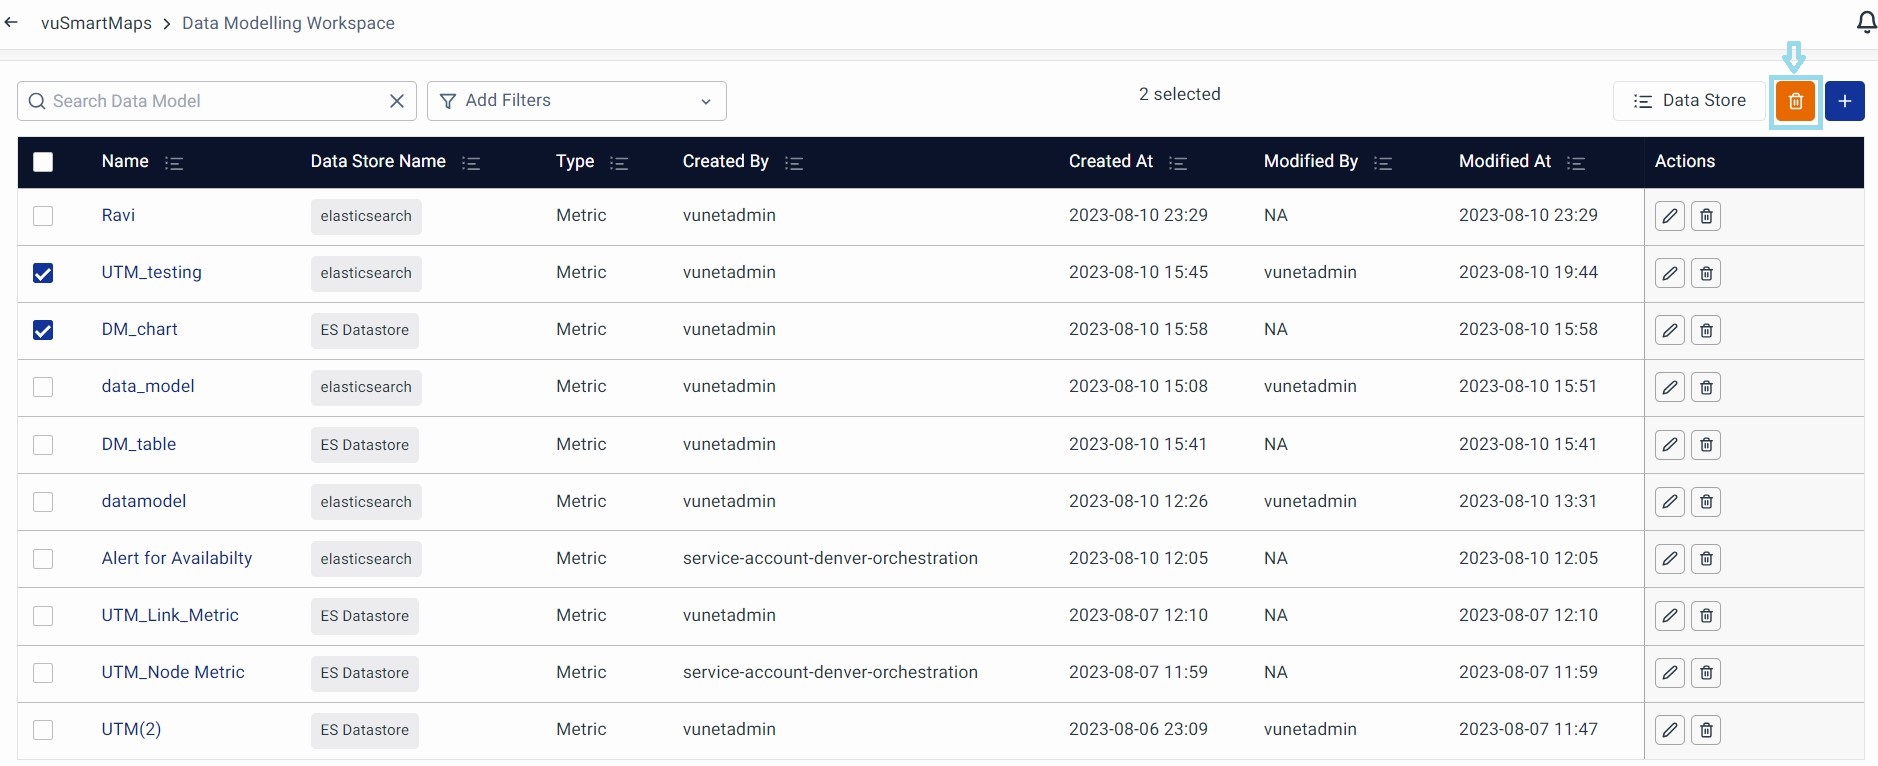
Deleting Multiple Data Models: Select the multiple Data Models by checking the boxes on the extreme left and clicking the Delete button on the top right.
Setting Permissions for a Data Model
We use RBAC (Role Based Access Control) to let you grant access to Object Level Permissions which are made available in 'Edit' Mode. This ensures that only authorized users can access specific functions, resources, or information.
- Click on Edit for the data model you want to manage.
- You'll be directed to the Set Properties page.
- Click on Permissions to access and manage Object Level Permissions.
The screen will look like this, For each role, you can assign three types of permissions
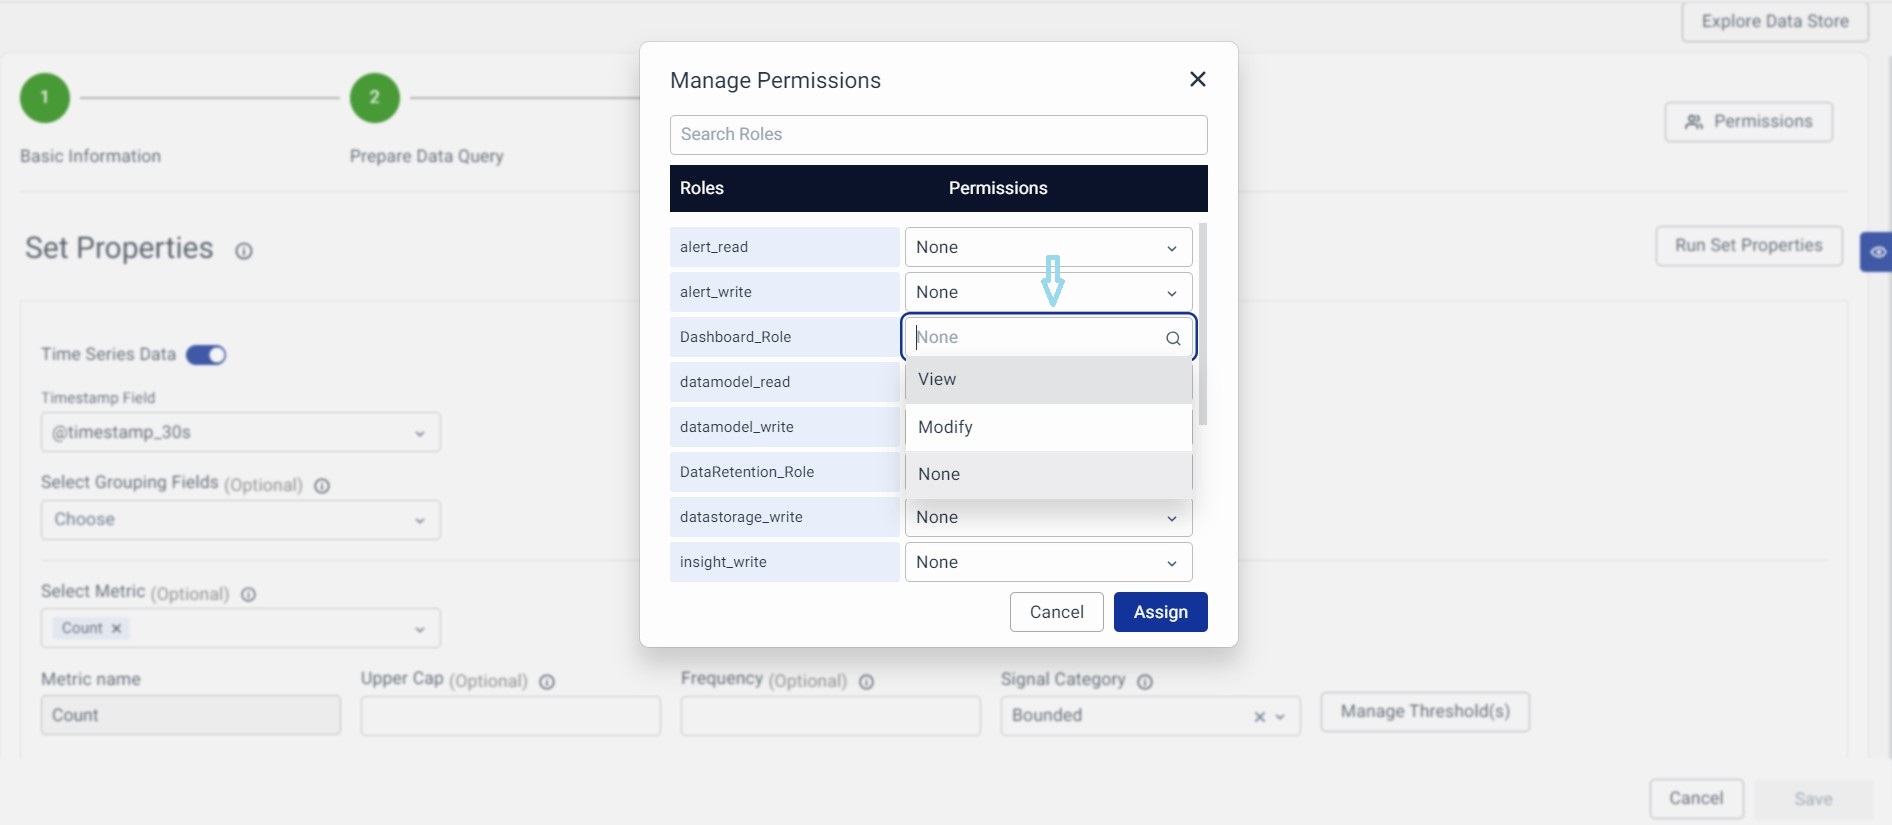
- None: There are no permissions given.
- View: The selected user can only view the Data Modelling Workspace.
- Modify: The selected can also modify and make changes to the Data Modelling Workspace.
Data Store
Data Store refers to the Sql and NoSql databases available in vuSmartMaps. vuSmartMaps supports multiple databases.
Supported Data Stores
The following Data Stores are officially supported:
- PostgreSQL 14.7 and above
- MySQL - 14.14 and above
- Elasticsearch 7.0 and above
- Hyperscale DB 23.8+ and above
Data Store Management
vuSmartMaps comes with the default configurations of NoSql and Hyperscale DB. You can easily add other supported data stores to the available data stores. Click on the Data Store button at the top right corner to see the listing of already configured data stores and also manage them.
Add New Data Store
- Click Data Store on the right top corner of the landing page.
-
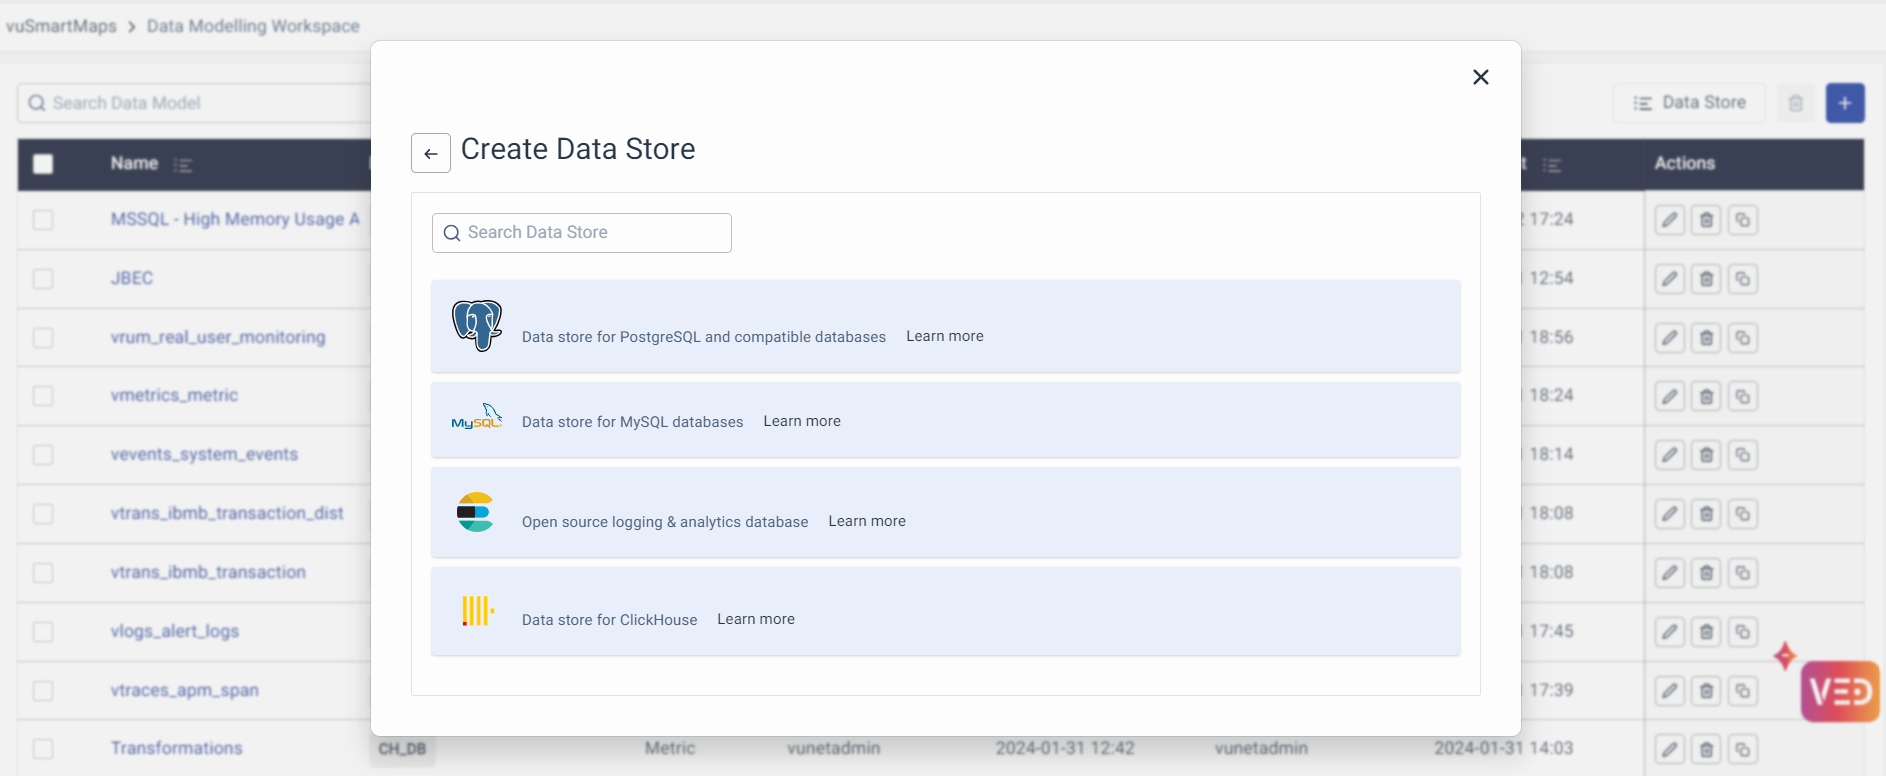
The Data Store landing page shows a list of previously configured Data Stores. Now click on the + icon on the top right to create a new Data Store.
- Name: User-defined unique name for the Data Store.
- Data Store Type: Type of the selected Data Store (e.g., PostgreSQL, Elasticsearch).
- Created By: Name of the user who created the Data Store.
- Created At: Date and time when the Data Store was created.
- Modified By: Name of the user who made the most recent modifications to the Data Store's configuration.
- Modified At: Date and time of the most recent configuration changes.
- Actions: Each Data Store has two buttons:
- Edit: Click to make changes to the Data Store's configuration.
- Delete: Click to delete the Data Store (further details are in the next section).
-
You can see the list of supported Data Stores. You can search for any specific supported Data Store in the search bar. Click on the Data Store of your choice.
- Follow the Data Store's instructions for configuration, then click the Save & Test button.
-
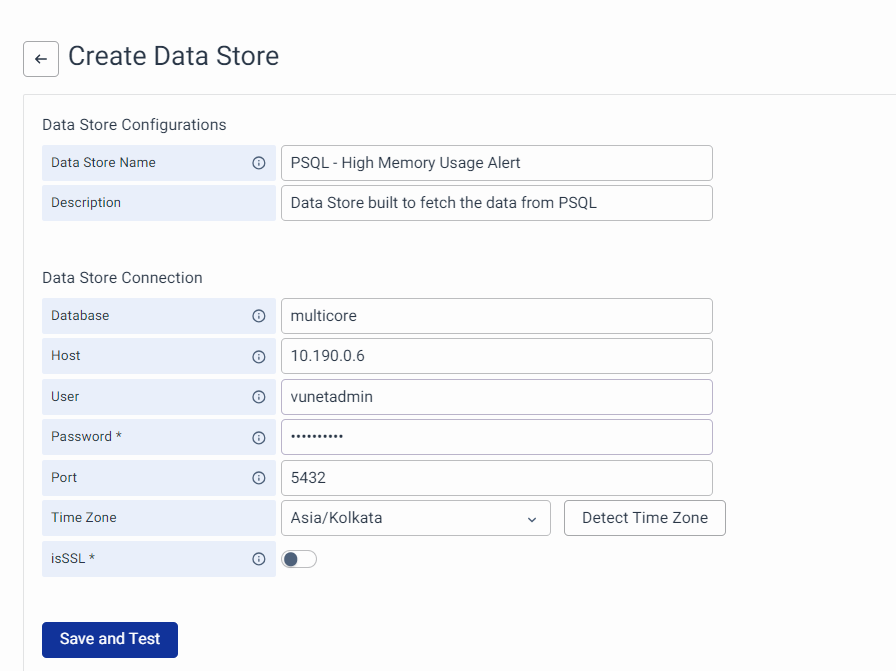
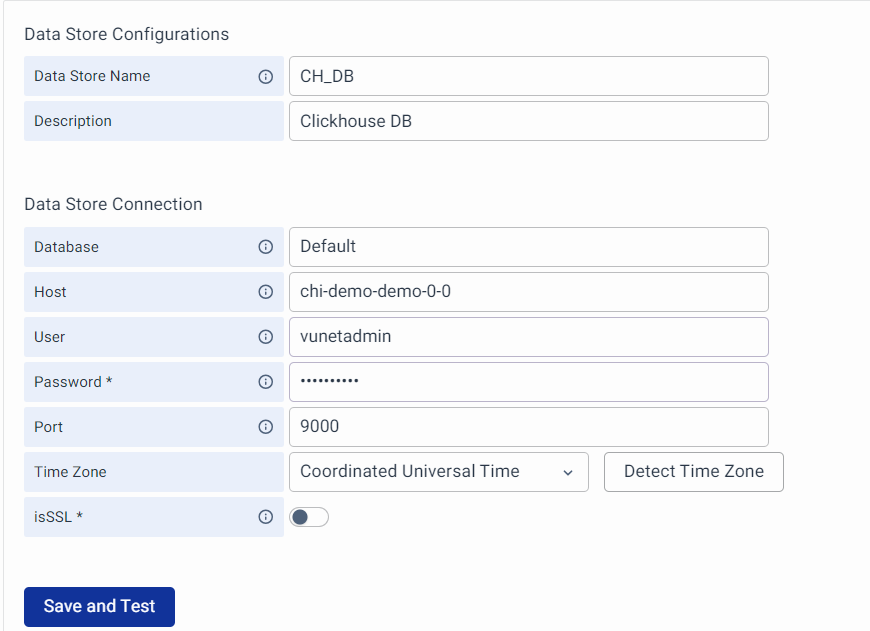
PSQL Data Store: All the fields are mandatory. The platform engineer or an admin should know the access details.
- Data Store Name: Enter the name of the Data Store.
- Description: Give a brief description.
- Database: Admin to enter the Database name.
- Host: Enter the Database Host IP address.
- User: Enter the user name of the Database
- Password: Enter the Database password.
- Port: Enter the Port number.
- Timezone: You can manually choose the Timezone or click on the Detect Time Zone to automatically select the timezone.
- Selecting a Time Zone at the Data Store level ensures correct time-range data is fetched from the Data Store.
- isSSL: Enable it if you have SSL (Secure Sockets Layer) certified and enter the CA certificate details, Client Certificate, and vuSmartMaps.dataModels.labels.client_key.
-
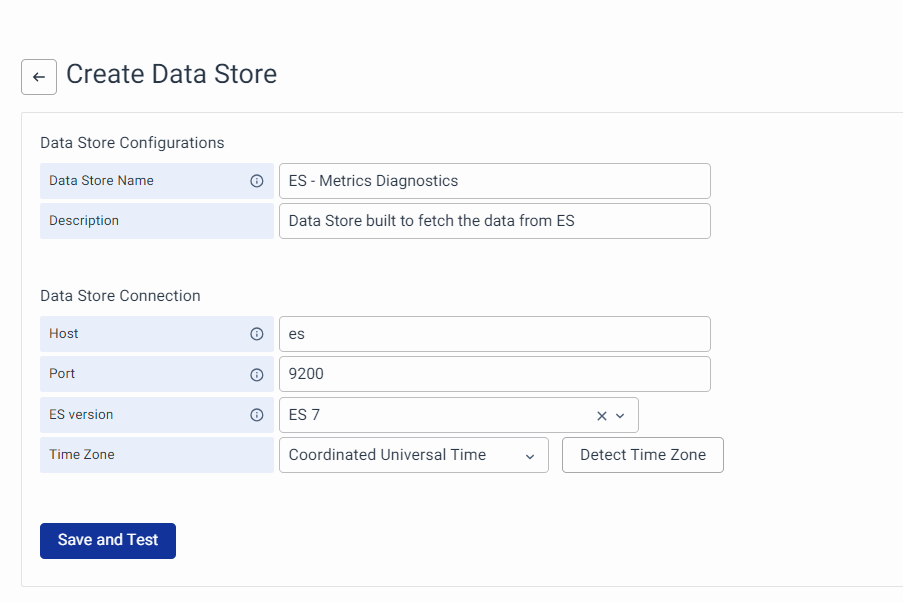
Elastic Search Data Store: All the fields are mandatory. The platform engineer or an admin should know the access details.
- Data Store Name: Enter the name of the Data Store.
- Description: Give a brief description.
- Host: Enter the Database Host IP address.
- Port: Enter the Port number.
- ES Version: Choose the Elasticsearch version from the dropdown.
- Timezone: You can manually choose the Timezone or click on the Detect Time Zone to automatically select the timezone. It is a mandatory field.
-
Hyperscale Data Store: All the fields are mandatory. The platform engineer or an admin should know the access details.
- Data Store Name: Enter the name of the Data Store.
- Description: Give a brief description.
- Database: Admin to enter the Database name.
- Host: Enter the Database Host IP address.
- User: Enter the user name of the Database
- Password: Enter the Database password.
- Port: Enter the Port number.
- Timezone: You can manually choose the Timezone or click on the Detect Time Zone to automatically select the timezone.
- isSSL: Enable it if you have SSL (Secure Sockets Layer) certified and enter the CA certificate details, Client Certificate, and vuSmartMaps.dataModels.labels.client_key.
-
- If the Data Store connection is successful, you'll be directed to the listing page, and your newly added Data Store should be visible.
If the hostname, user, and password are incorrect then the Datastore will not get created and immediately throws an error message.
Delete
Use this option to delete the Data Stores that are no longer required.
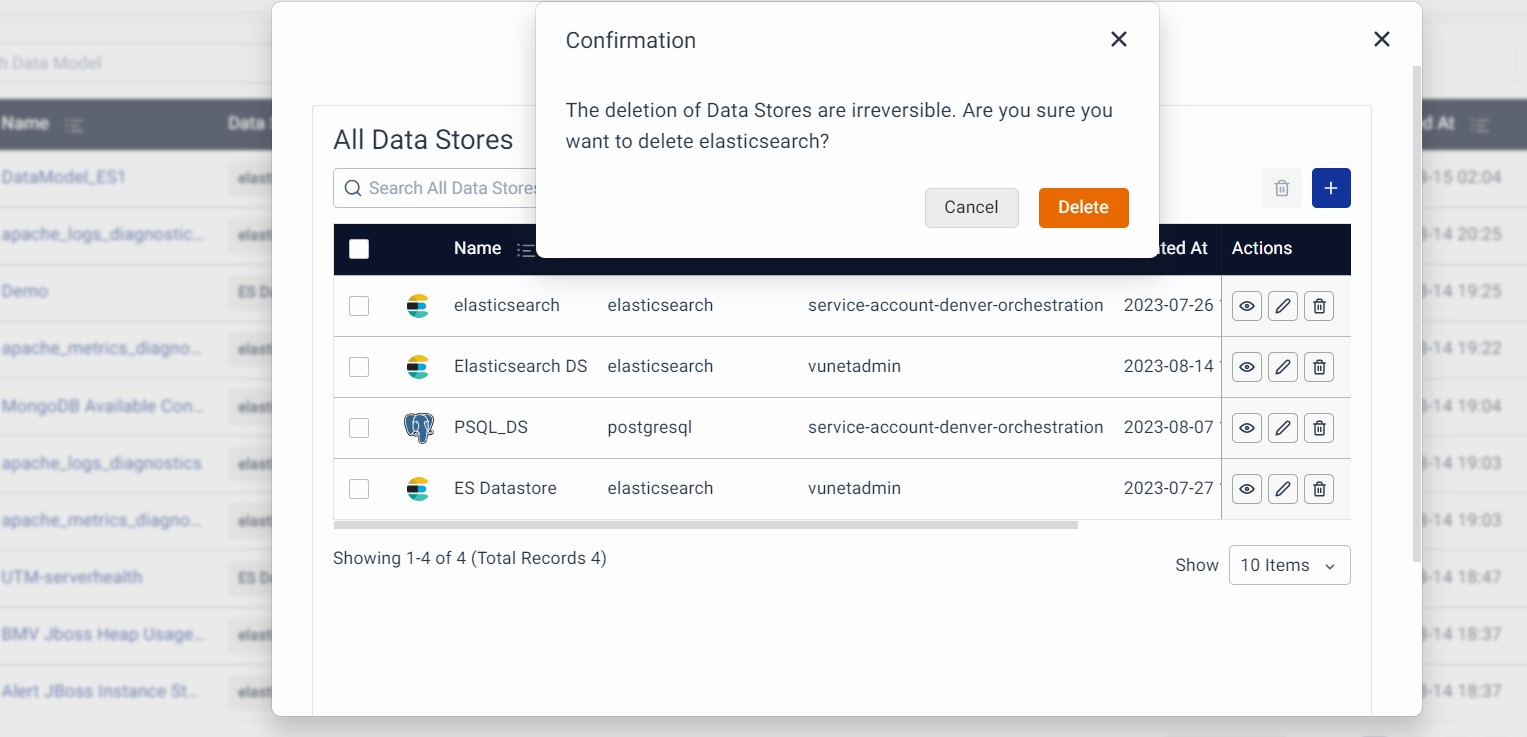
- Click the Delete button under the “Actions" column for the specific Data Store you want to delete.
- A confirmation window will appear to ensure you want to proceed with the deletion.
- Click Delete to confirm and permanently remove the Data Store.
- If you change your mind, you can click Cancel to abort the deletion process.
Please note that deleting a Data Store is irreversible, so be certain of your decision before confirming the deletion.
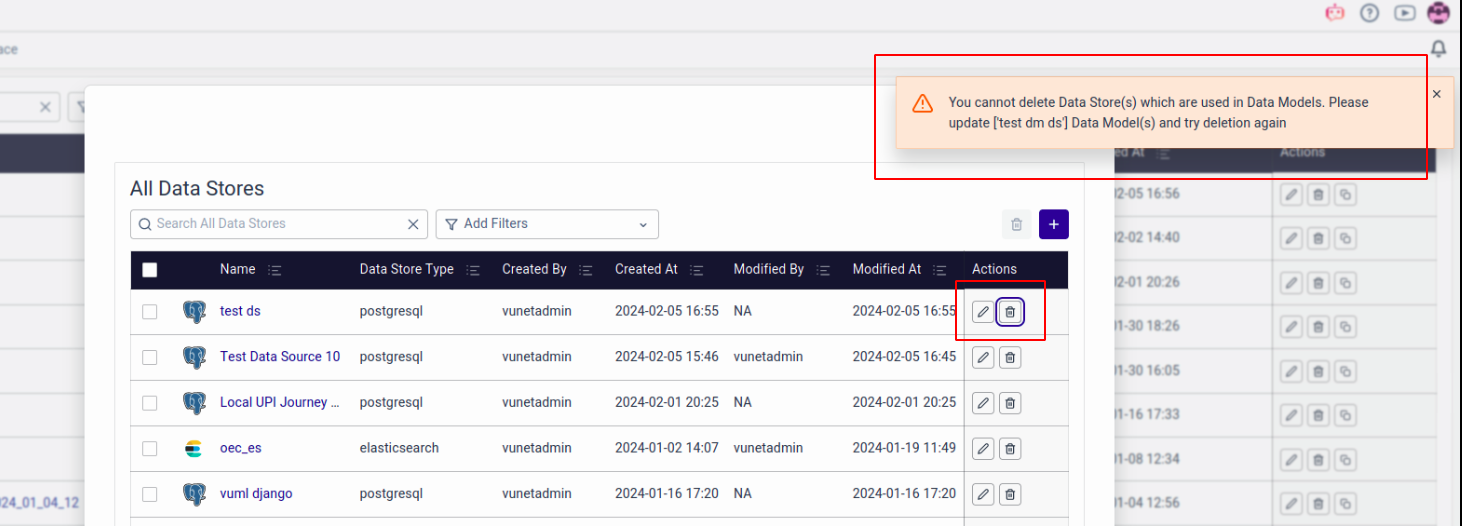
You can’t delete the Data Store if it is being used by any of the Data Models. The system will immediately throw an error.
With that, you have successfully created a new Data Store.
New Data Model Creation
To add a new Data Model, simply click the + icon on the Data Models listing page.

Data Model creation is a 4 step process. These steps are as follows:
- Basic Information: Fill in the basic details.
- Prepare Data Query: Configure the data query.
- Do Transform: Apply transformations as needed.
- Additional Attributes: Define the Additional Attributes of your Data Model.
