Query Transformations
Organize Fields
The "Organize Fields" transformation allows you to rename fields or columns in a query. Here's how to use it:
- Choose the Organize Fields option.
- Select the query you want to modify.
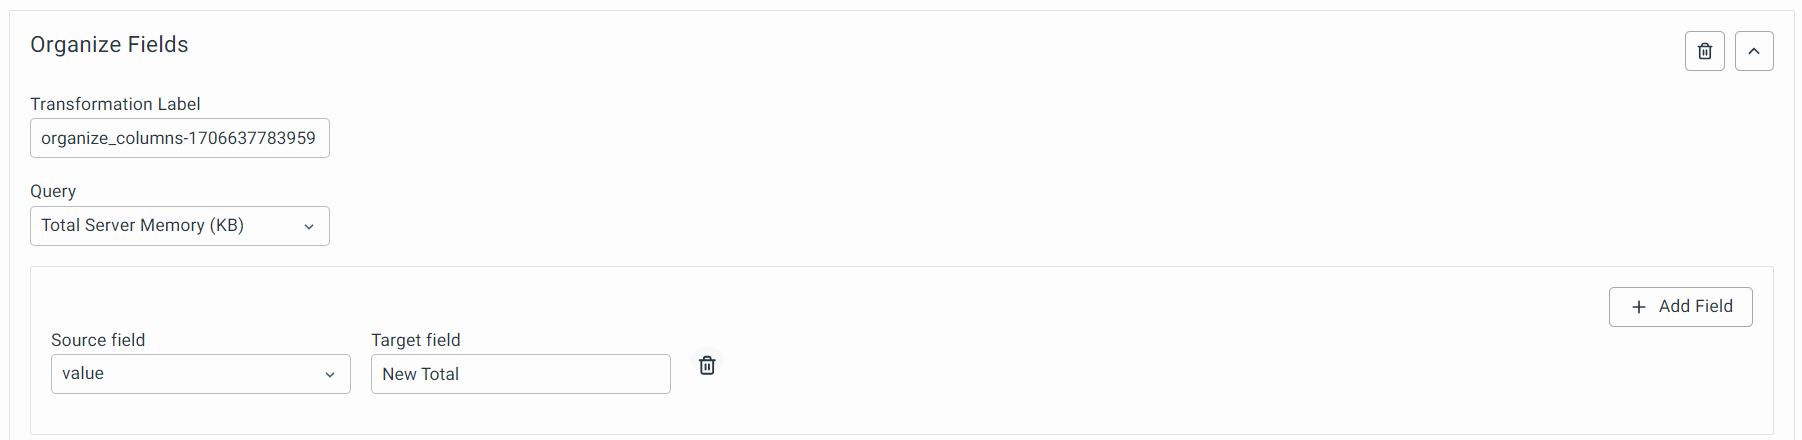
- Select the Source field from the dropdown and provide the new field name in the Target field.
- If you wish to rename other fields from the same query, Click 'Add Field' to add another field you would like to rename.
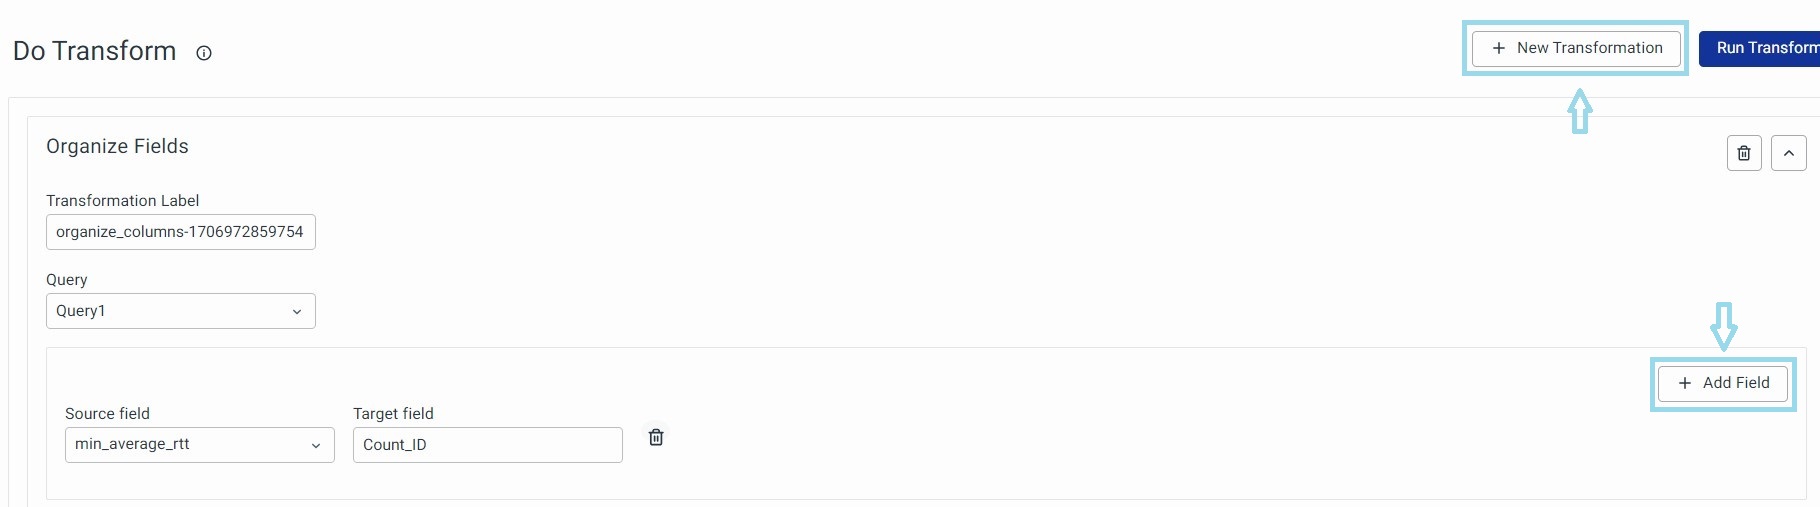
- If you need to organize fields for another query in the same data model, use the Add transformation option, select 'Organize field', and follow the same steps.
Add Field
The "Add Field" transformation allows you to add a new field to the output of a query. You can do this using arithmetic operations, custom values, or expressions.
Select a query in the Query dropdown. Choose a mode:
- Arithmetic Operation
- Custom
- Expressions
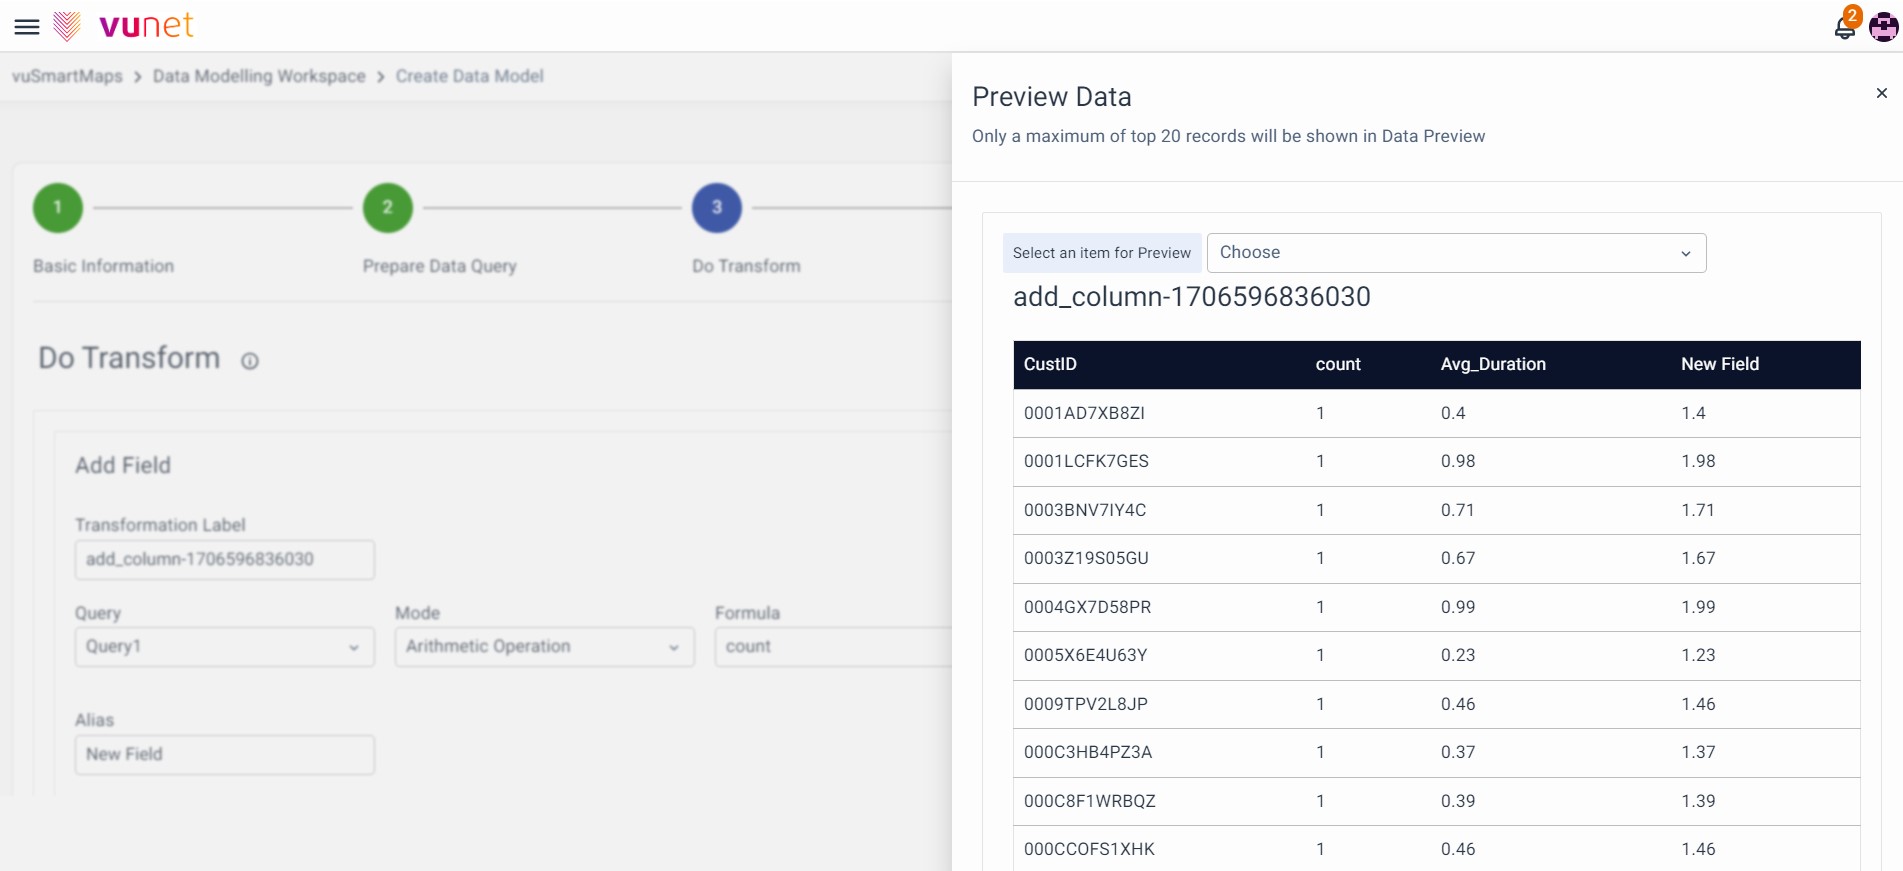
Arithmetic Operation

With the "Arithmetic Operation" mode, you can create a new field based on arithmetic operations between existing fields. Here's how to do it:
- Select a Field from the Dropdown.
- Choose an Arithmetic Operation of your choice (addition, subtraction, multiplication, or division).
- Select a second Field to perform the arithmetic operation with.
- Provide an Alias (name to the new column) for the newly calculated field.
The existing fields will stay the same, and a new field will be added based on your specifications.
Output:
Custom
In the "Custom" mode, you can create a new field with a static value in the Query. The value can be a number (integer or float) or a string. Here's how to do it:
- Provide the Field Value, which can be a number or string.
- Provide an Alias for this new field.
Example: You can give a field value of 100 and name it Total. You can add a new “Add Field” transform to find the ratio of Count to Total using Arithmetic Operation mode.

Now the ‘count’ is divided by the result “Total” column and the result is stored in the Alias name “%RespCode”

Output:
Once you've entered this information, click the Run Transform button to see the changes reflected in the preview. In the output, you'll discover columns ‘Total’ with a static value, the ‘%RespCode’ column representing the result of ‘count’ divided by ‘Total’.
Expressions
In the "Expressions" mode, you can create a new field based on a user-defined expression that involves operations like addition, subtraction, multiplication, or division between two or more existing fields or static floats/integers in the same Query. Here's how to do it:
- Write a custom expression involving two or more fields and multiplicative factors as applicable.
- Enclose the field names you want to compute in curly braces, like this:
{column1}. - Use round brackets for other purposes, for example, to compute a complex expression. For example,
2*({column1}+{column2})/{column3}. - Do not use square brackets [].
- Ensure that curly braces are only used for specifying field names in the expression.
- Provide an Alias for each newly calculated field.
- You can compute multiple fields using multiple expressions in the same transformation.
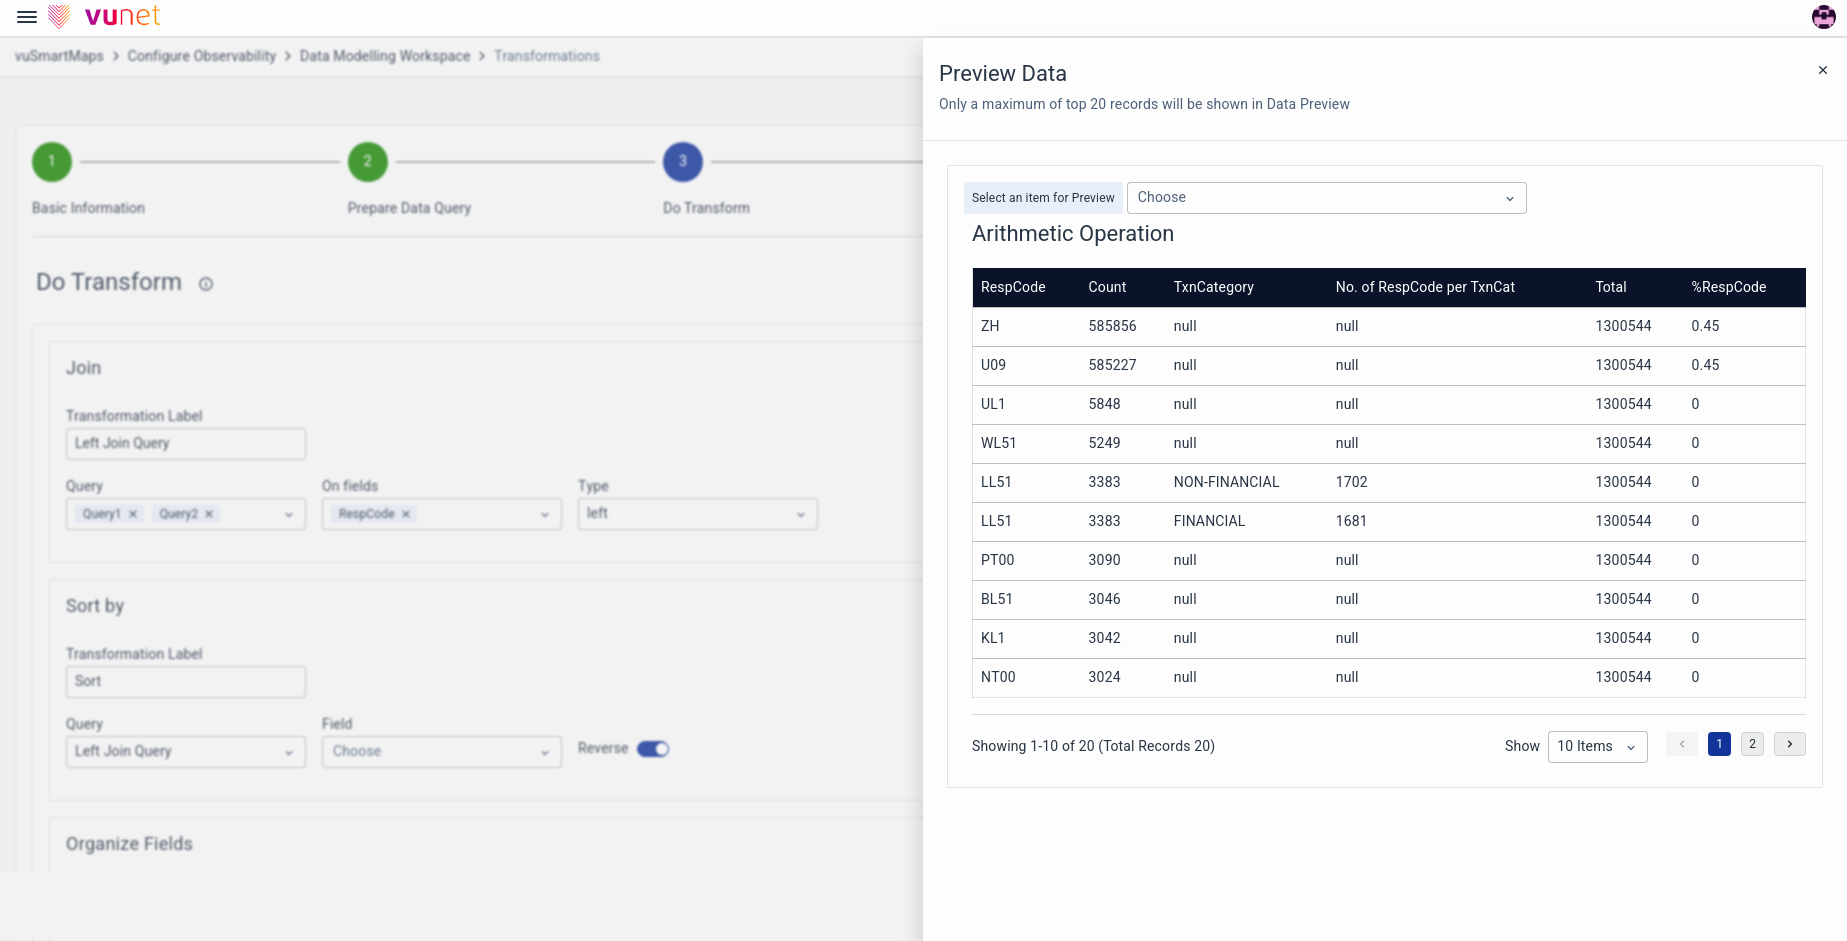
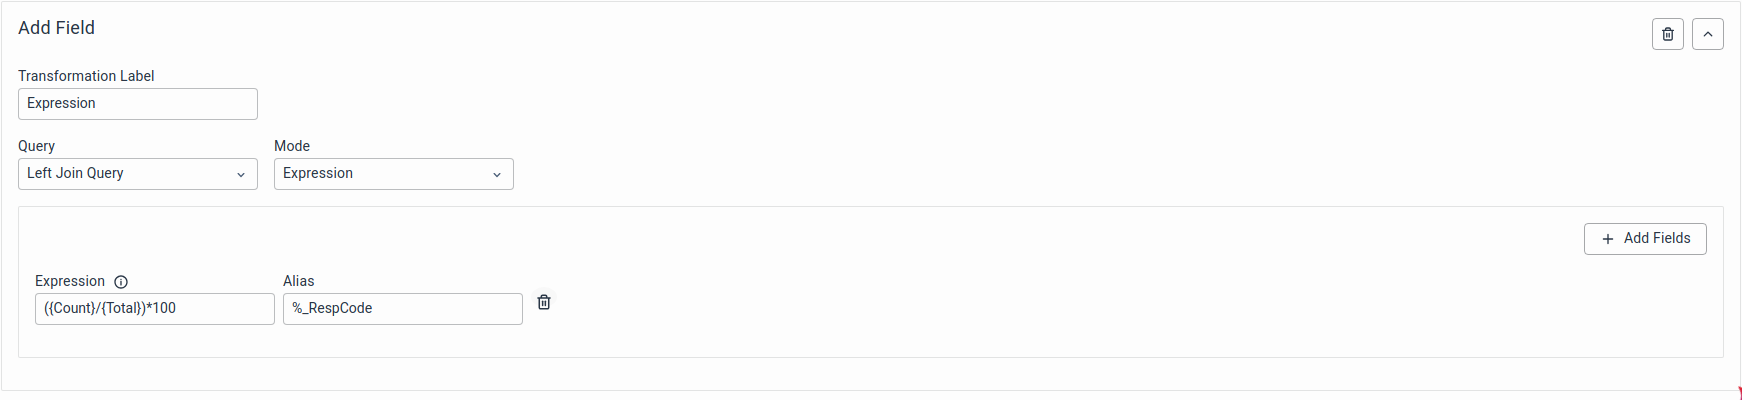
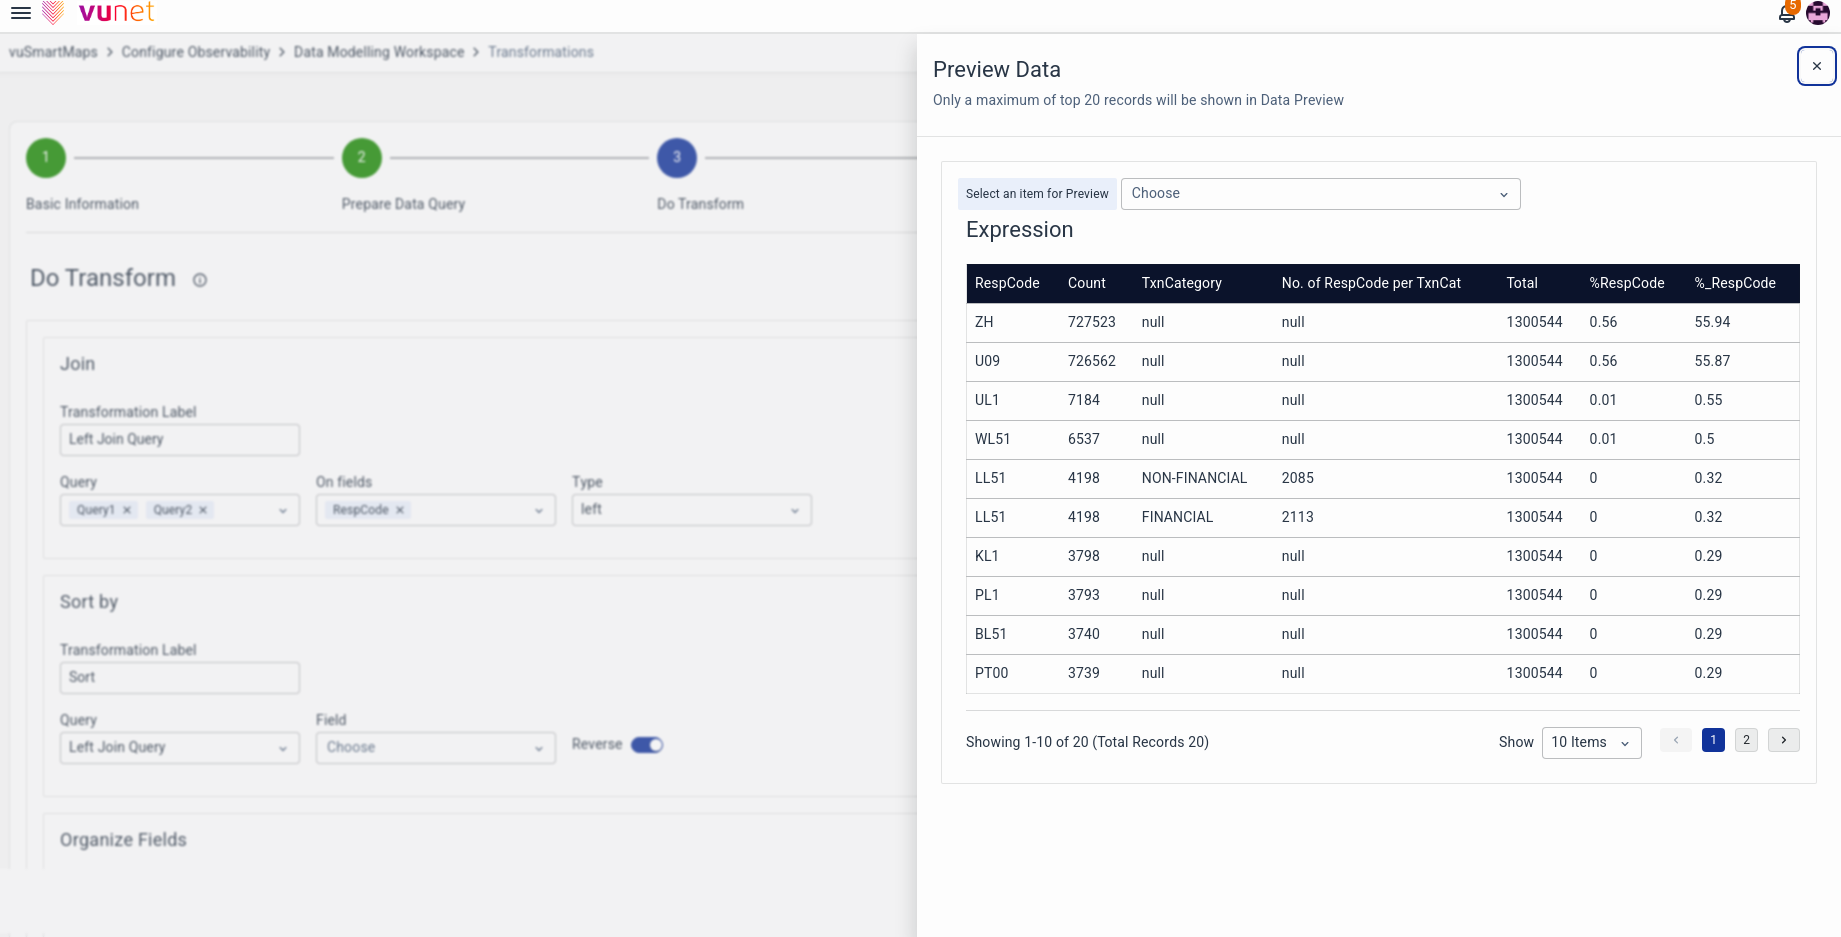
Example: Here we are calculating the percentage of average duration to the count using the expression {Count}/{Total}\*100 and the result is stored under the Alias name %_RespCode
- If the brackets are not completed and If the field datatypes don't match the requested computation (e.g. str/float) then the corresponding error is thrown.
- We have also nested field expressions such as
{system.cpu.util.norm},{system.cpu.util.min},{system.cpu.util.init}, etc. are separate selectable fields. If these are selected, they become separate fields in the visualized data. Essentially, we flatten any nested-value fields.
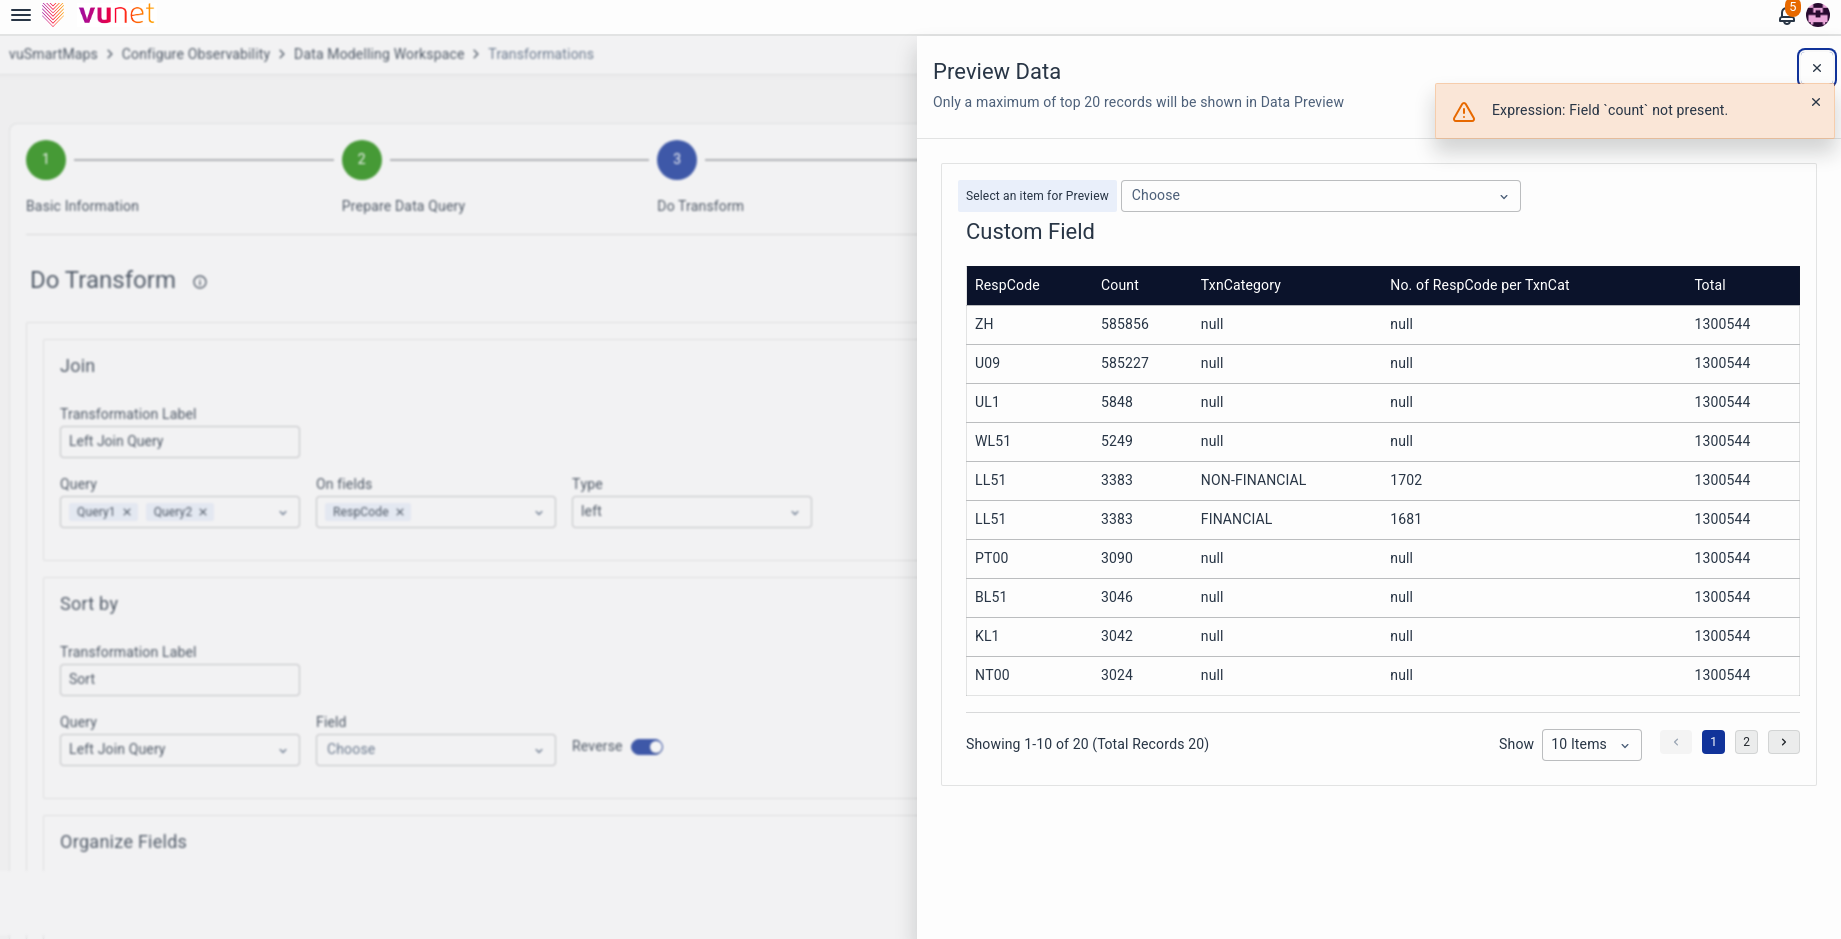
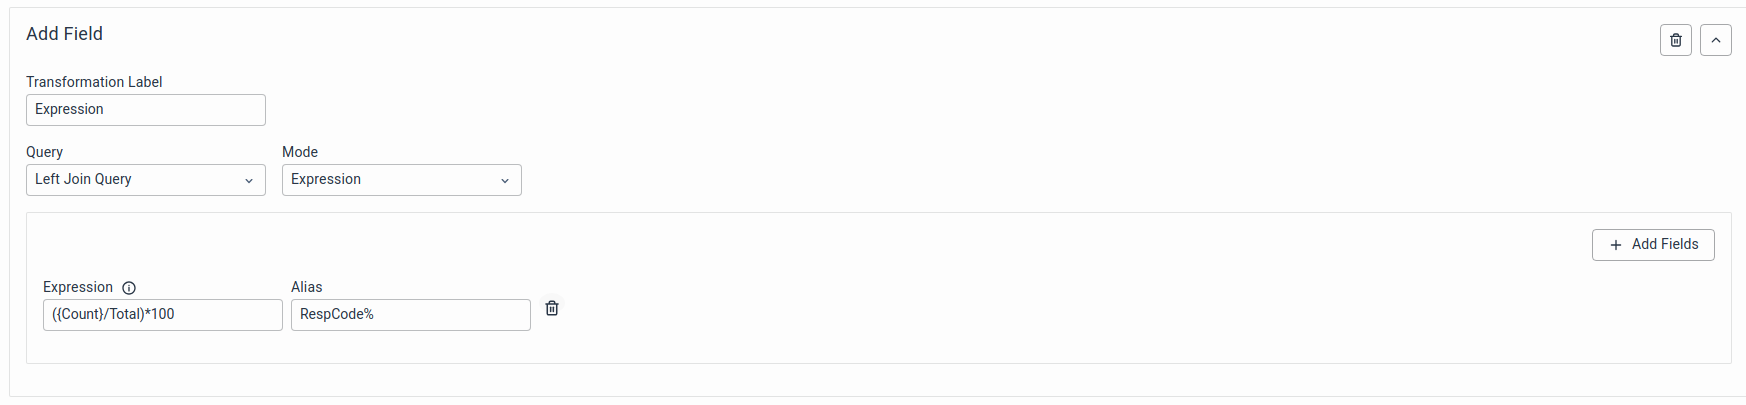
If the syntax is incorrect the errors will be flagged as shown in the below screenshots. In the following example the field ‘count’ is not present.

Syntax Error
In the following example the field ‘total’ is not defined.
Syntax Error

Once you've entered your expressions and aliases, click the Run Transformation button to see the changes reflected in the preview. The existing fields will remain unaffected, and new fields will be added according to the specifications of your expressions.
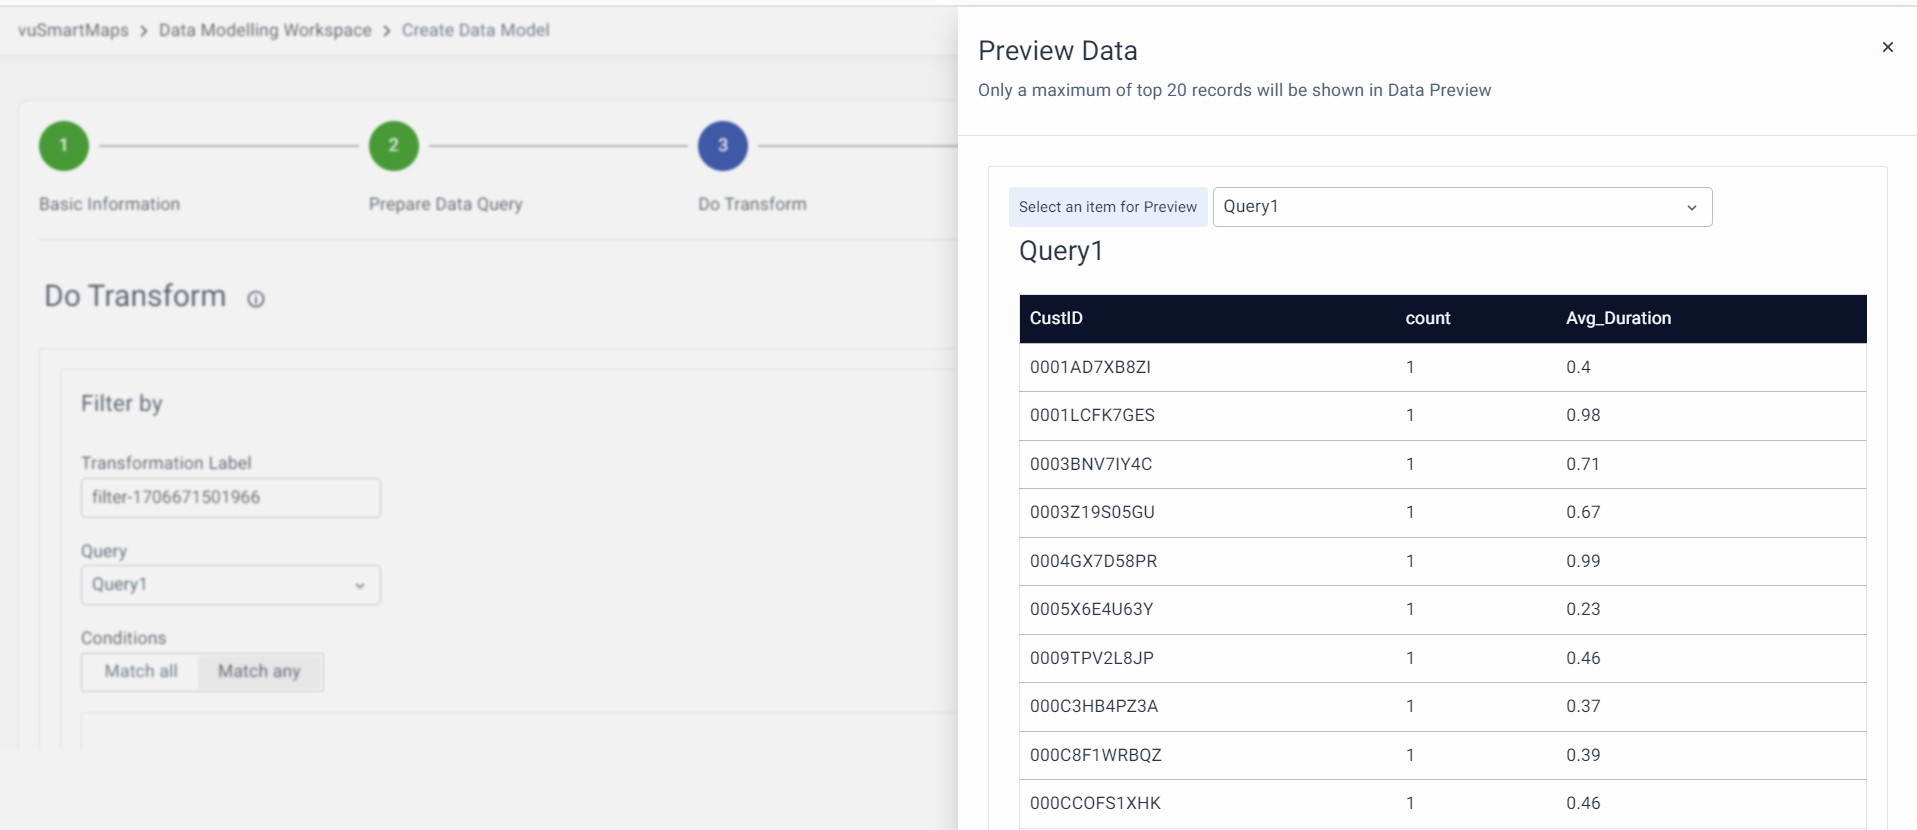
Filter By
The "Filter By" transformation allows you to filter or remove specific portions of the data in a frame. Here's how to use it:
- Choose the query from the dropdown menu and specify the condition for data filtration.
- The user is required to select the field and input the corresponding matching fields to facilitate the filtering process.
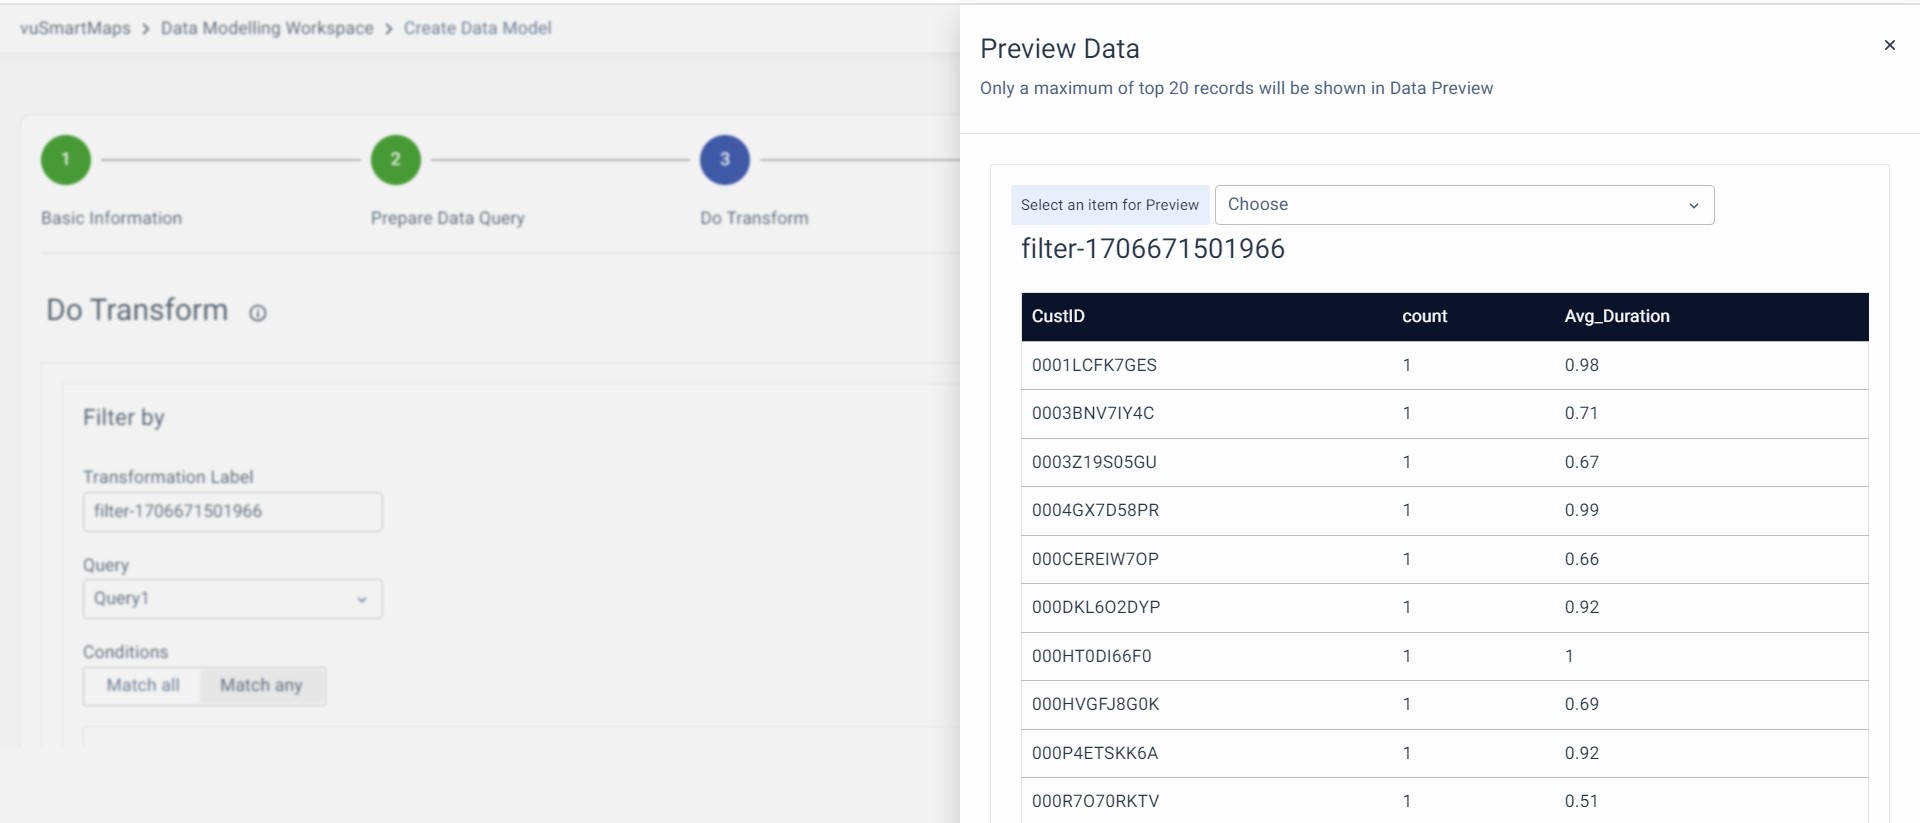
This transformation helps you refine your data by including specific records based on the defined conditions and matching values.
Example: You are filtering out the Avg_Duration value which is greater than 0.5.
Table before filtering
Filter-By Transformation
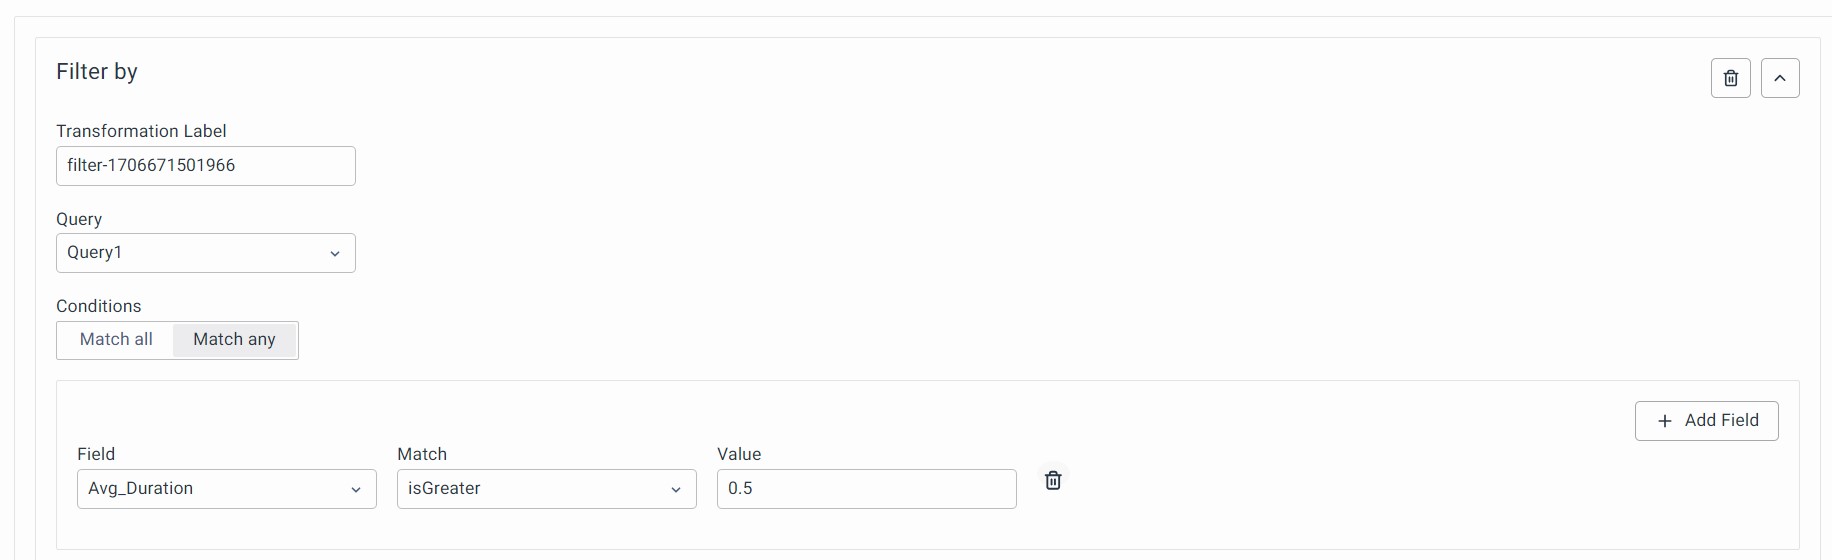
Table after Filtering
Aggregate
The "Aggregate" transformation is used to summarize or aggregate the output of a query. It also offers time-bucketing capabilities.
Here's how to use it:
- Select the query from the dropdown that you want to aggregate.
- If needed, choose one or more "Group By" fields to group your data.
- Next, you have two options:
- Aggregate without Time Bucketing
- Aggregate with Time Bucketing
The "Aggregate" transformation allows you to condense and analyze your data, providing you with insights and summaries based on your chosen fields and grouping criteria. Time bucketing helps in organizing data based on time intervals, which can be particularly useful for time-series data.
a) Aggregate without Time Bucketing
This process allows you to aggregate data based on the chosen source field, perform various calculations, and create new fields with summarized information. You can add and remove multiple aggregations as needed.
Example: We are calculating the Unique Count for the source field event_id and the result is stored under the alias name Unique which is grouped by Severity.
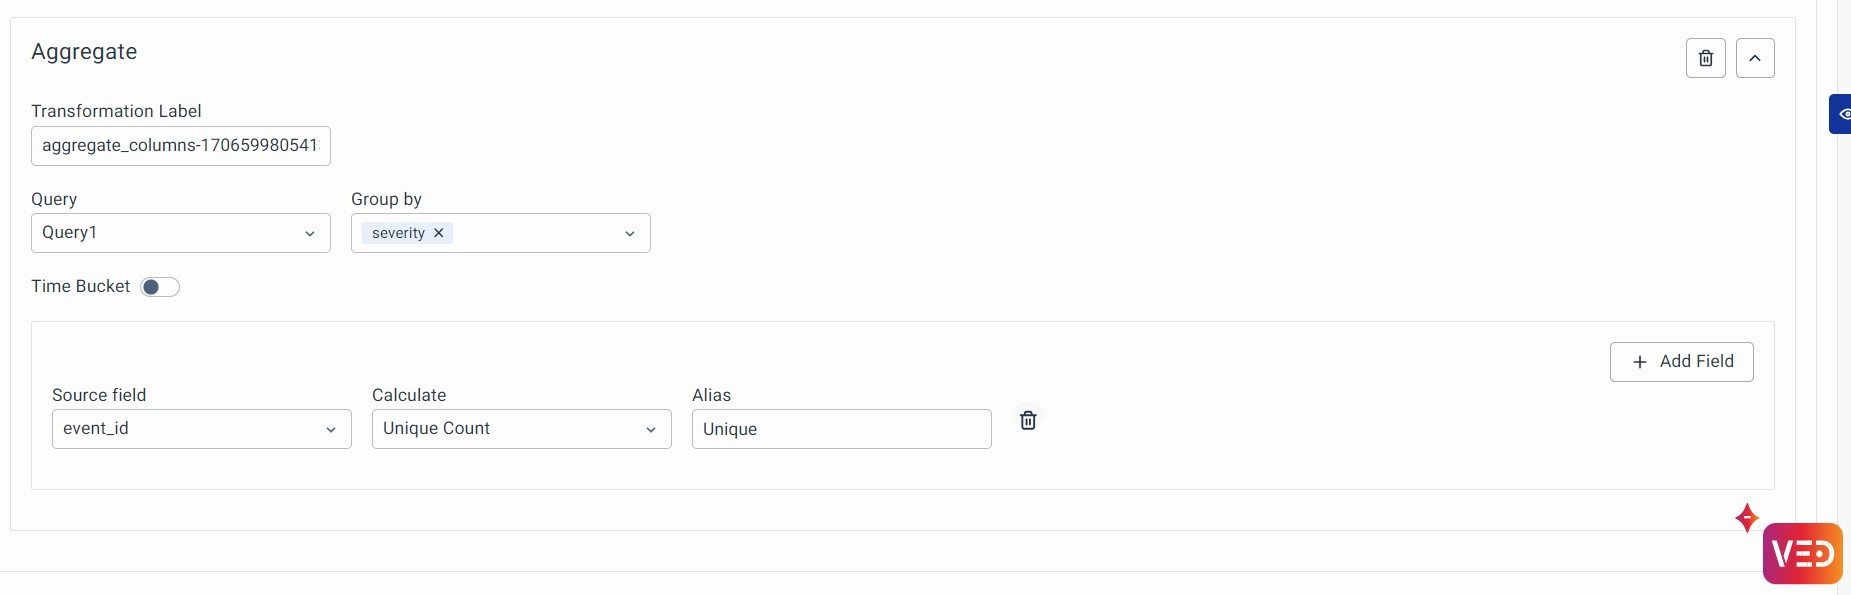
- Disable Time Bucketing: Time bucketing should be disabled by default for this option.
- Choose a Source Field: Select the field you want to aggregate.
- Select the Calculation: Choose from the available options for aggregation:
- Mean
- Min
- Max
- Count
- Total
- First
- Last
- Unique Count
- Provide an Alias: Give a name to the aggregated field. This name will represent the aggregated result.
- Add Multiple Aggregations: You can add multiple aggregations by clicking the "+ Add" button. You can perform multiple aggregation operations on the same field or different fields simultaneously.
- Remove an Aggregation: If you want to remove an aggregation that you've added, click the "Delete" button next to that aggregation.
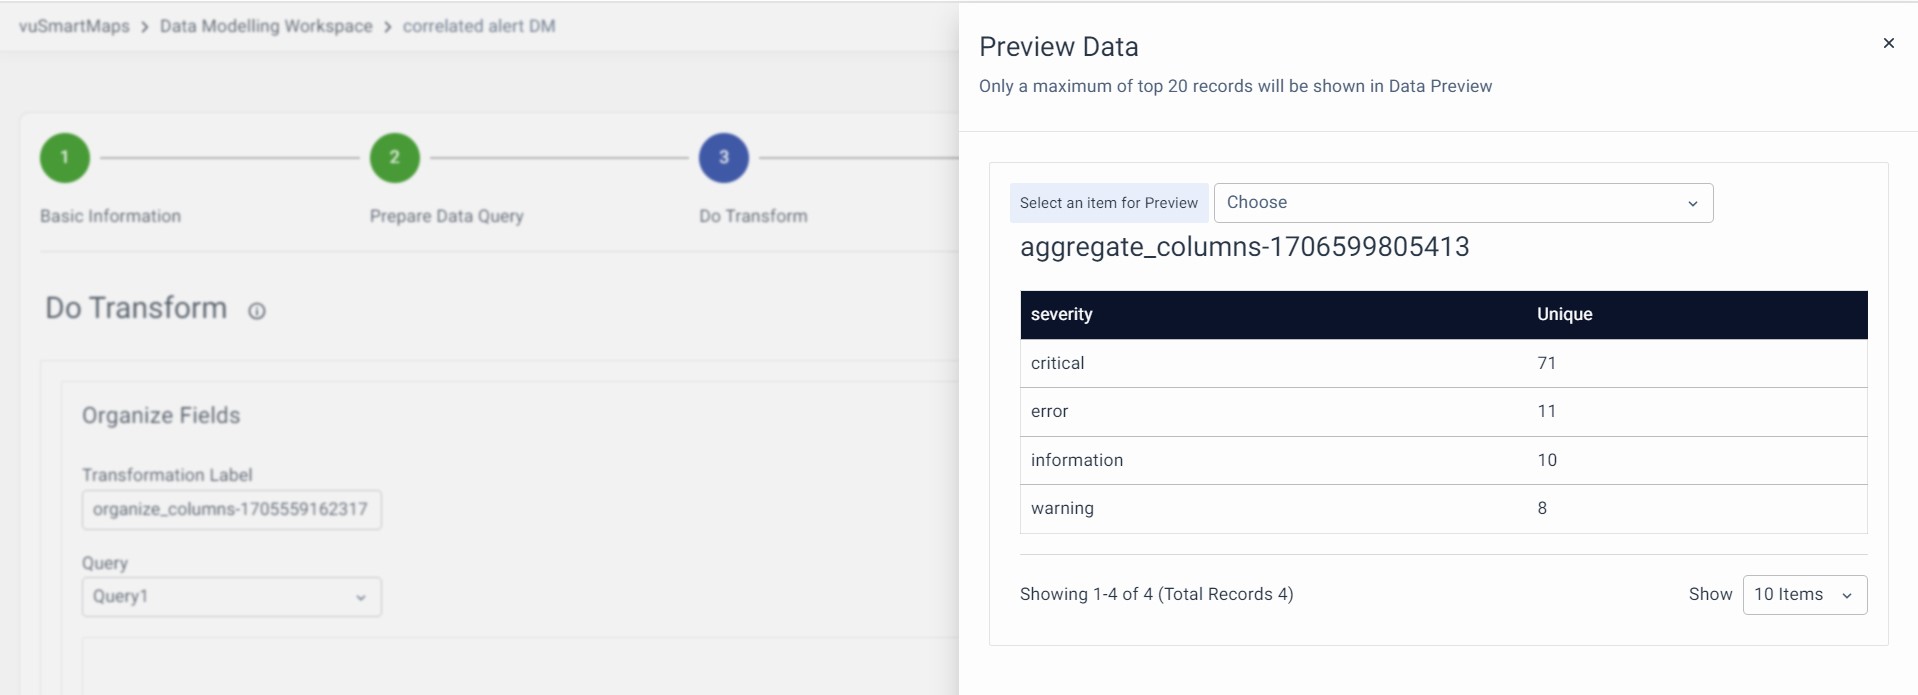
Output:
After clicking on Run Transform you will find the Unique Counts of the Event ID grouped by the severity.
b) Aggregate with Time Bucketing
This process allows you to perform time-based aggregation on data, summarizing information within specified time intervals. The other aggregation settings, like source field and calculation methods, are similar to aggregating without time bucketing.
Example: You are calculating the Unique Count for the source field event_id and the result is stored under the alias name Unique which is grouped by Severity. You are bucketing the start_time with intervals of 10mins and the result is stored under Bucket Label.
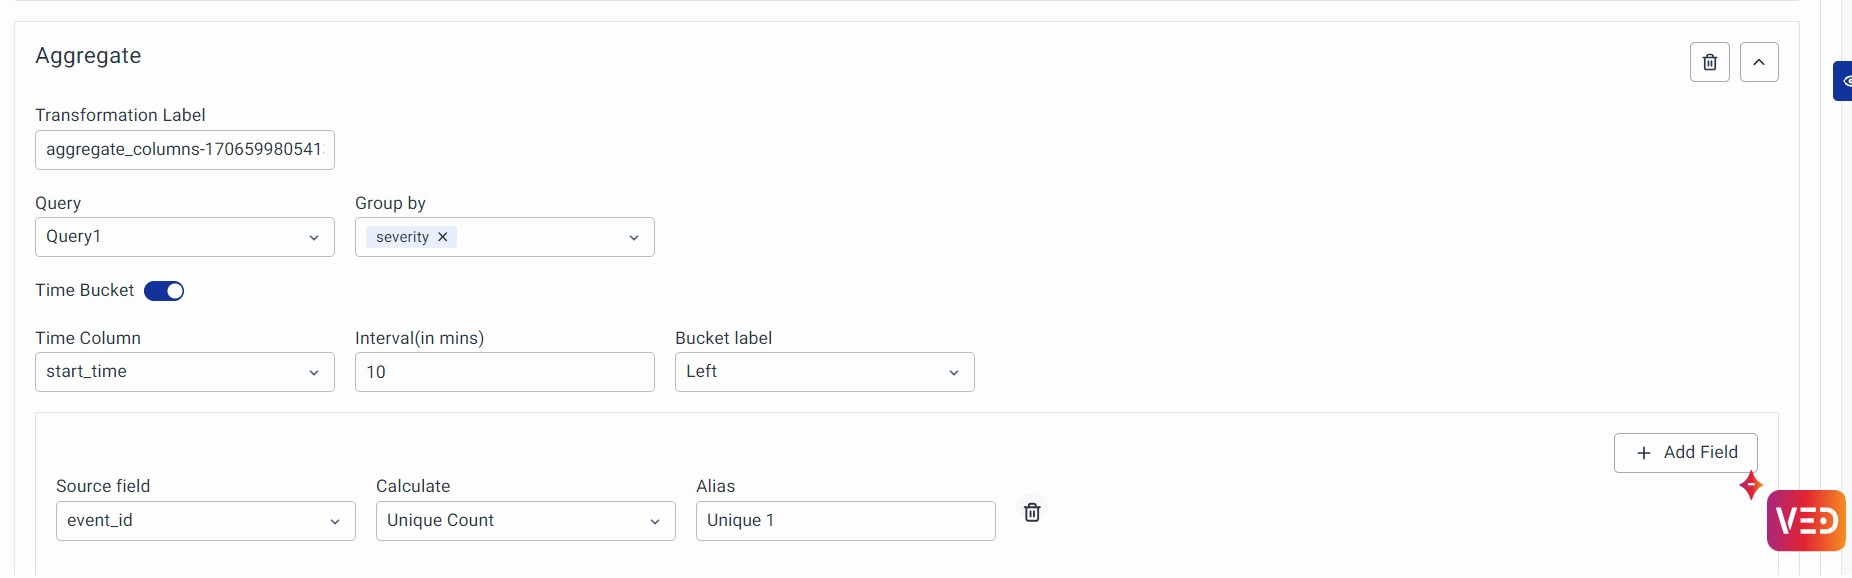
- Enable Time Bucketing: Turn on the Time Bucket option to perform time-based aggregation.
- Choose a Time Column: Select the column that contains time-related data, which will be used for time-based aggregation.
- Specify Bucketing Interval: Define the time interval in minutes for creating time buckets. Data will be aggregated within these specified time intervals.
- Configure Aggregation: Configure aggregation settings as you did in the previous case (without time bucketing). Choose the source field, select the calculation method, provide an alias, and add or remove multiple aggregations as needed.
- Preview: After configuring all the settings, click the Run Transform button to apply these aggregations with time bucketing. You can review the aggregated results in the preview.
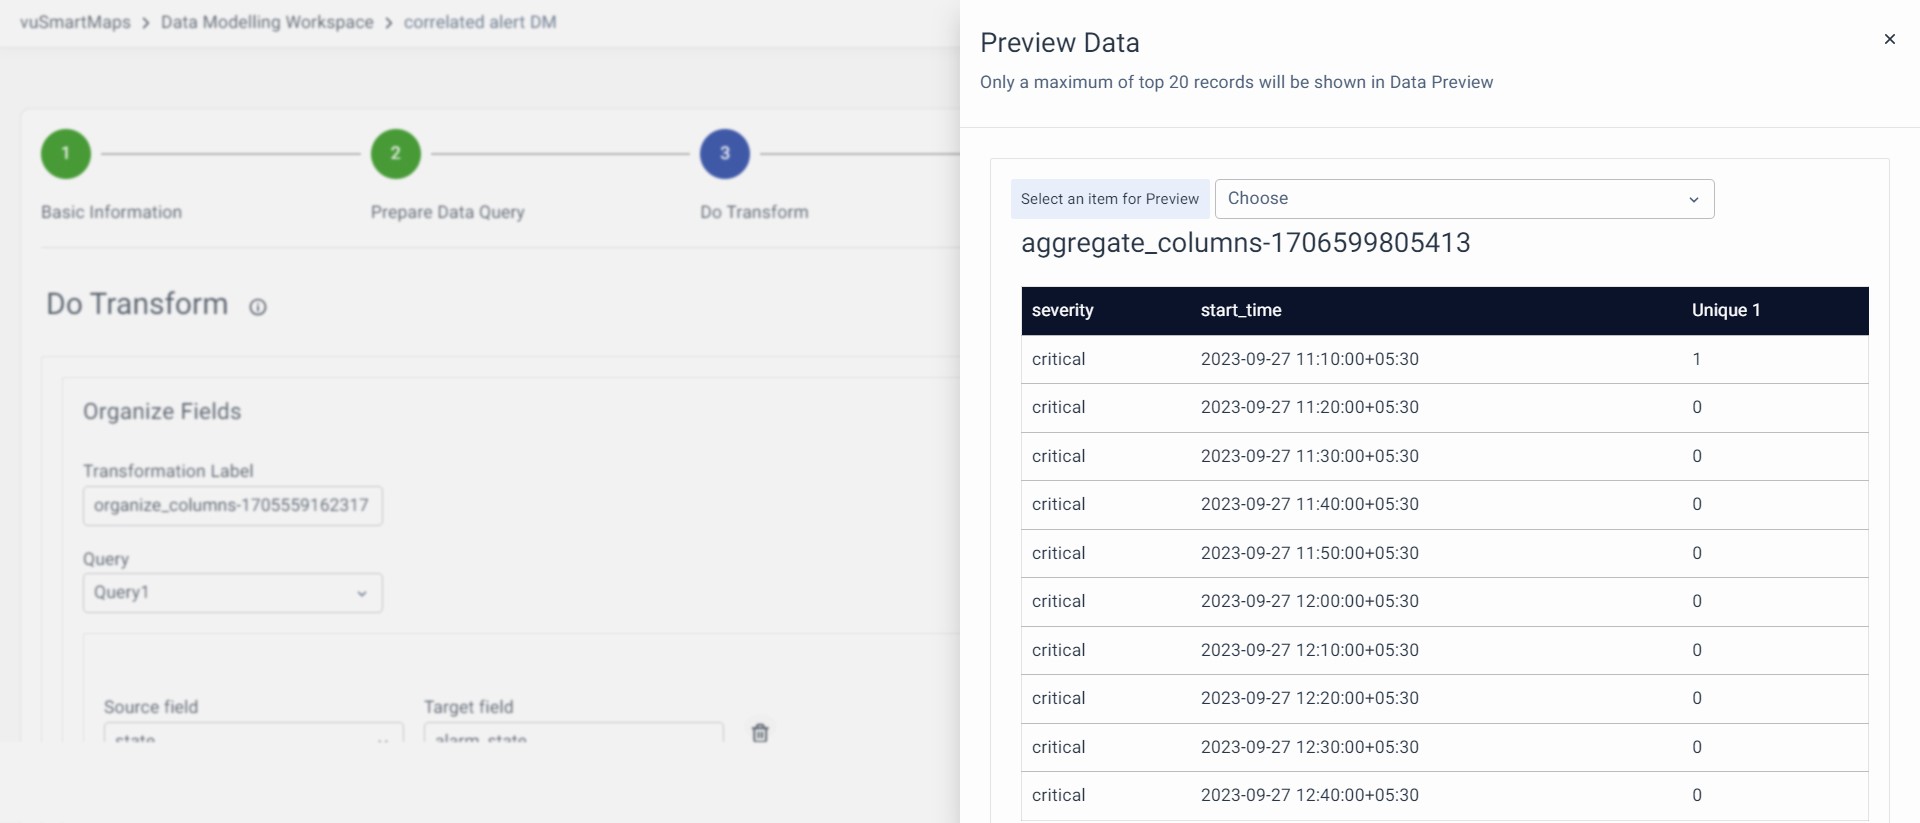
Output:
After clicking on Run Transform you will find the Unique Counts of the Event ID grouped by the severity with the start_time interval of 10 minutes.
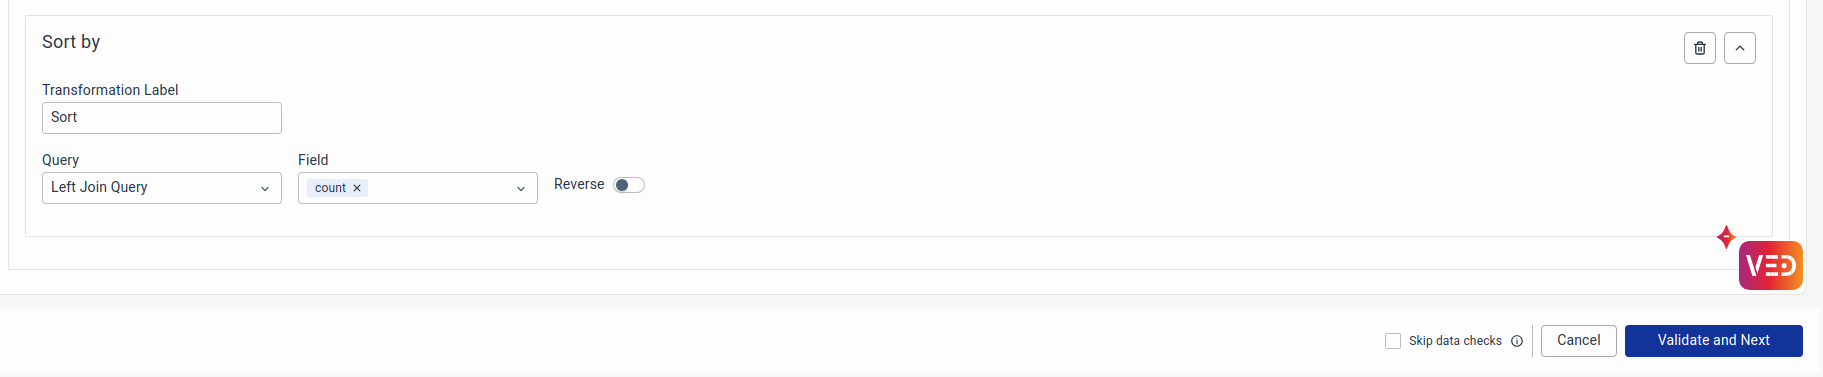
Sort By
Sort By transformation is used to sort a query output by the selected field. When reverse is enabled, the values are sorted in descending order.
To use the Sort By transformation:
- Select a Query.
- Choose a Field. The field is a multi-select dropdown. If multiple fields are selected, multi-level sorting is enabled. i.e. data is first ordered by the values in the first selected field, then by the values in the second, and so on.
- Optionally, enable Reverse for descending order.
- Click Run Transformation.
Ascending Sort-By: Select a query and choose the field. The reverse button is by default disabled to sort them in ascending order.
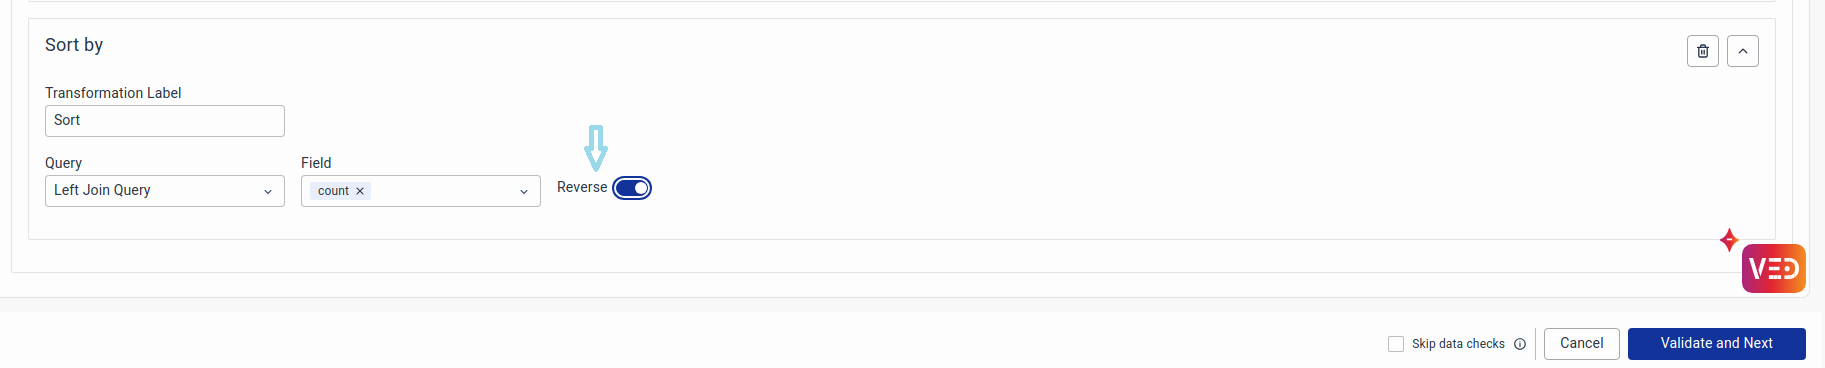
Descending Sort-By: Click the Reverse button to sort them in descending order.

Top N
This transformation helps you choose the top N rows from a data frame, allowing for further operations.

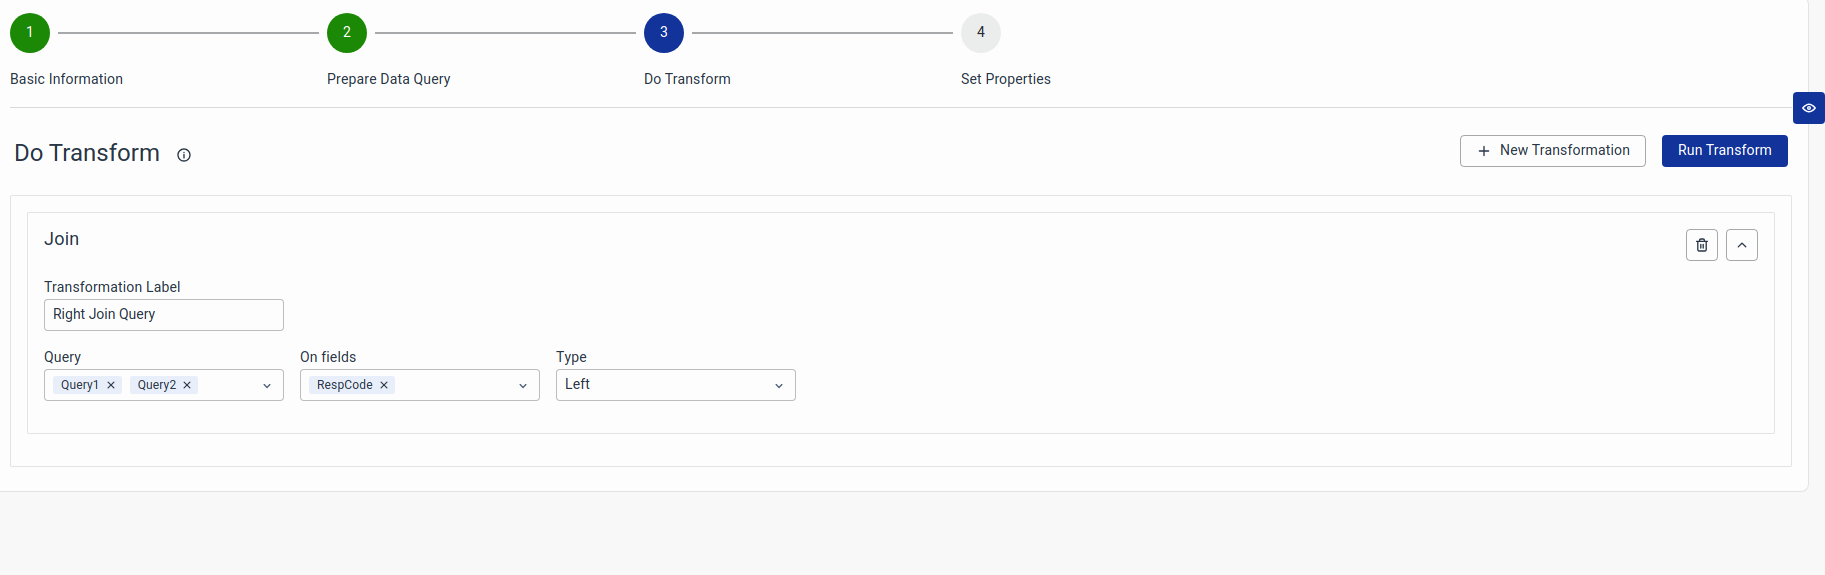
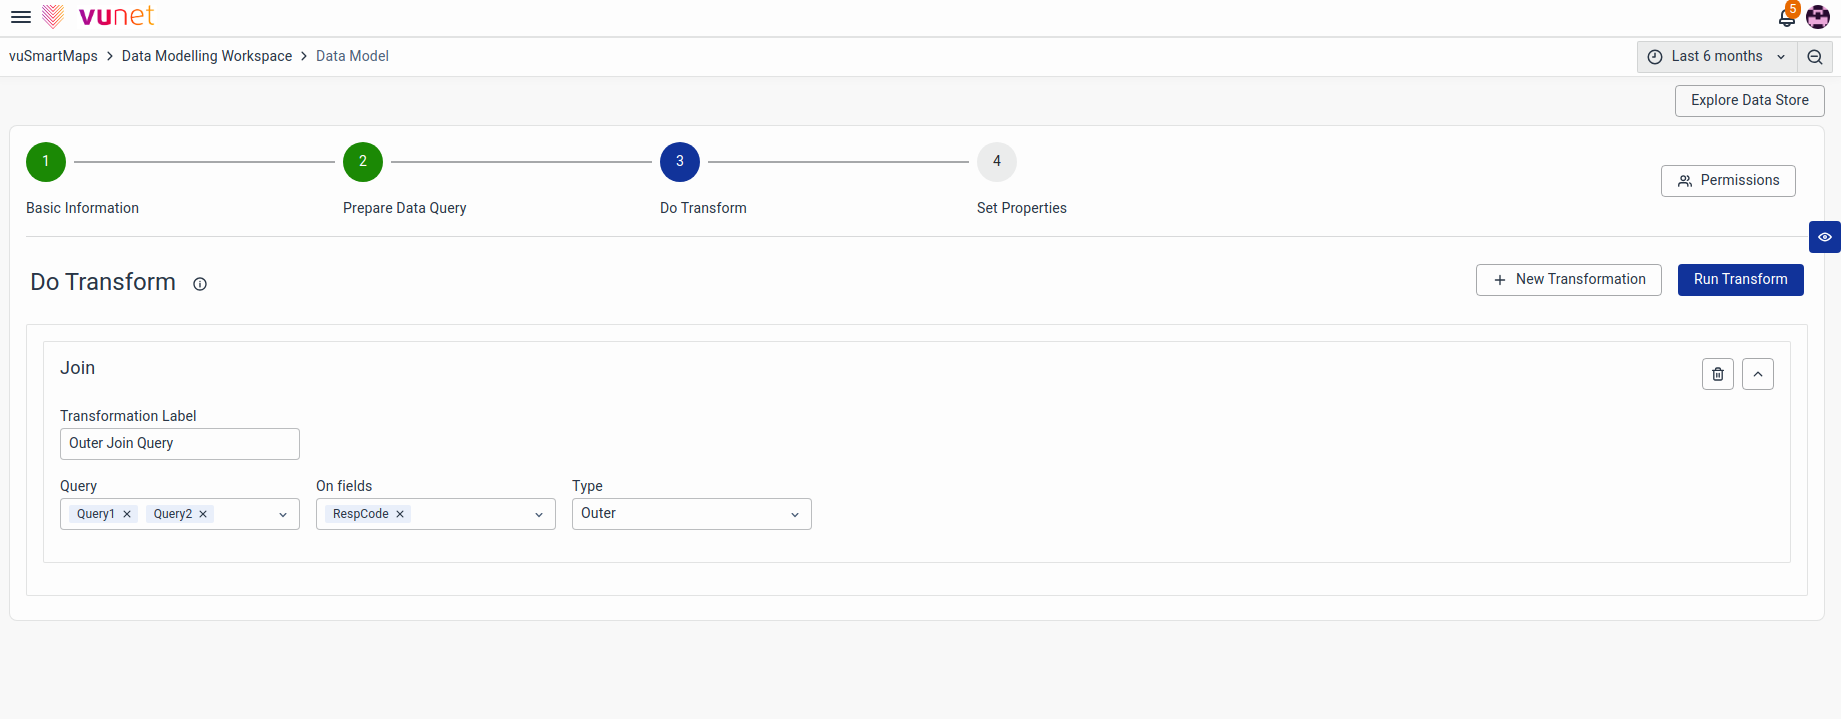
Join
This transformation allows you to join the outputs of two queries into a single frame, functioning like a typical SQL join.

- Choose two queries in the Query dropdown.
- Select the fields to join the queries using the On Fields dropdown. It will show only the intersection of fields from both queries.
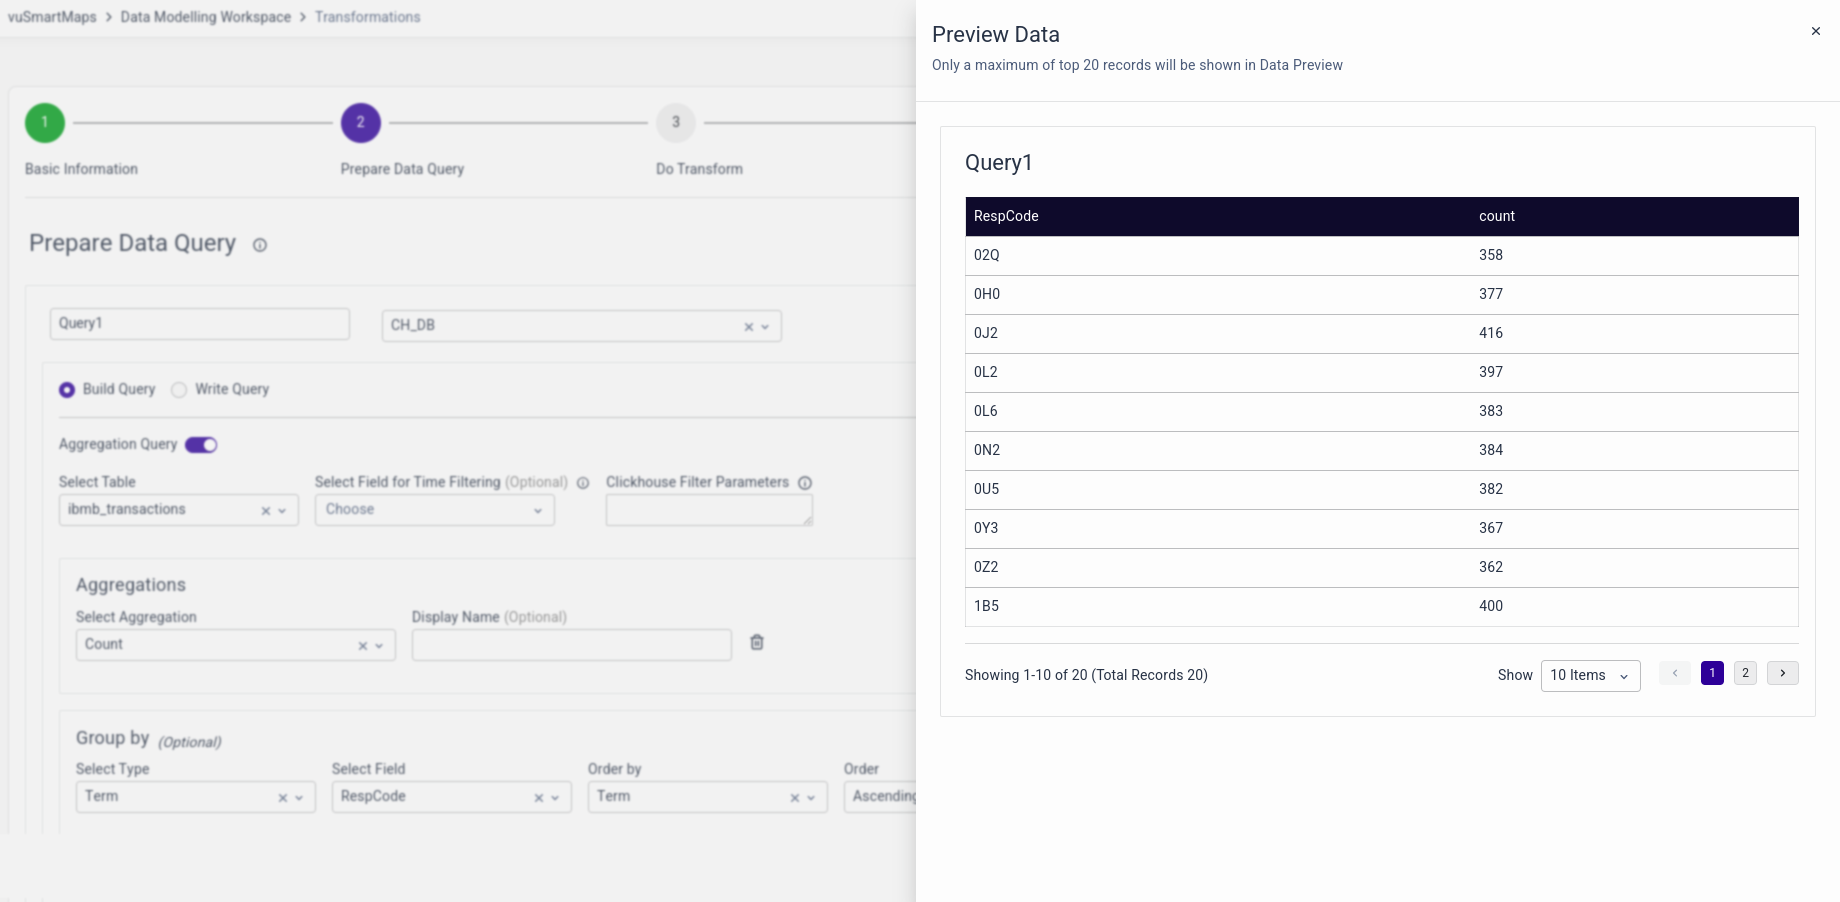
Please find the individual outputs of Query 1 and Query 2.
Here before using the Join transformation, you configure 2 queries in the Prepare Data Query section. Where Query 1 gives you the data of the count of Respcode.
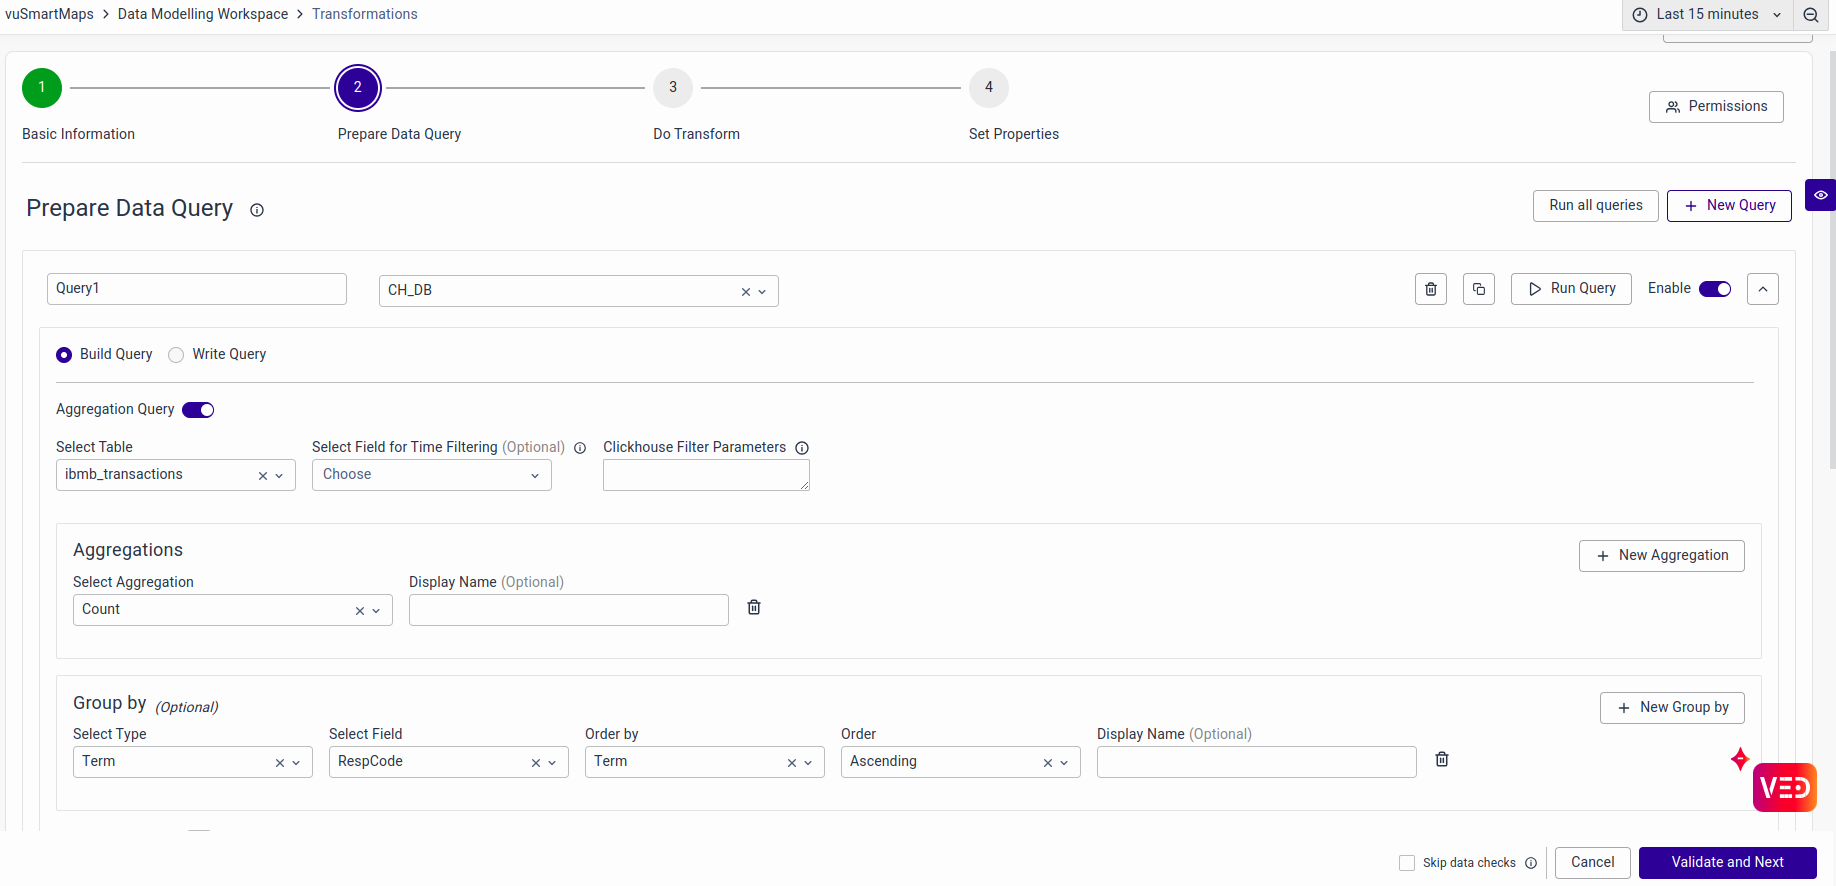
The output of Query 1.
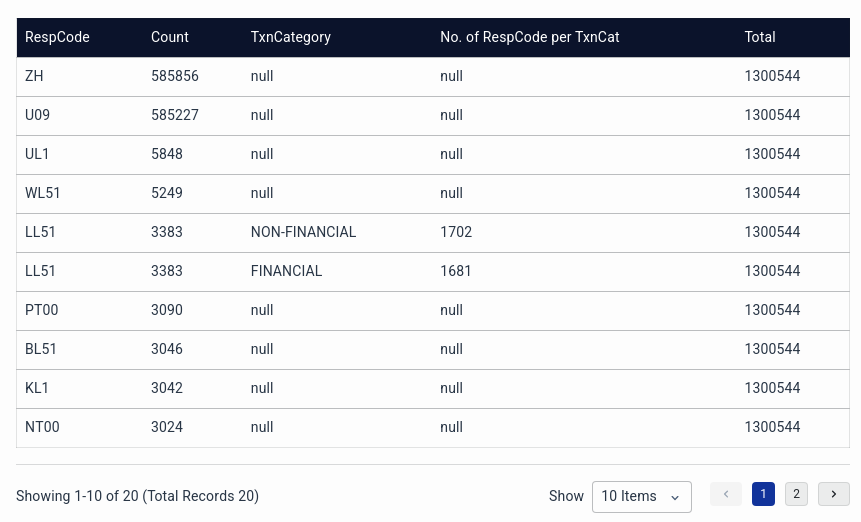
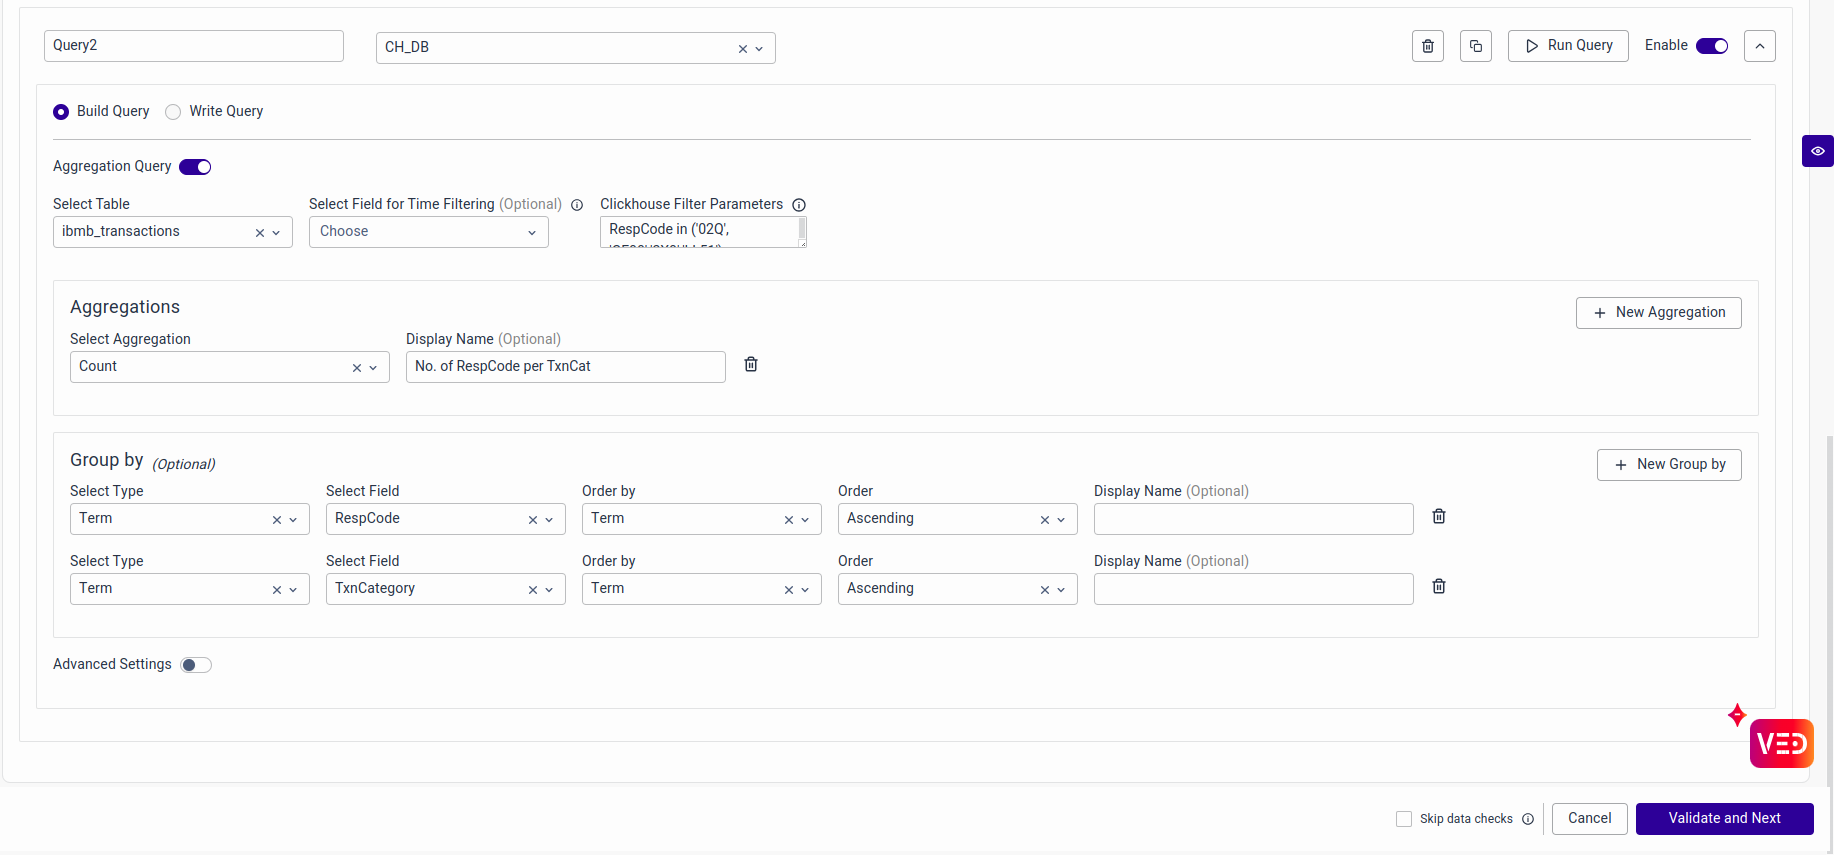
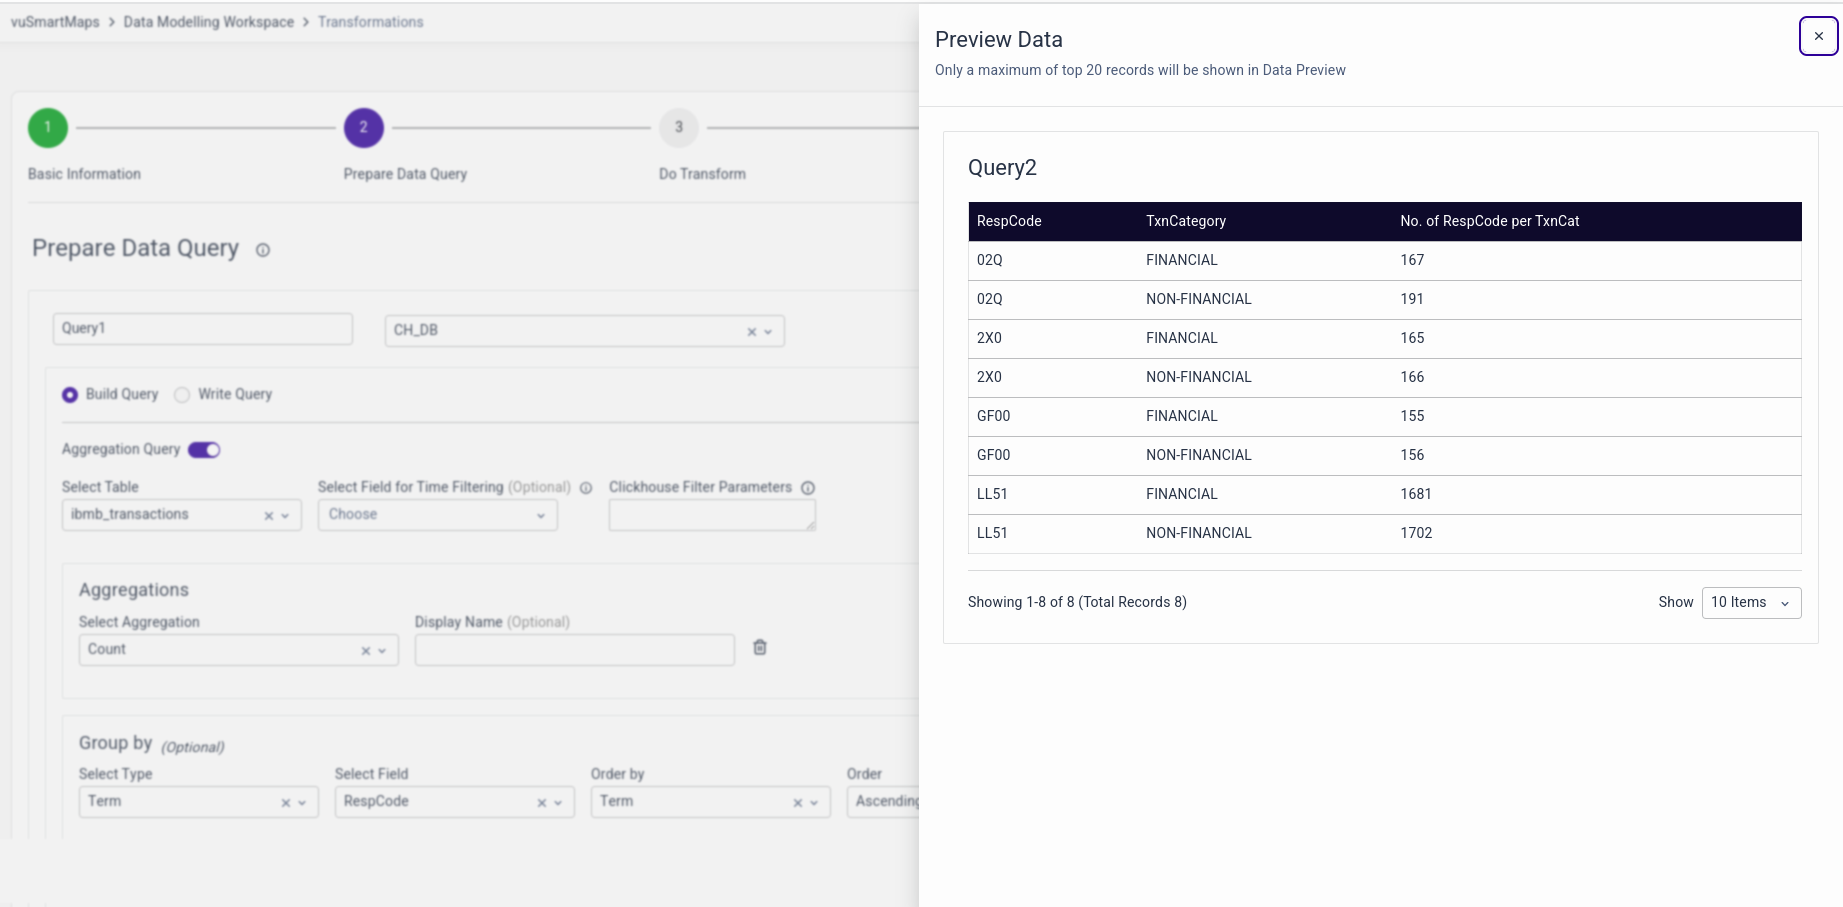
Query 2 displays data on the “number of respcode” per transaction category.
The output of Query 2
Once done, choose the type of Join you want to perform. Available options are:
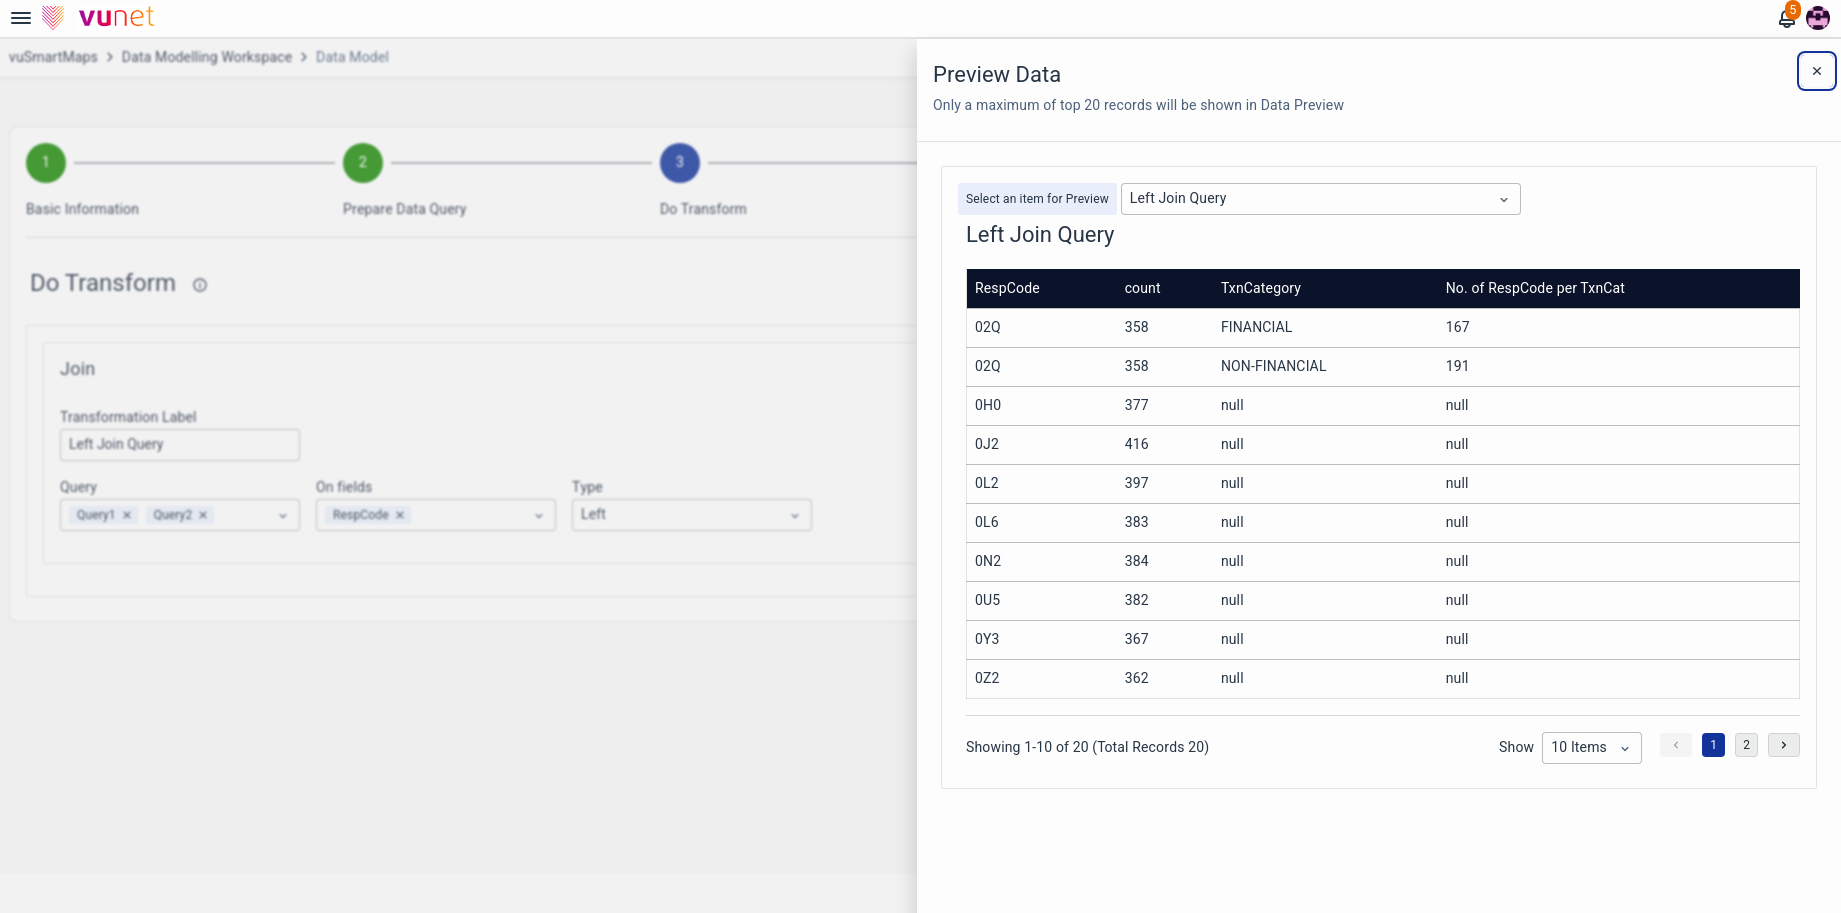
Left join: It returns all records from the left table and the matched records from the right table.
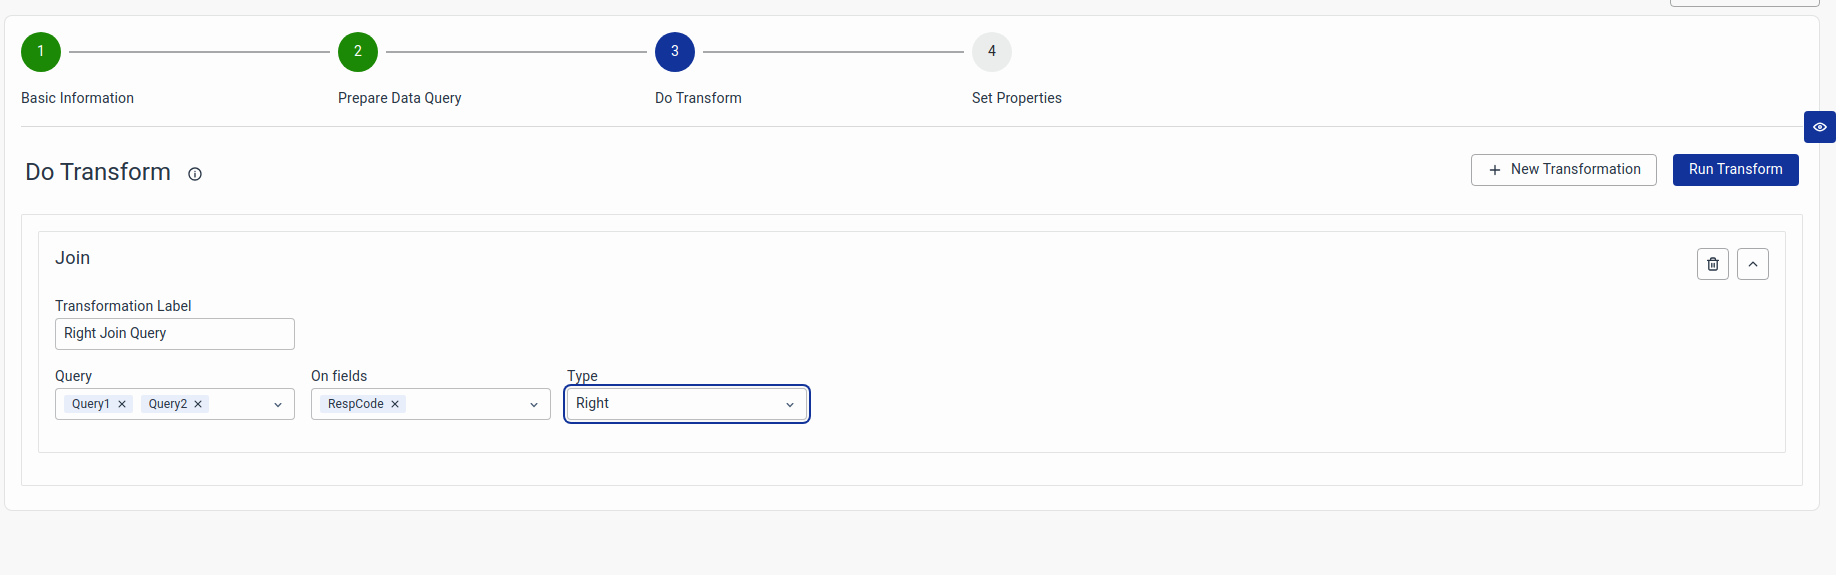
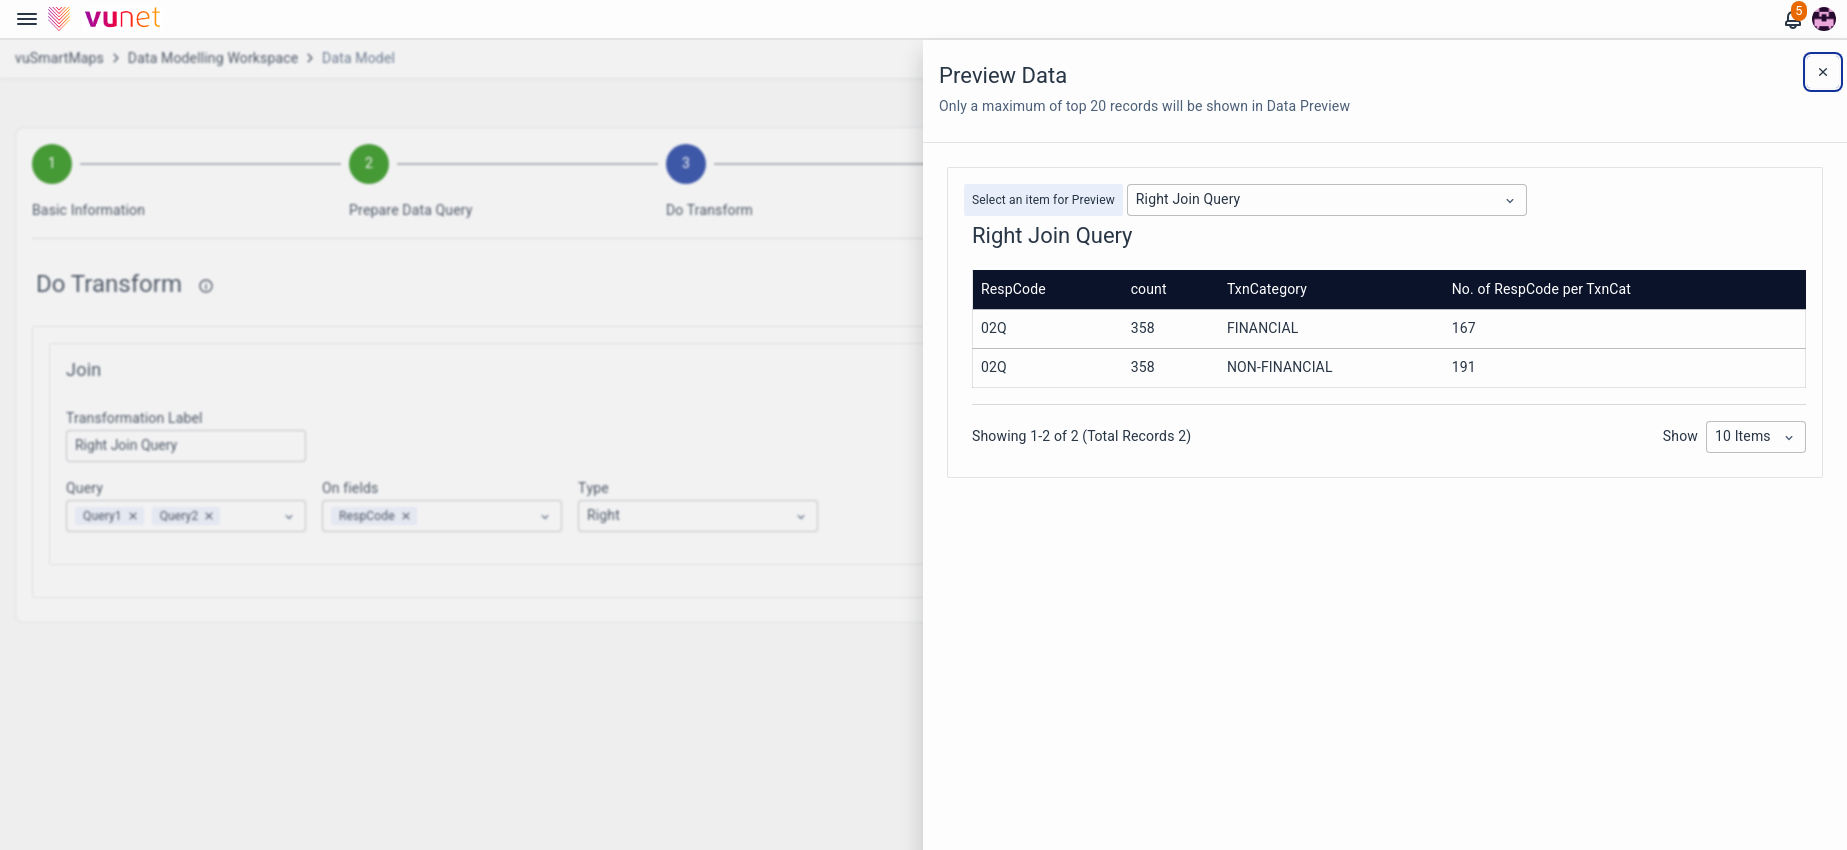
Right join: It returns all records from the right table and the matched records from the left table.
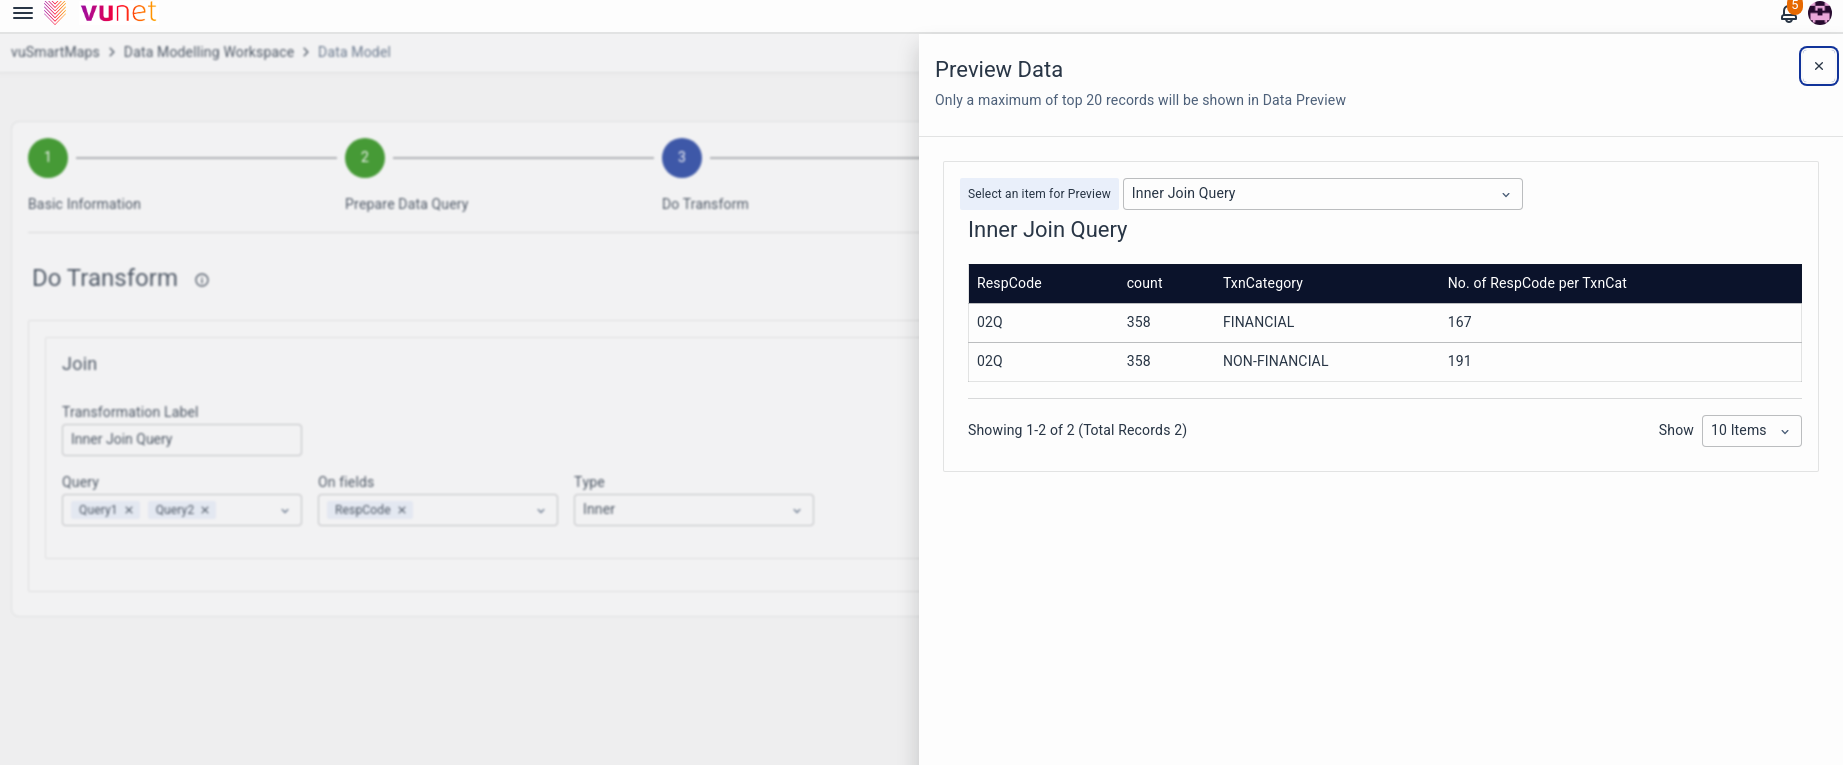
Inner join: It returns records that have matching values in both tables

Outer join: It returns records that have unmatching values in both tables.

Click on the Run Transform button to see the changes in the preview.
You can join multiple fields across multiple queries using this transformation.
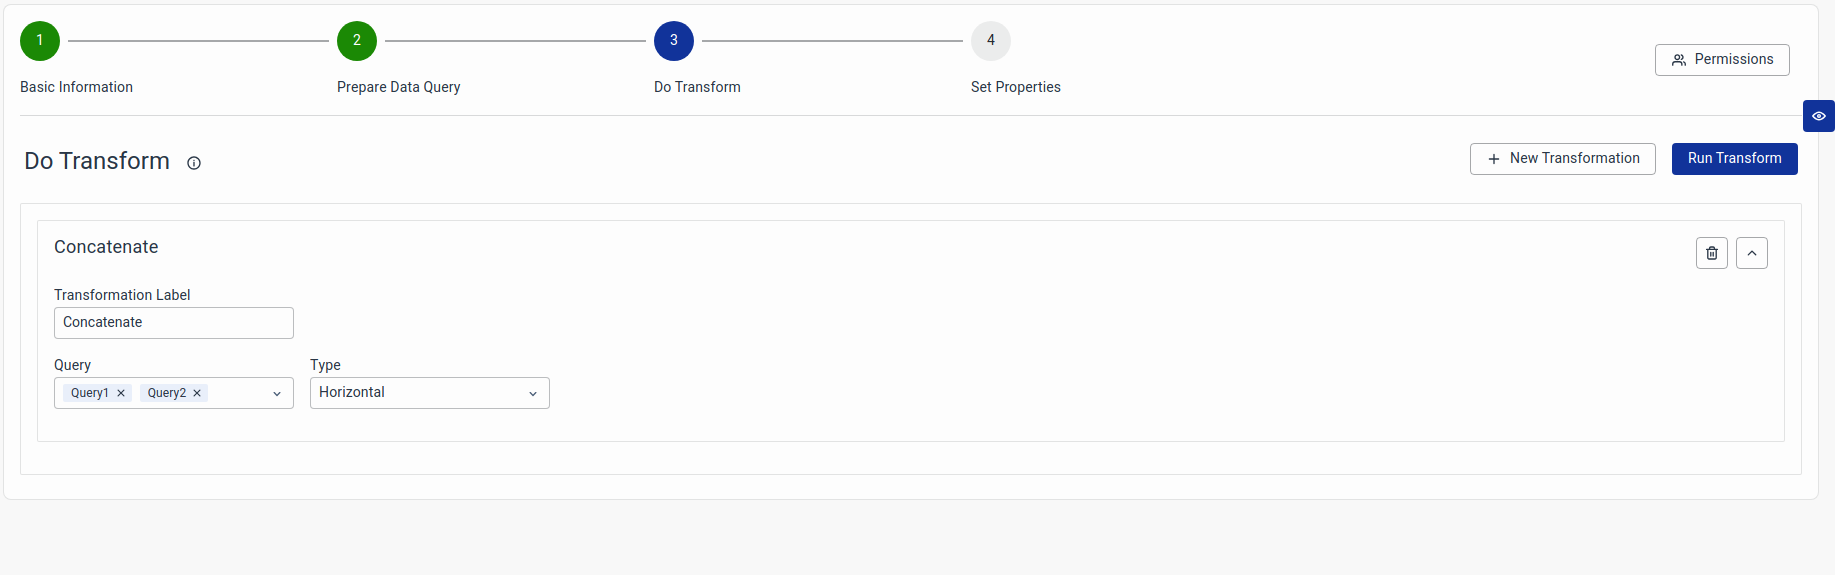
Concatenate
Concatenate combines the results of two Queries into one frame. Choose two Queries in any order from the dropdown. Pick either Horizontal (side by side) or Vertical (stacked) concatenation.
- Horizontal - Concatenate the stages horizontally (left to right)
- Vertical - Concatenate the stages vertically (top to bottom)
Click Run Transform to see the merged results.
a) Horizontal Concatenate
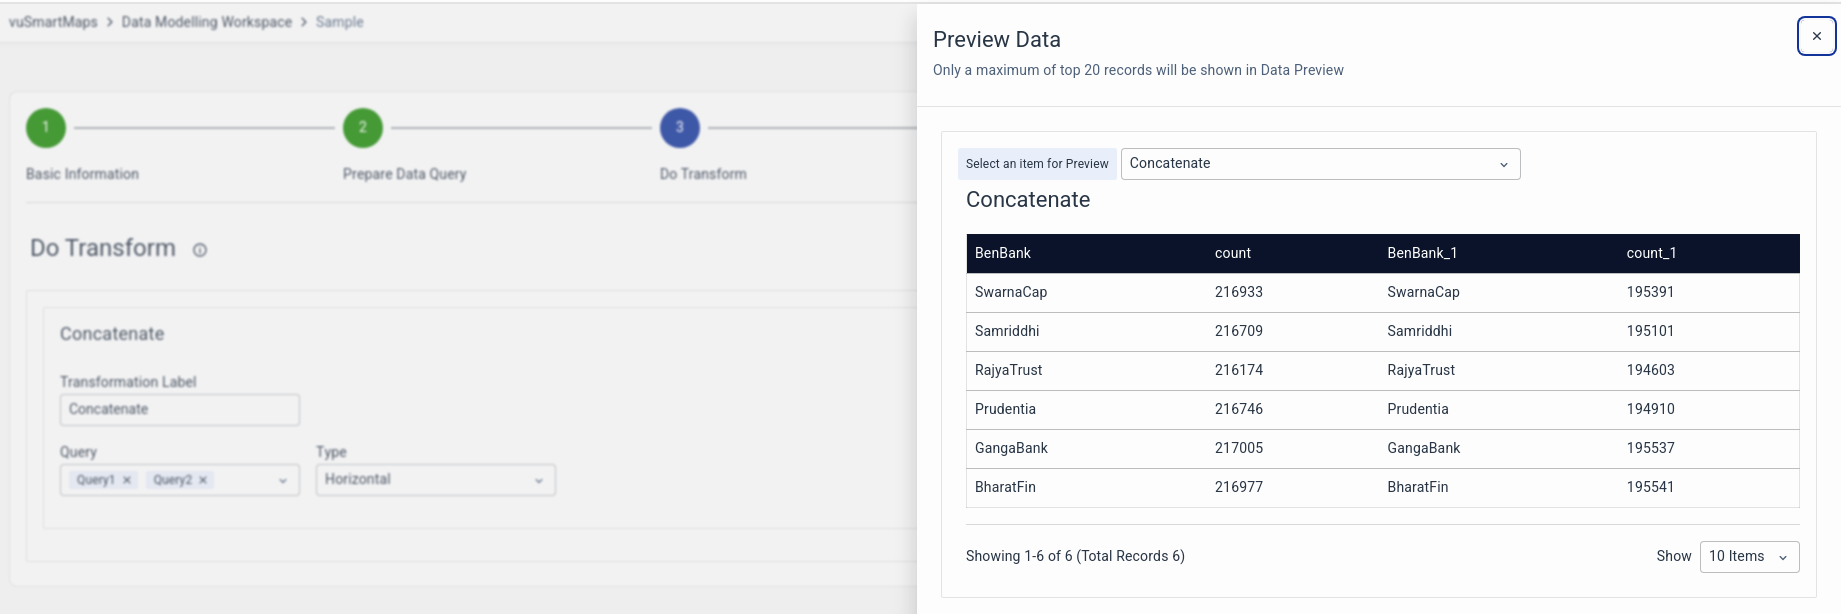
You are Horizontally concatenating Query 1 and Query 2 to create a new table.
As seen above, this is aggregated data from two or more sources having a similar number of rows in them.
Output:
b) Vertical Concatenate
You are Vertically concatenating Query 1 and Query 2 to create a new table.
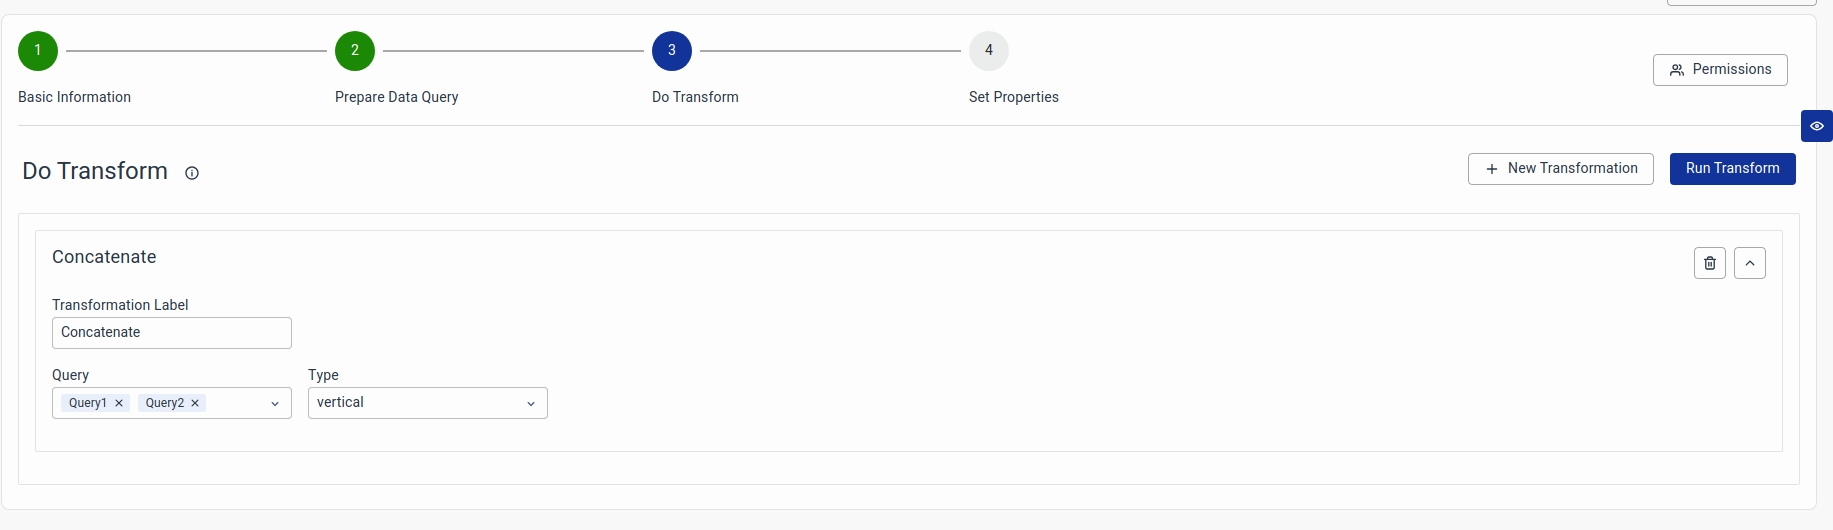
As seen above, this is time series data with a similar schema coming from two different queries. To concatenate these into a single stage/frame, use Vertical Concatenate.
Output:

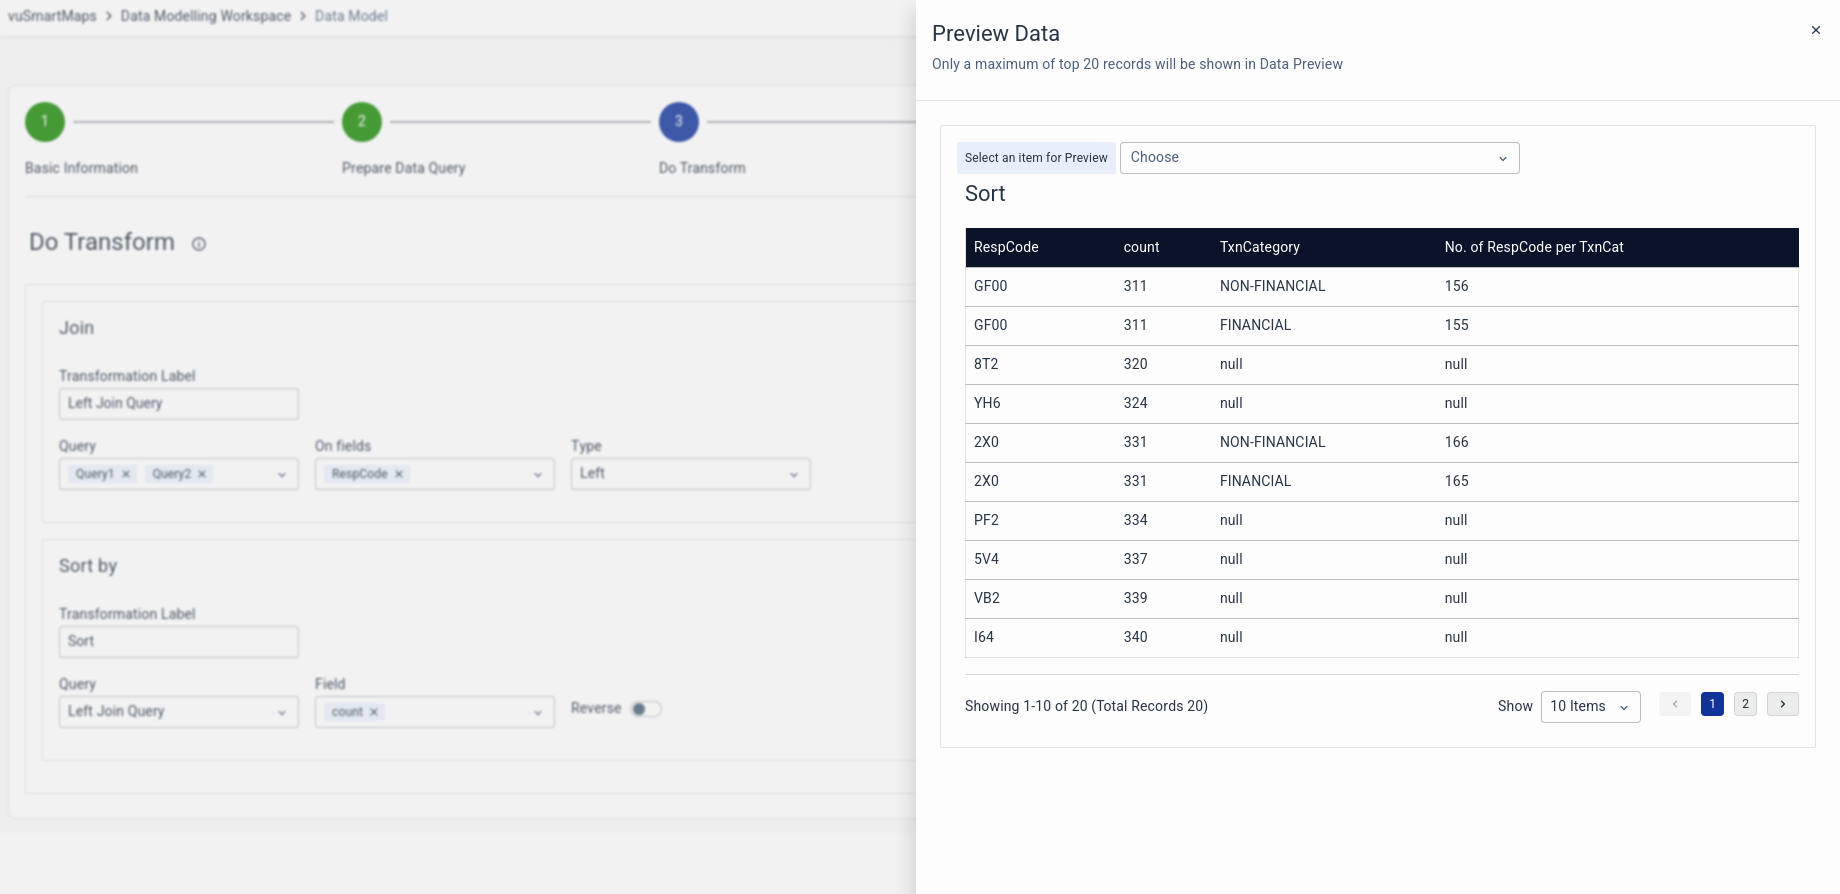
Preview is restricted to a max of 20 records.
