ADFS Integration
Active Directory Federation Services (ADFS) is a Windows Server feature extending single sign-on (SSO) access to applications and systems outside the corporate firewall. ADFS operates on a claims-based access control authorization model, provided by Microsoft.
ADFS enables SSO across secure boundaries like the internet, allowing users to utilize their local credentials for external systems. It establishes trust relationships between different systems, enabling users to present tokens for access.
Configure ADFS
ADFS configuration can be performed using either the identity provider or vuSmartMaps. The vuSmartMaps ADFS configuration API wraps around the identity provider's API.
ADFS Configuration Guide
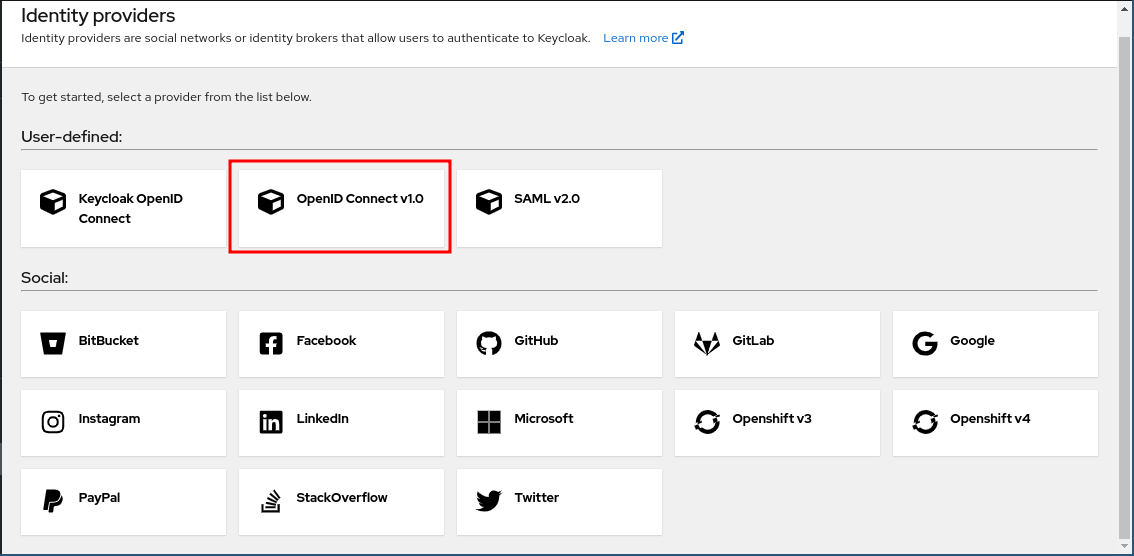
Follow these step-by-step instructions to configure OpenID Connect v1.0 using the Identify Providers section:
-
Accessing the Configuration Page: Open the identity provider’s administration console and navigate to the "Identity Providers" section. Click on OpenID Connect v1.0 in the User-defined section to initiate the configuration process.
-
Setting up the OpenID Provider: You'll be presented with a form similar to the one shown below:
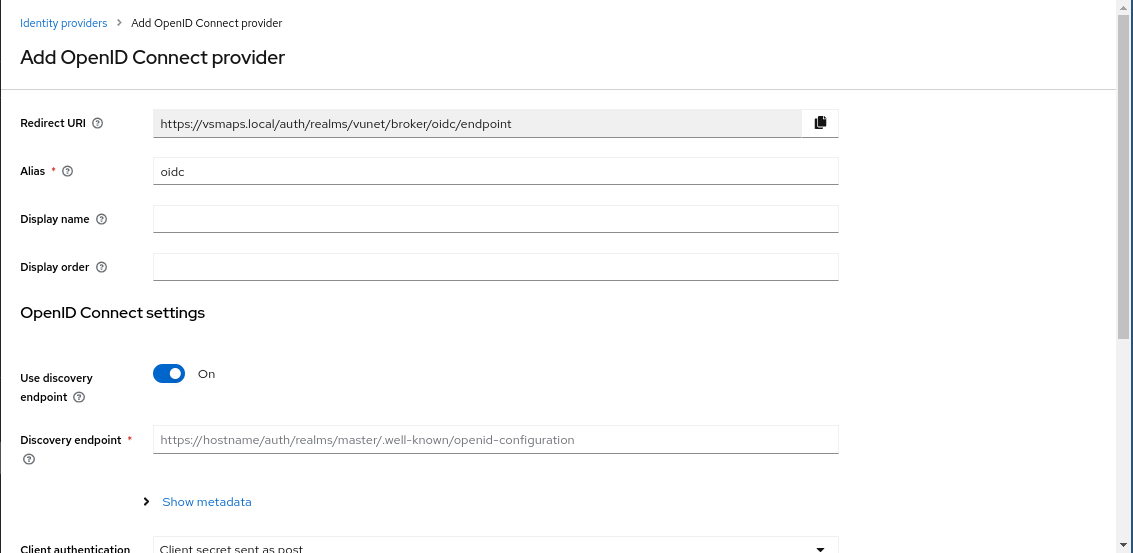
- Alias: Choose a unique alias to identify your identity provider in the IDP.
- Display Name: Define the name that will be displayed to users in the login form. For example, if you use "Azure AD" as the display name, a corresponding button "Sign in with Azure AD" will appear in the login form.
- Display Order: If configuring multiple identity providers, set the display order to determine button rendering in the UI. Leave it blank for default ordering.
- Discovery Endpoint: Provide the OpenID configuration URL for the app registered with your identity provider. This URL enables the IDP to fetch necessary URLs like token URL, authentication URL, user info endpoint, etc.
- Client Authentication: Specify how the IDP will interact with the identity provider. Use the default value ("Client secret sent as post") unless instructed otherwise.
- Client ID and Client Secret: Obtain these values from the app registered with your identity provider.
-
Complete the Configuration: Fill in the required fields based on your OpenID Connect setup. Once all the settings are configured, proceed to the next step.
-
Save and Test Configuration: After entering the necessary information, save the configuration. The IDP will validate the setup by testing the connection to the OpenID provider.
-
Verification and Activation: Once the configuration is saved and tested successfully, you can proceed to activate the OpenID Connect integration. This will enable users to log in using the configured OpenID provider.
Mappers
Besides configuration, clients often create mappers to synchronize user roles and memberships. Our API exposes three mapper types:
- Advanced Claim to Group: Assigns users to specific groups based on claims.
- Attribute Importer: Imports declared claims from tokens into user properties.
- Hardcoded Attribute: Sets a predefined value to a specific user attribute.
Signing in with ADFS Provider
Upon successful ADFS configuration, an additional login button will appear for the configured identity provider. Proper configuration prompts redirection to the provider's authentication form. Once logged in, you will be redirected to the IDP. If it's your first login, you must provide additional user information.
- Access the ADFS Login: Upon successful configuration, a new button will appear alongside the regular login options. Click on this button to initiate the ADFS login process.
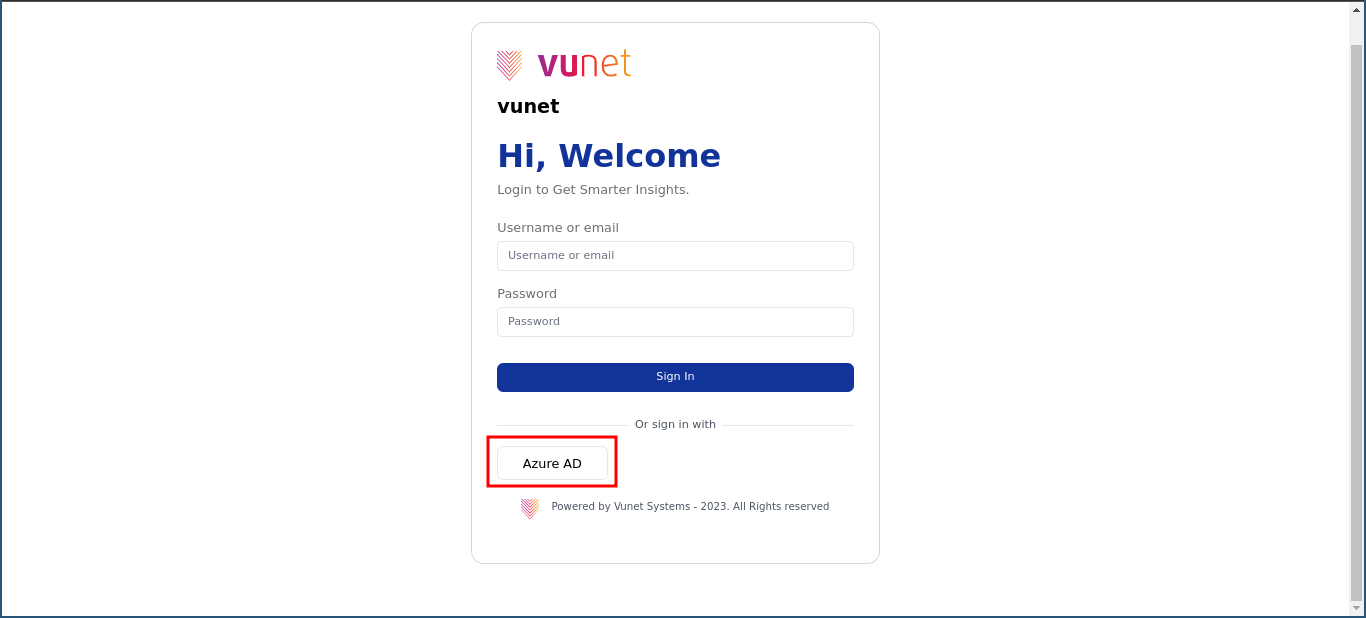
- Authentication Form: If your configuration is correct, clicking the ADFS login button will take you to the authentication form of the configured identity provider. Below are screenshots illustrating this process using Azure AD as an example:
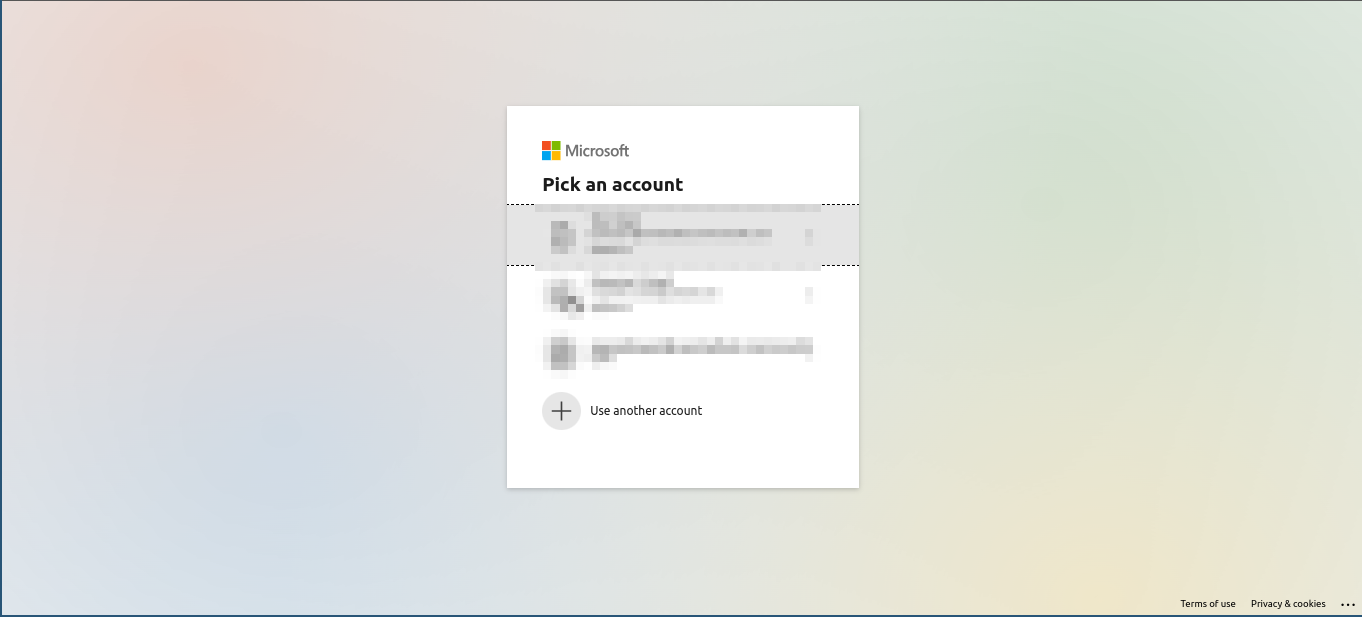
- Completing the Provider Login: Once redirected to the identity provider's authentication form, follow the provided instructions to log in using your identity provider credentials. After successfully logging in through the identity provider, you will be redirected back to the identity provider platform.
- Additional User Information: If this is your first time signing in with the configured identity provider, you may be prompted to provide additional user information. This step ensures seamless integration for the identity provider.
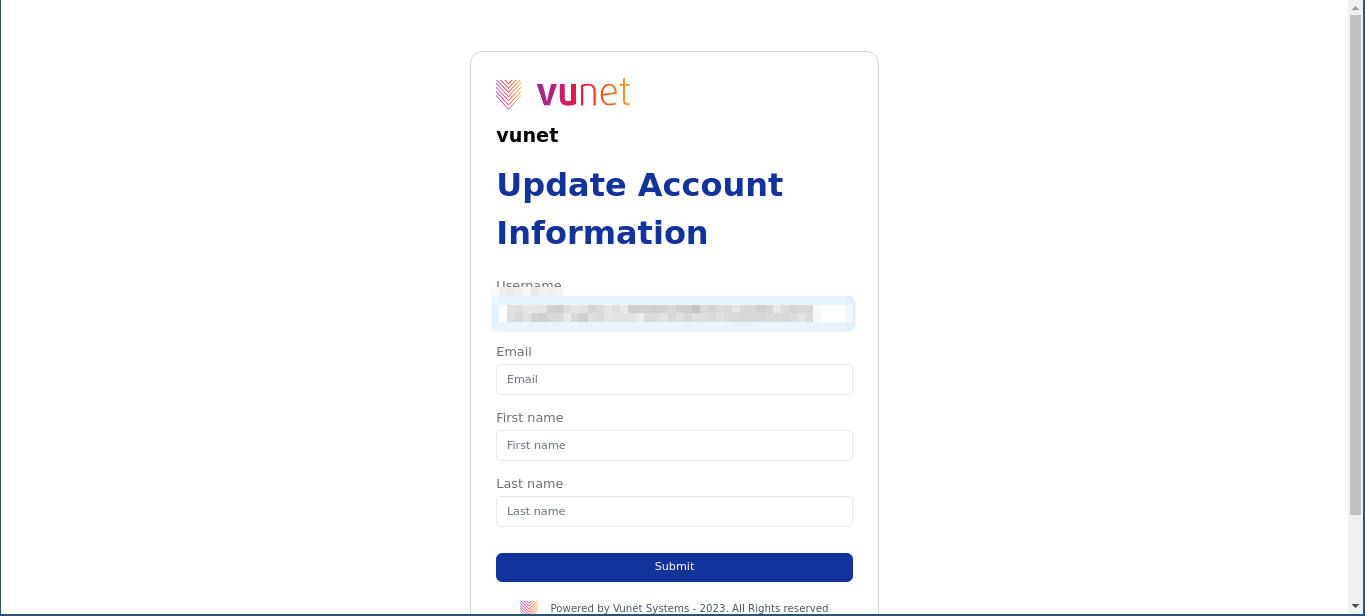
- Logged in to External User Account: Once you've filled in the required information, you will be logged into vuSmartMaps as an external user. Enjoy a smooth login experience without the need for additional credentials.
Depending on the mappers you've configured, users can be automatically assigned to groups based on the mapper logic. This streamlines access control and ensures that users are directed to the appropriate resources within the platform.
By successfully signing in with your ADFS provider, you enhance security and user experience by leveraging established authentication infrastructure and streamlined access to external systems.
